- Add SAP Build Process Automation entitlements to your subaccount
- Create a service instance and application subscription
- Verify entitlements, instances, and subscriptions
- Assign role collections to a business user
- Install the automation agent
- Activate Generative AI capabilities
- Administrator access to an SAP BTP global account and subaccount
- A Cloud Foundry environment with a Dev space already created
- A business user account to assign role collections to
Procedure 1: Add Entitlements for SAP Build Process Automation
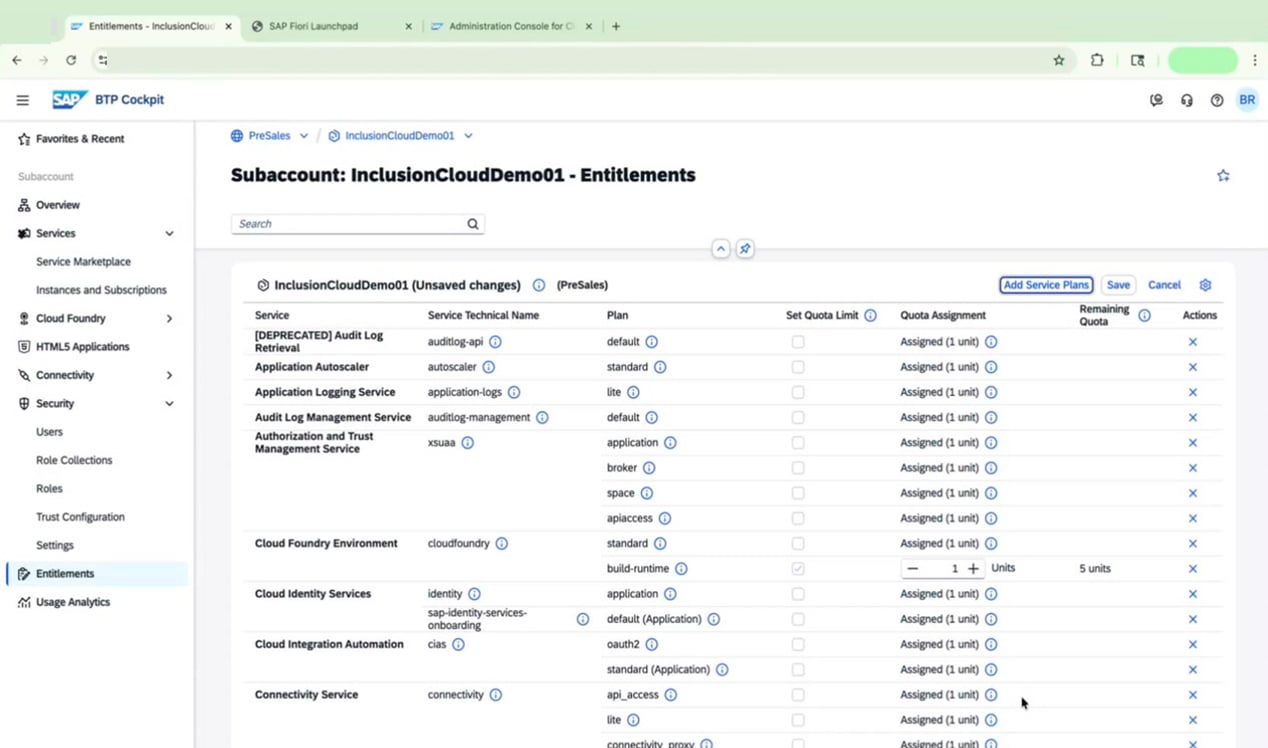
Before you can use SAP Build Process Automation, add the required service plans as entitlements to your subaccount.Open Entitlements
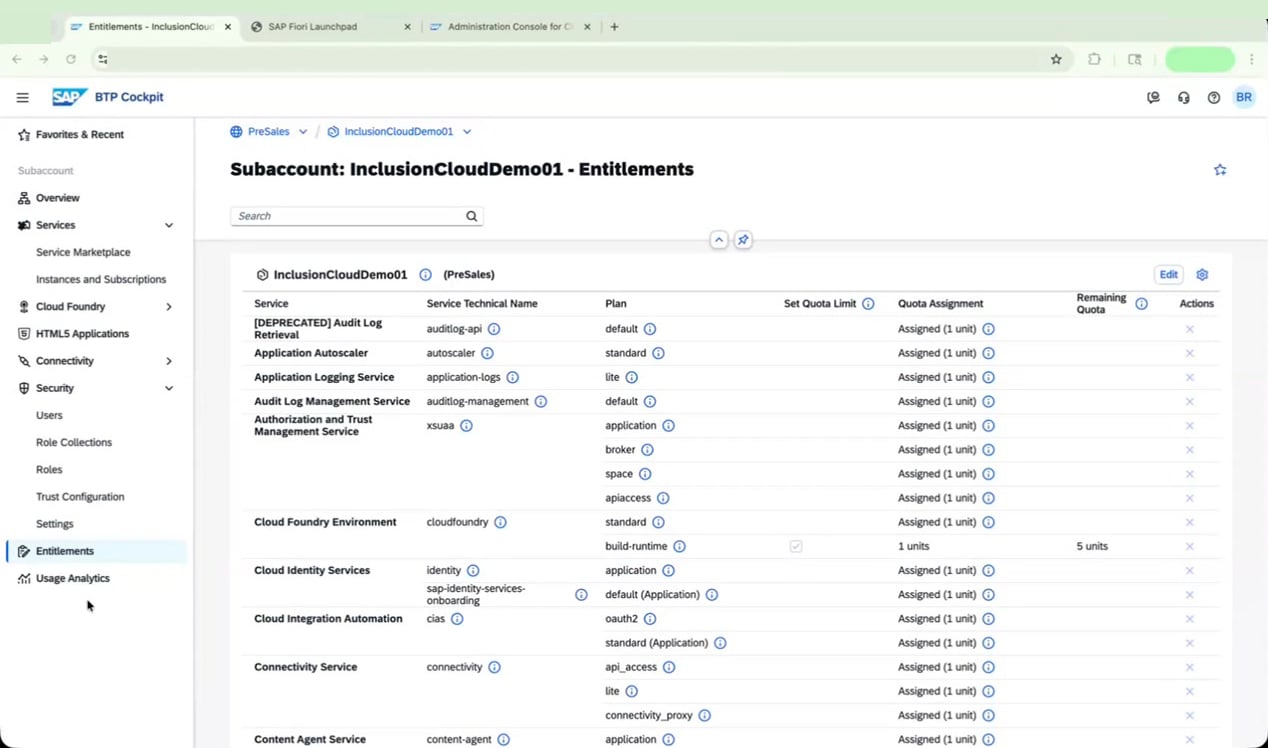
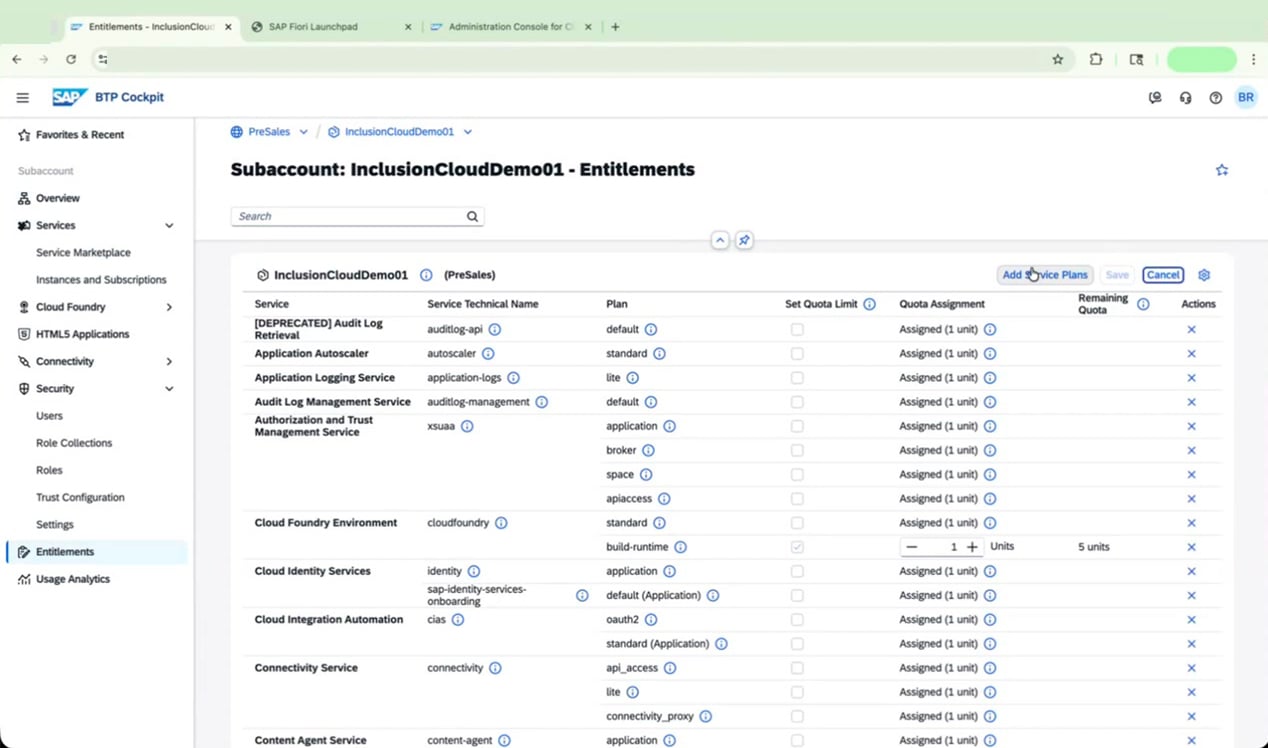
Search for SAP Build Process Automation
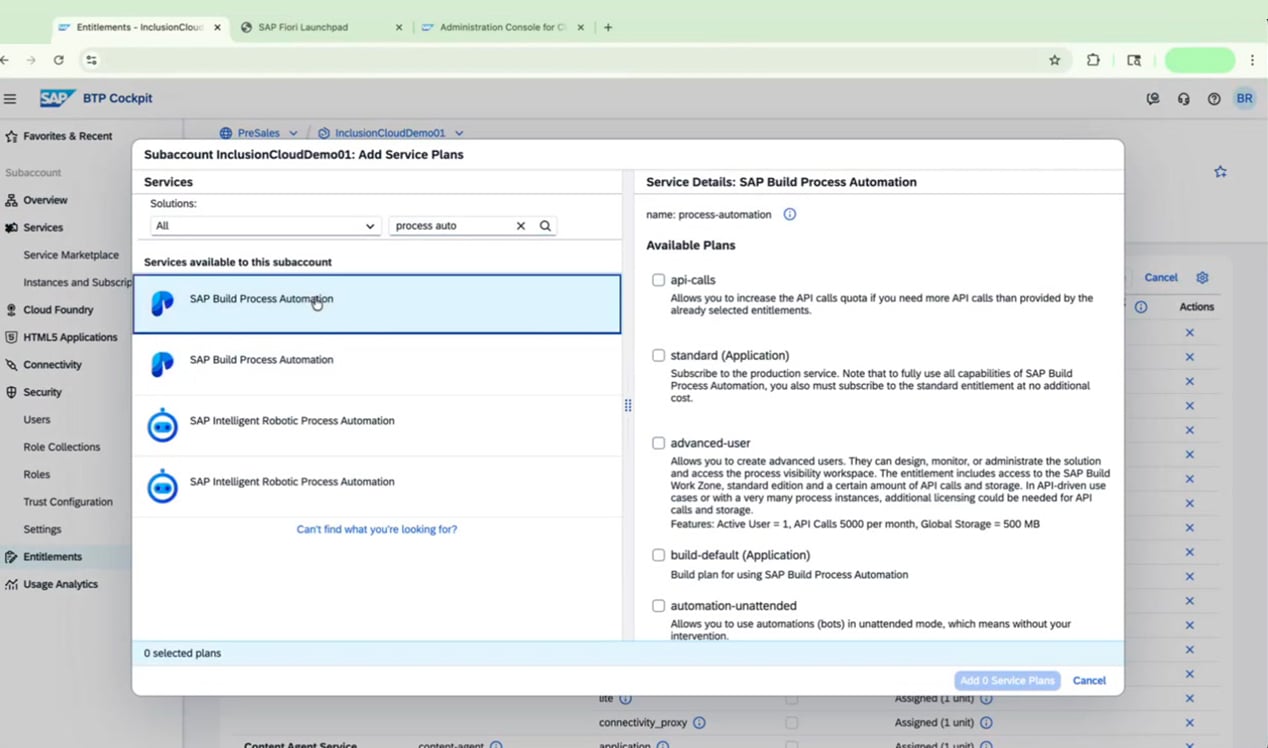
Select all five plans
| Plan | Purpose |
|---|---|
standard | Main service plan |
build-default (Application) | Build plan for the application subscription |
automation-attended | Run bots in attended mode |
automation-unattended | Run bots in unattended mode |
advanced-user | Access to process visibility workspace |

Procedure 2: Create the Service Instance and Subscription
With entitlements in place, create both a service instance and an application subscription for SAP Build Process Automation.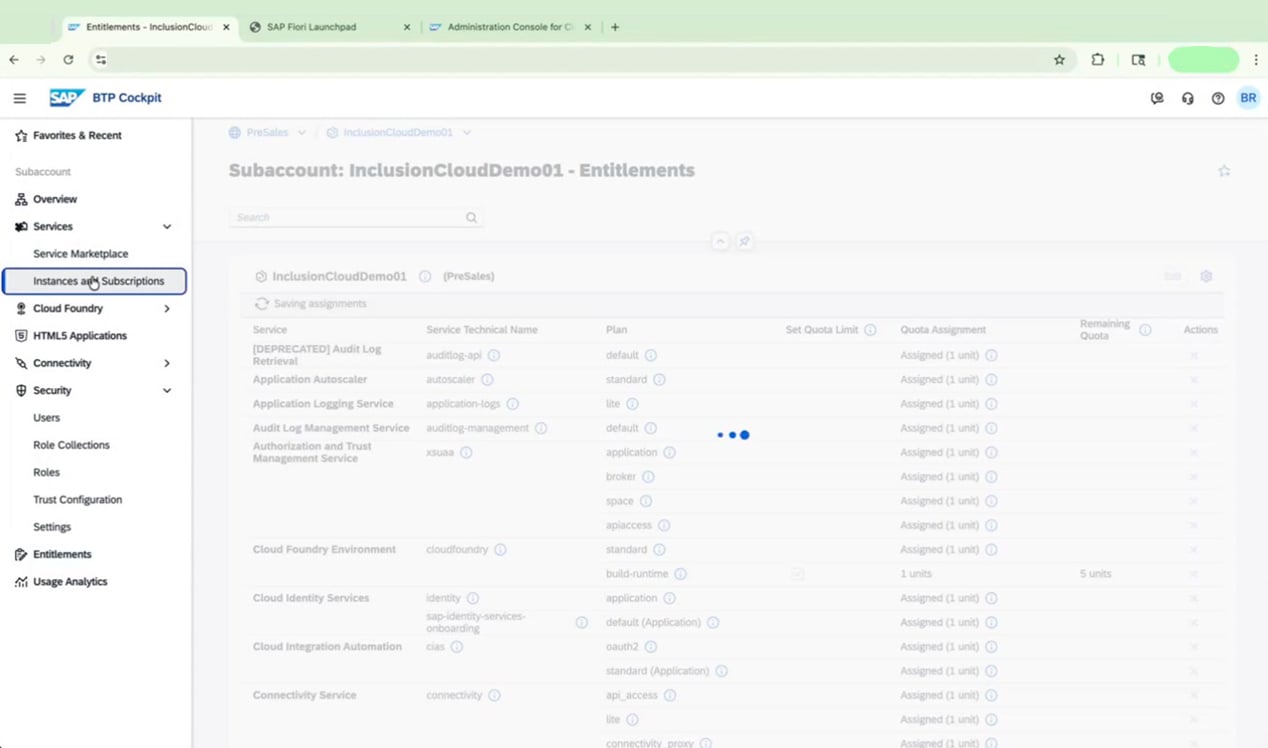
Create the service instance
- Service: SAP Build Process Automation
- Plan: standard
- Runtime Environment: Cloud Foundry
- Space: Dev
- Instance Name: SAP Build Process Automation
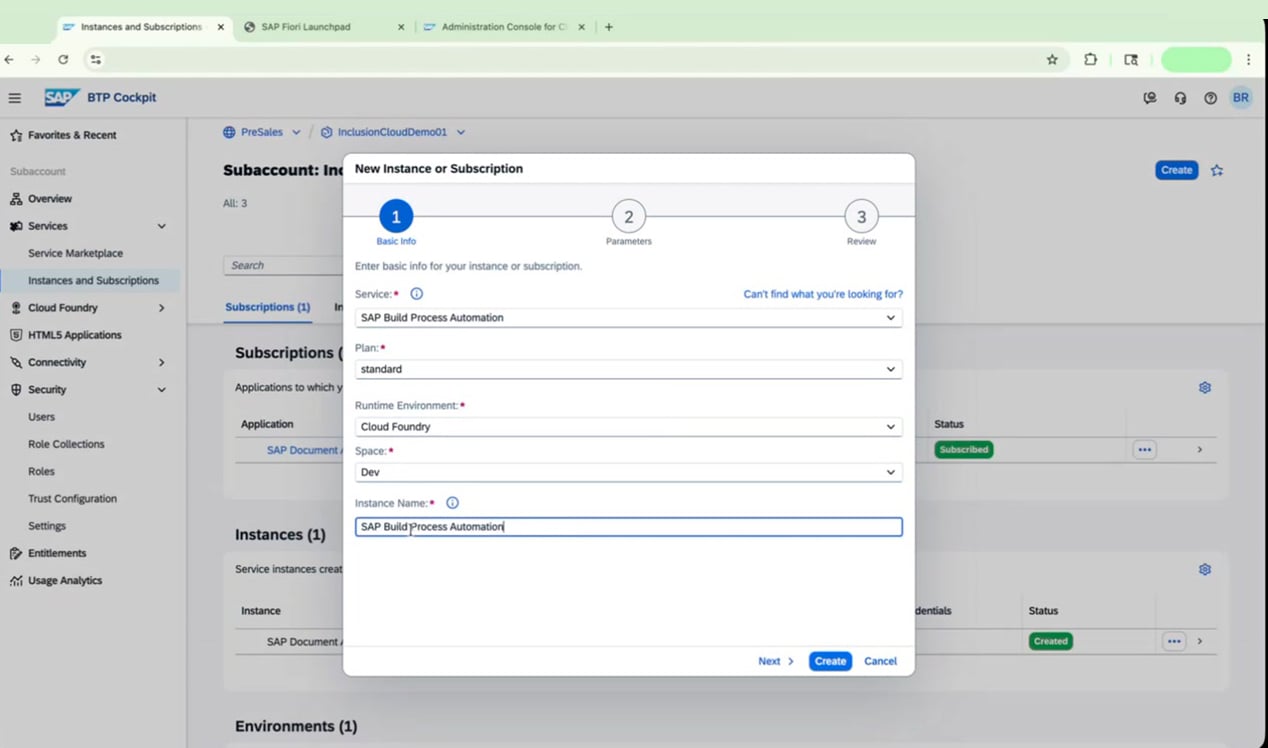
Wait for the instance to be created
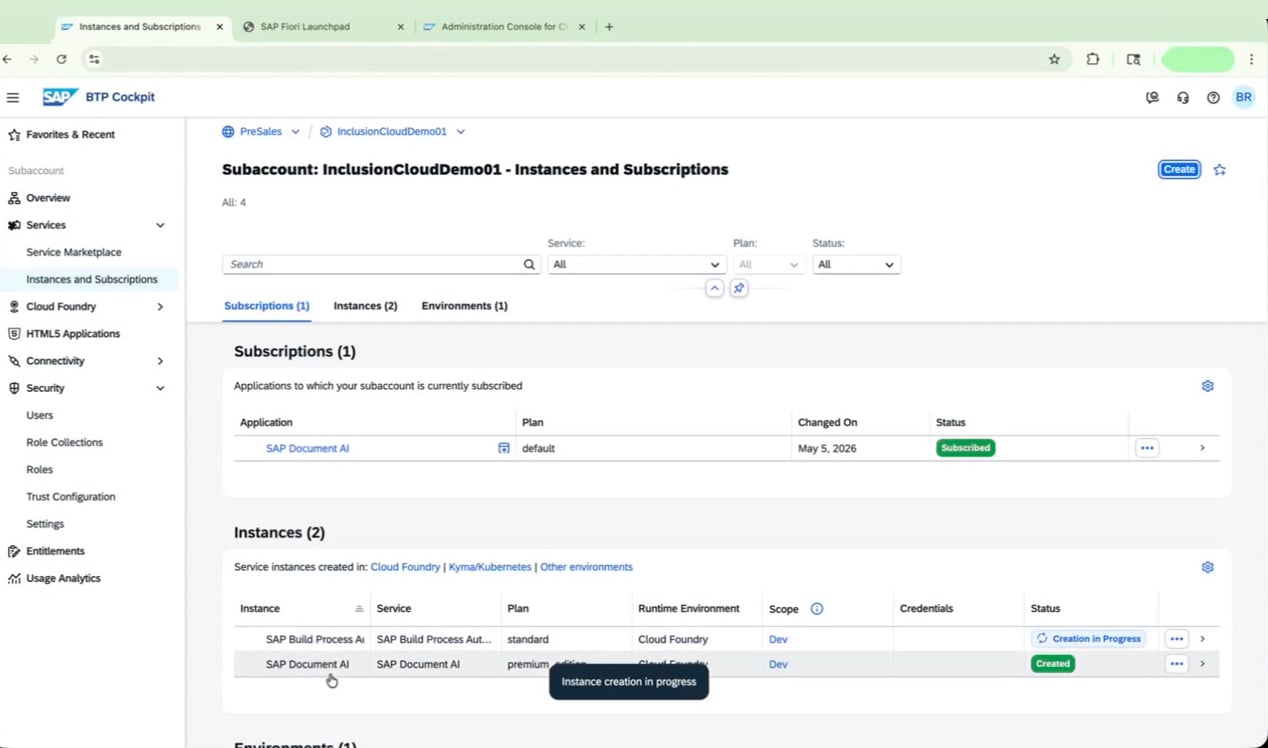
Create the application subscription

Wait for the subscription to reach Subscribed status
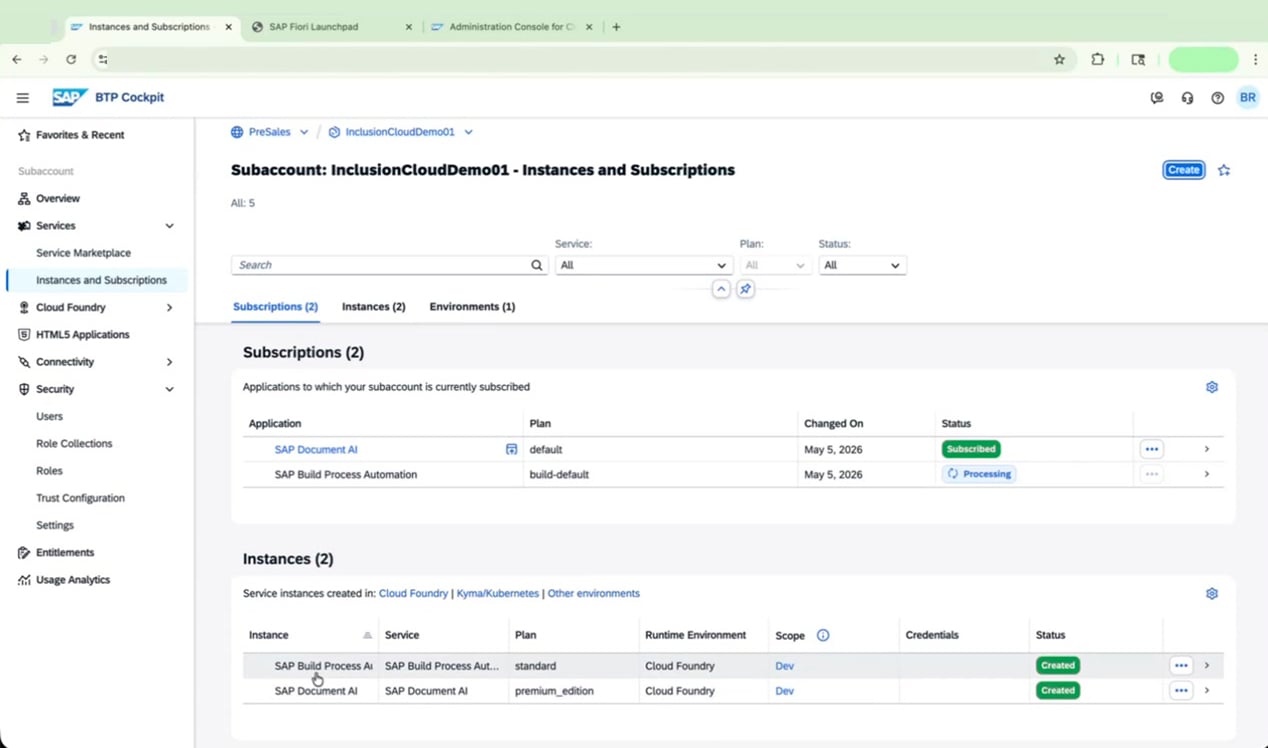
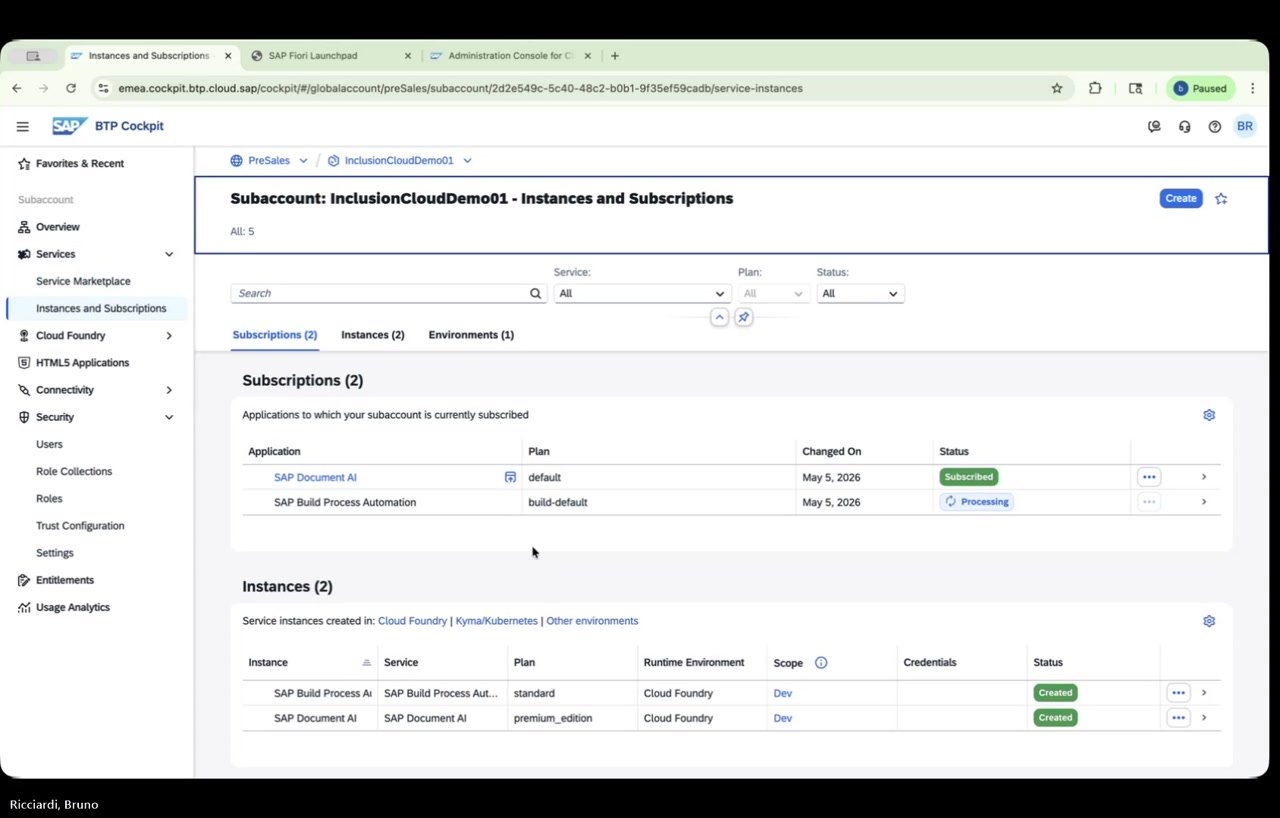
Procedure 3: Verify Your Configuration
Once provisioning is complete, confirm everything is correctly configured before assigning roles.Verify the Subscriptions table
| Application | Plan | Status |
|---|---|---|
| SAP Build Process Automation | build-default | Subscribed |
| SAP Document AI | default | Subscribed |
Verify the Instances table
| Instance | Service | Plan | Runtime | Space | Status |
|---|---|---|---|---|---|
| SAP Build Process Automation | SAP Build Process Automation | standard | Cloud Foundry | Dev | Created |
| SAP Document AI | SAP Document AI | premium_edition | Cloud Foundry | Dev | Created |
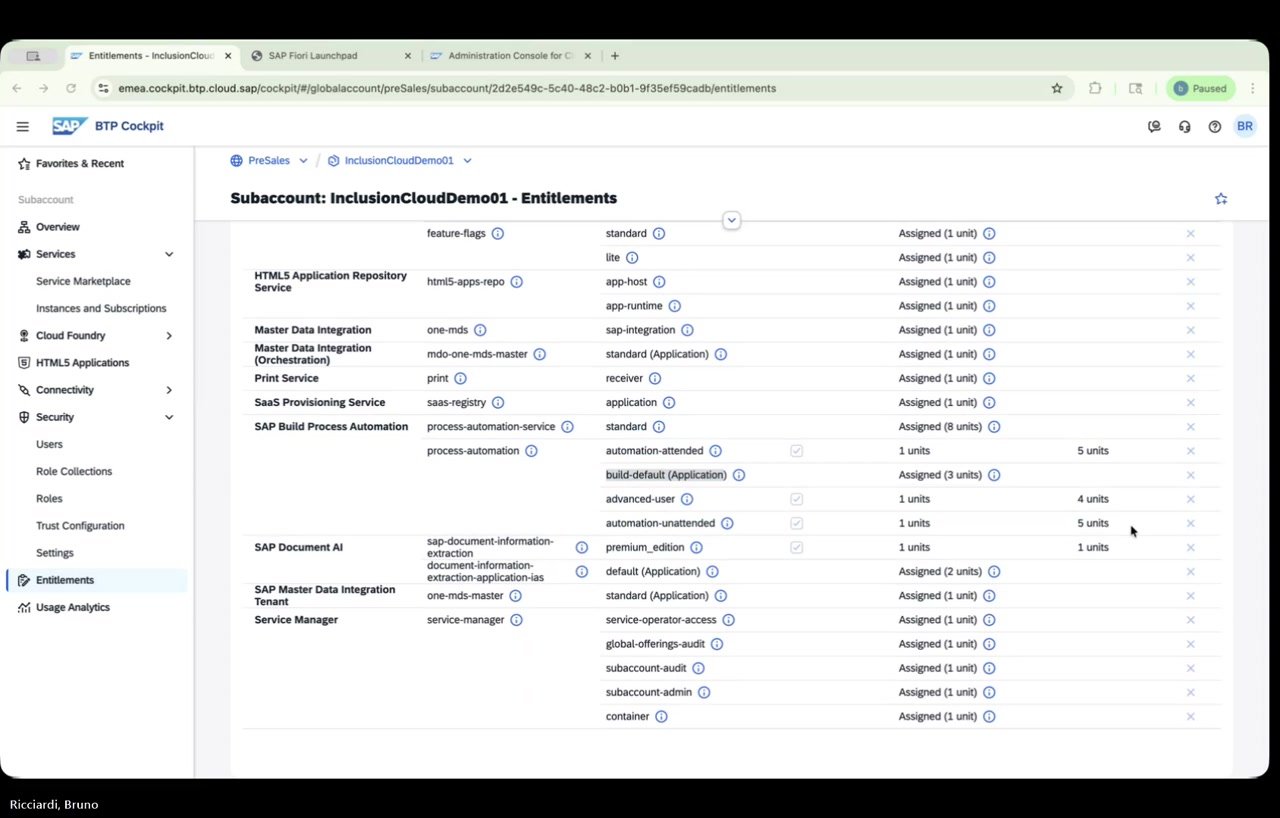
Verify Entitlements quotas
| Plan | Assigned |
|---|---|
| automation-attended | 1 unit |
| build-default (Application) | 3 units |
| advanced-user | 1 unit |
| automation-unattended | 1 unit |
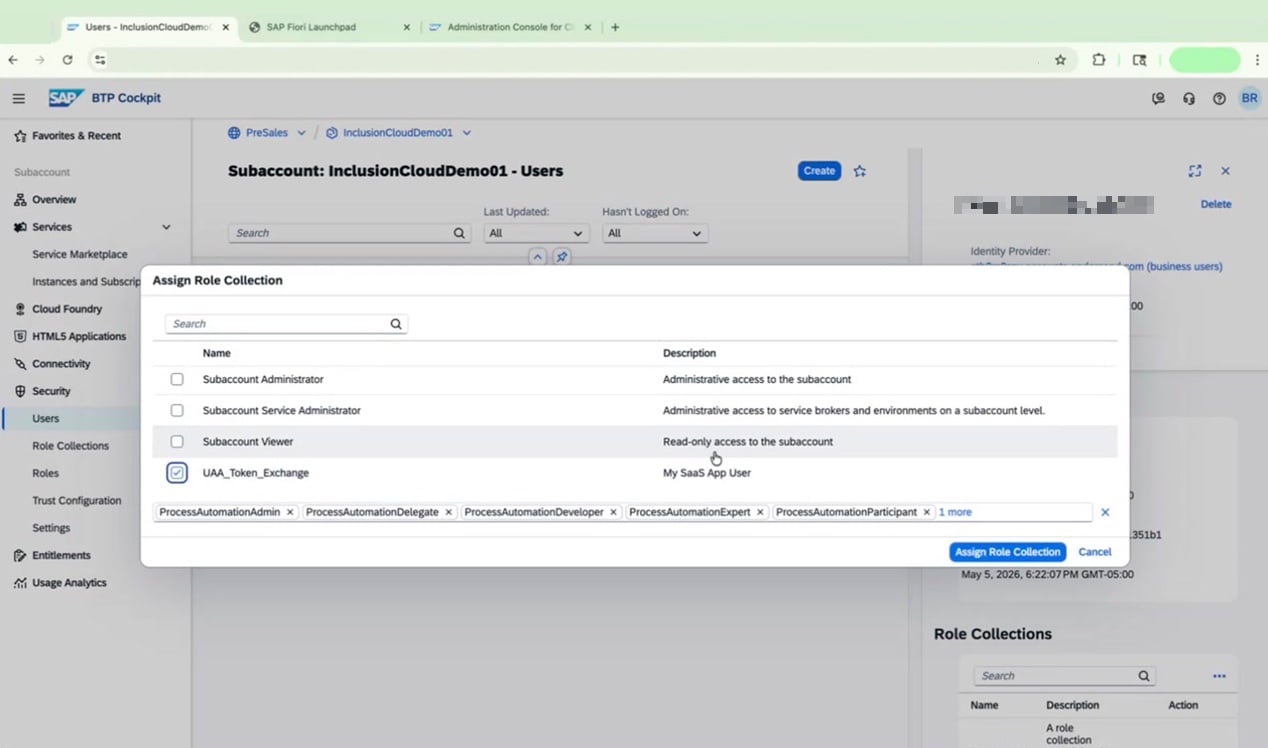
Procedure 4: Assign Role Collections to a Business User
Users need specific role collections assigned before they can access SAP Build Process Automation.Confirm Subscribed status
Open the Users screen
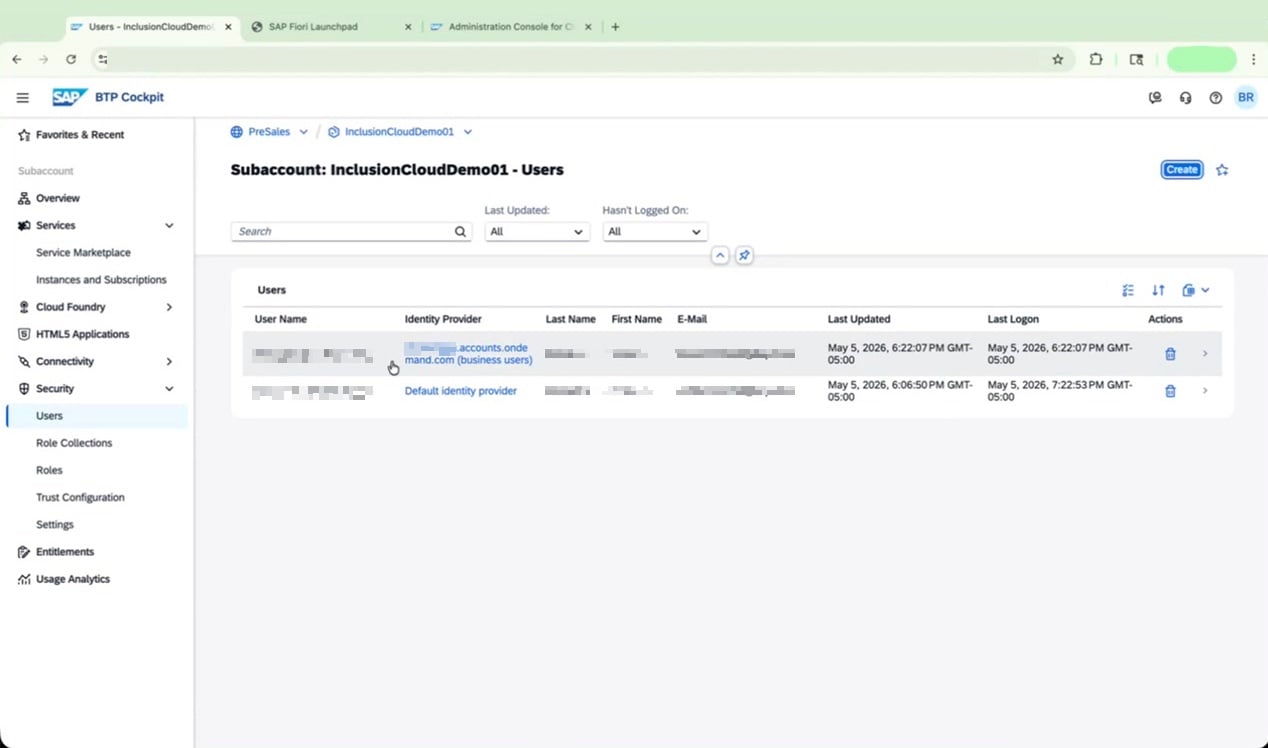
Assign role collections
ProcessAutomationAdminProcessAutomationDelegateProcessAutomationDeveloperProcessAutomationExpertProcessAutomationParticipantUAA_Token_Exchange
ProcessAutomationDeveloper, while an end user who only triggers processes needs ProcessAutomationParticipant.Procedure 5: Access the App and Install the Automation Agent
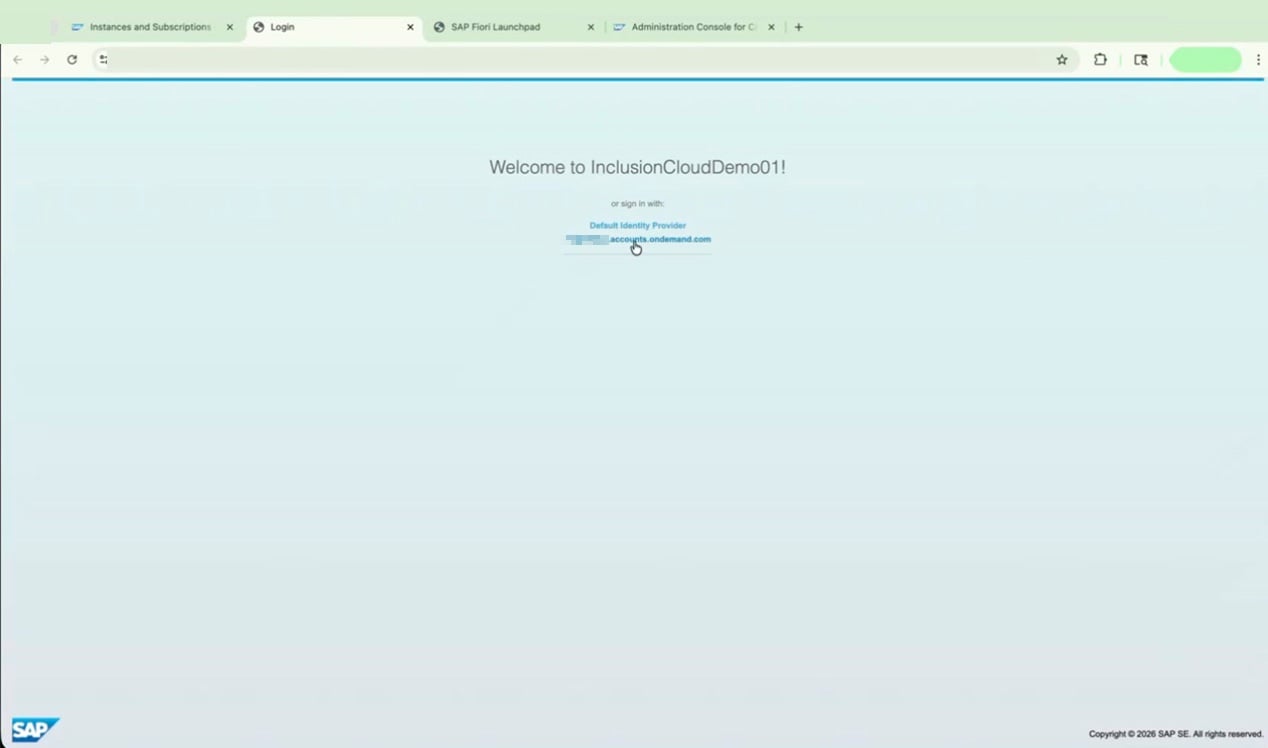
With roles assigned, open the SAP Build Process Automation application and set up the automation agent.Open SAP Build Process Automation
Select your identity provider and sign in
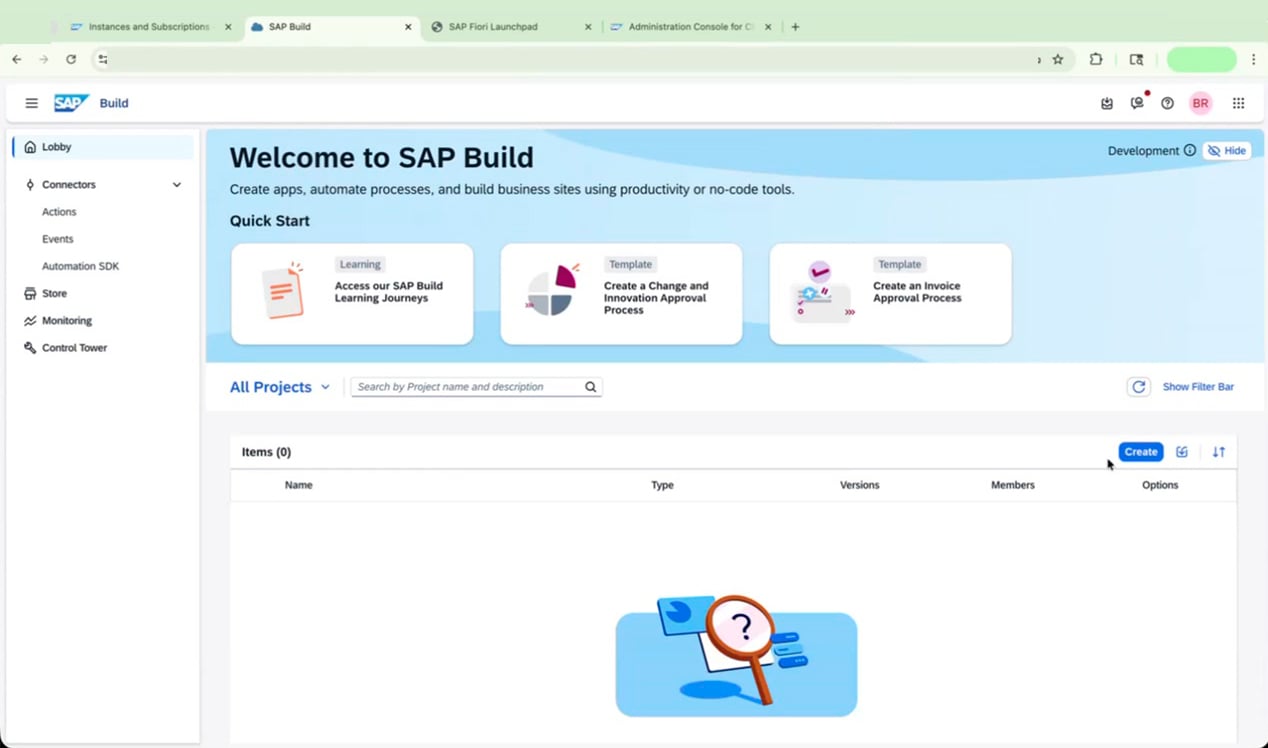
Explore the SAP Build lobby
- Application
- Automated Process
- Joule Agent and Skill (if subscribed)
-
Business Site (if subscribed)
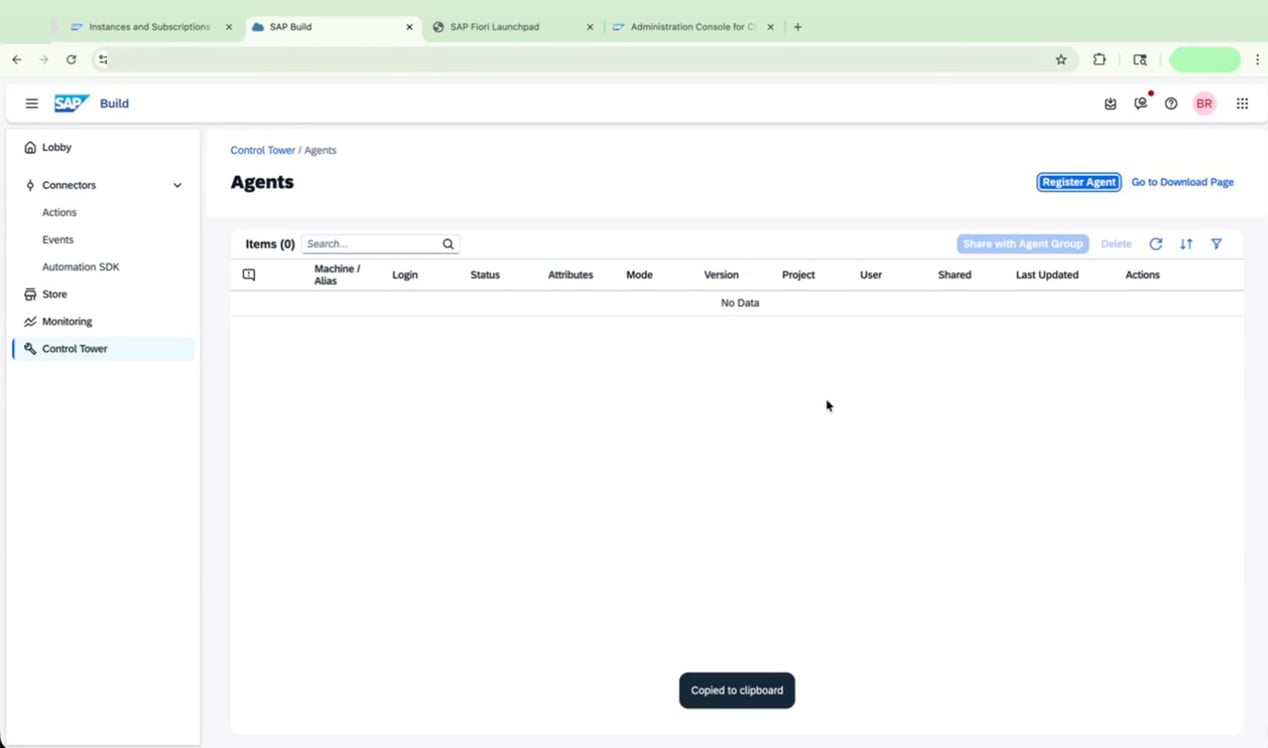
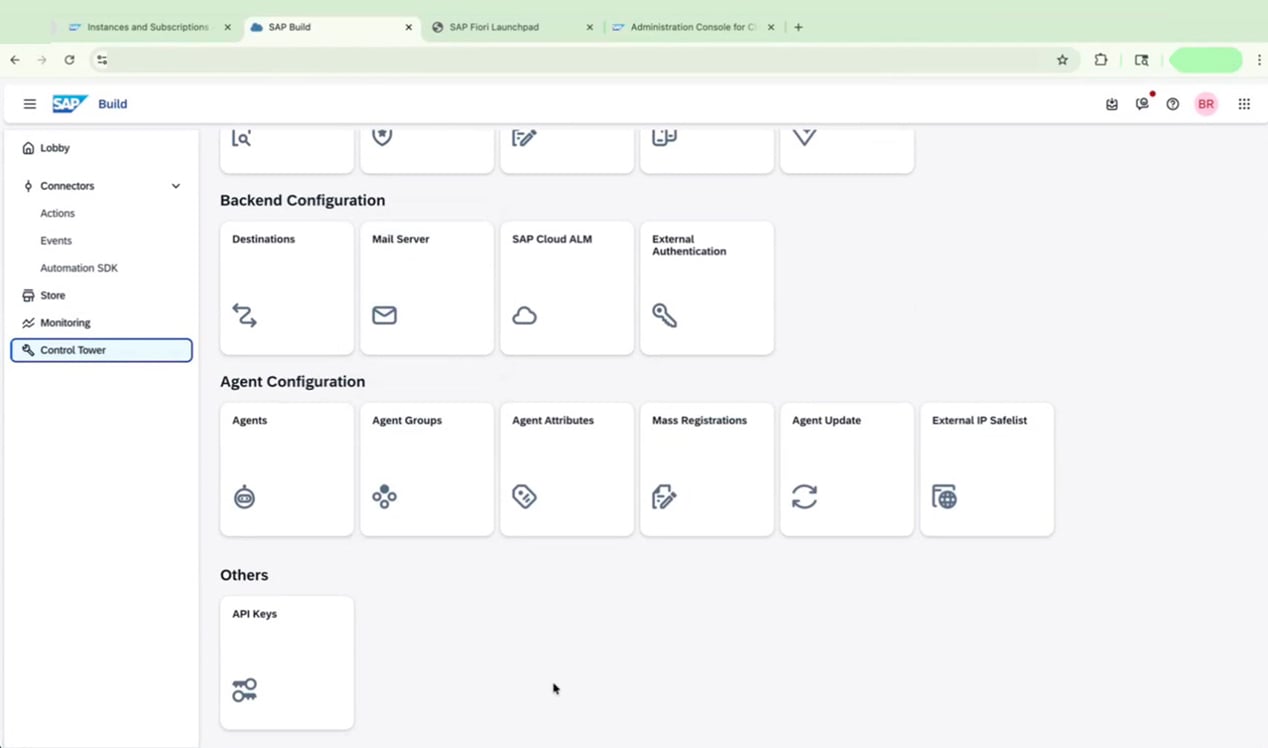
Navigate to Control Tower > Agents
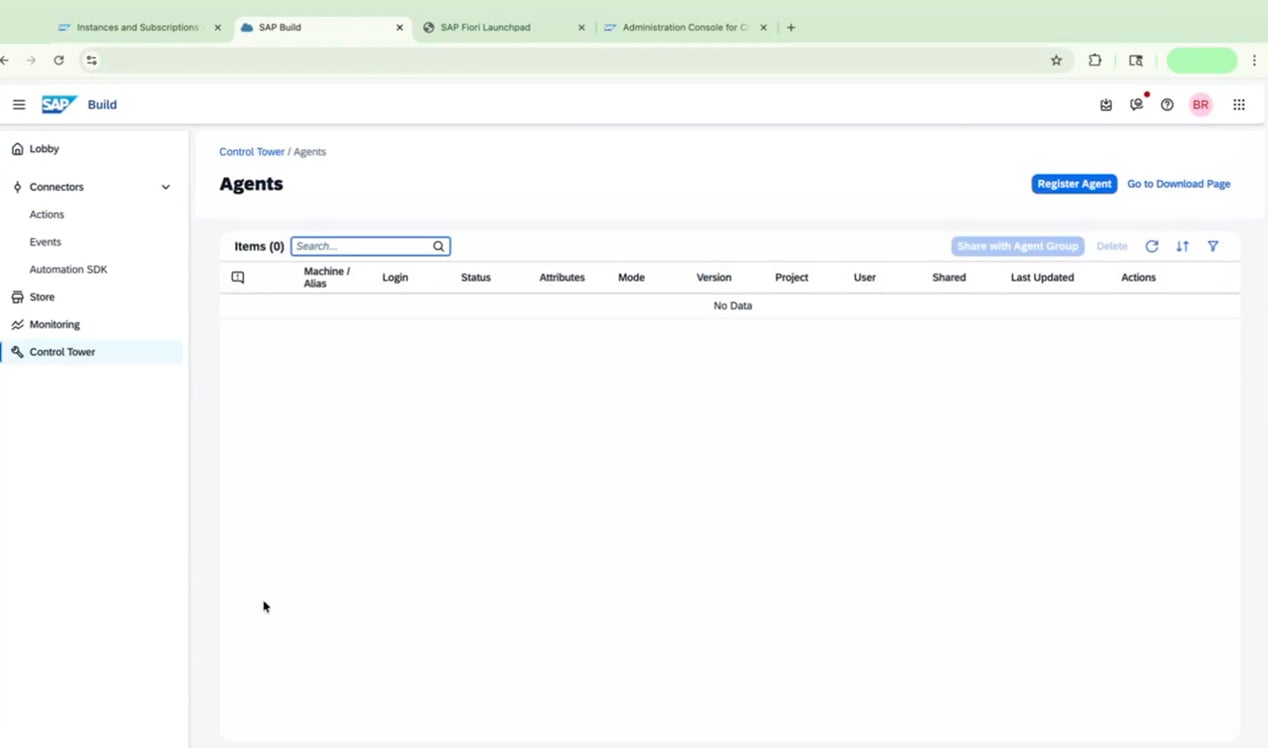
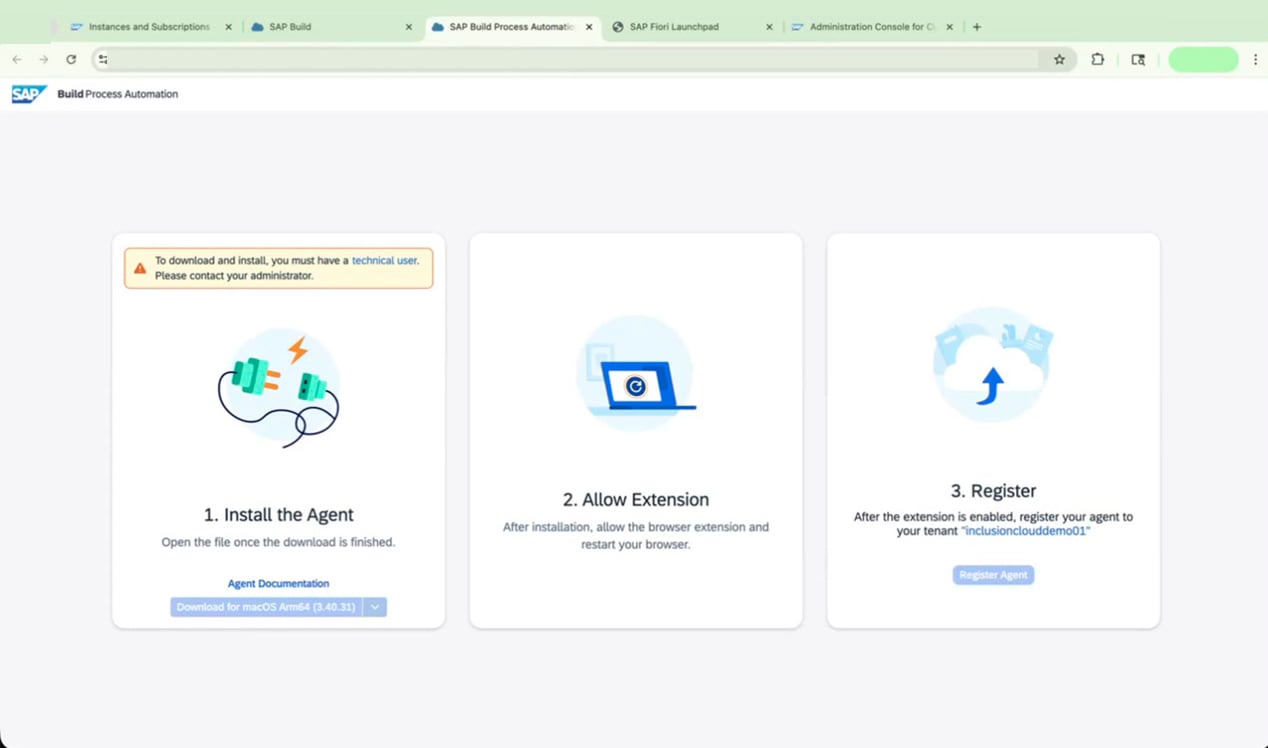
Download and install the agent
- Install the agent — Download and run the installer for your operating system.
- Allow the extension — Enable the required browser extension and restart your browser.
-
Register — Register the agent to your SAP Build Process Automation tenant.
Procedure 6: Activate Generative AI Capabilities
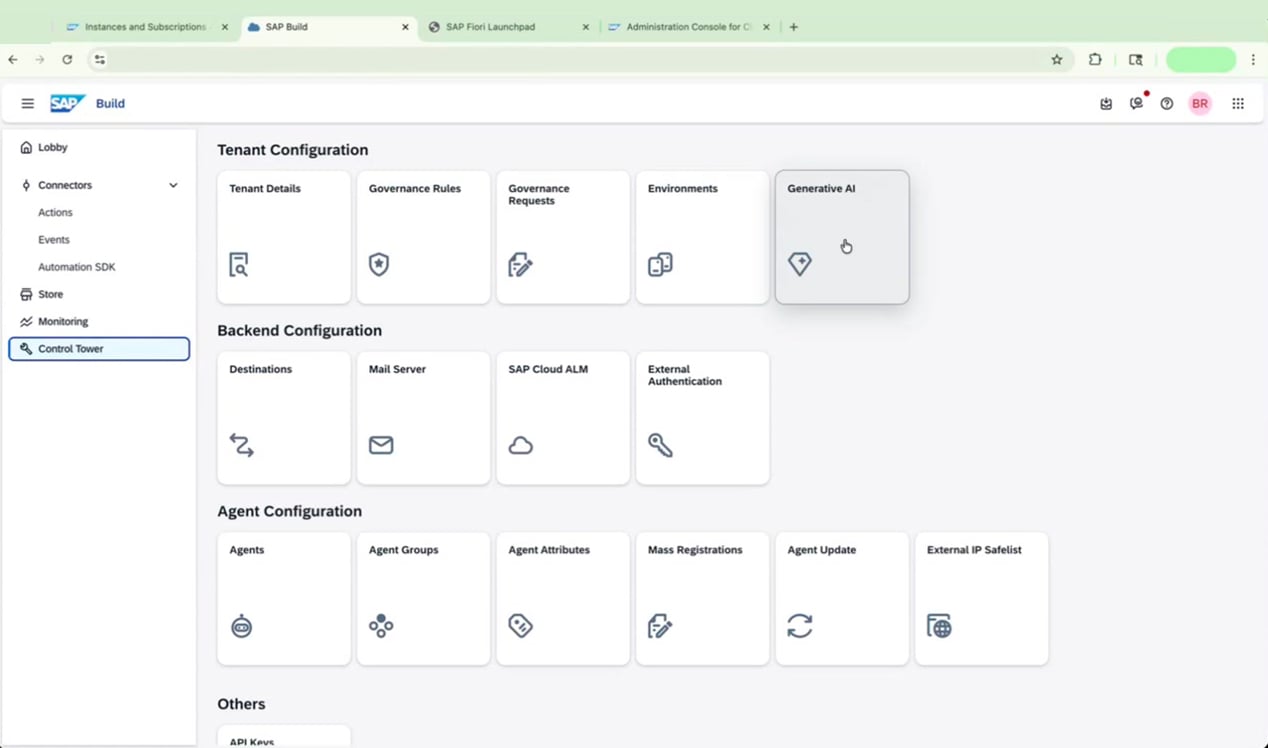
SAP Build Process Automation includes optional Generative AI features you can enable from the Control Tower.Open the Generative AI tile
Accept the AI Usage Terms and Conditions
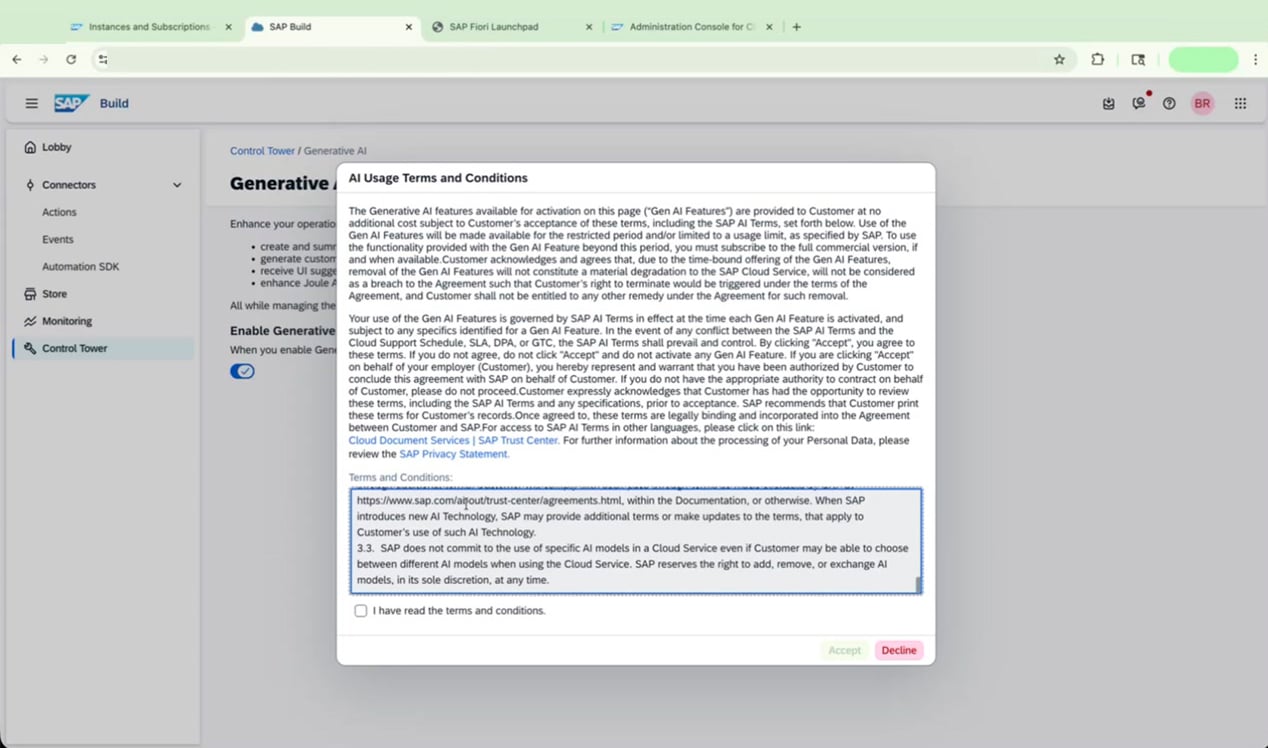
Confirm Generative AI is enabled
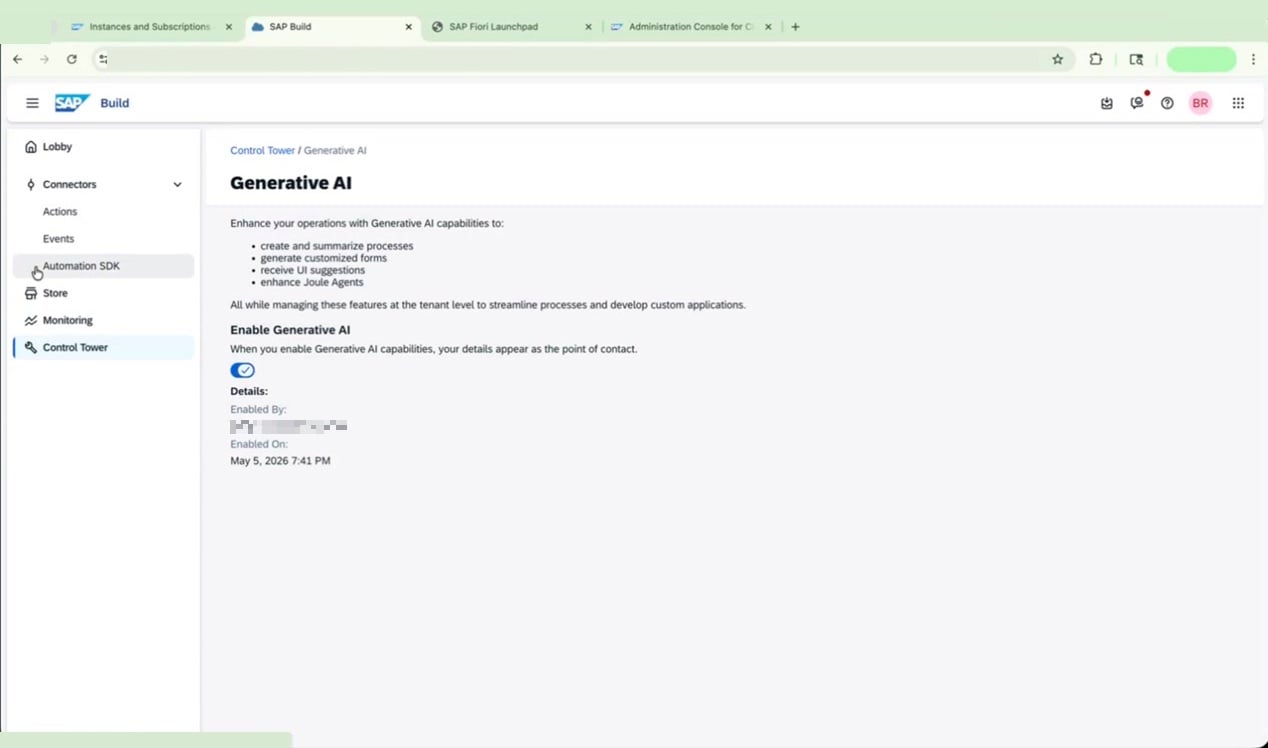
- Creating and summarizing processes
- Generating customized forms
- Receiving UI suggestions
- Enhancing Joule Agents
FAQ
How long does subscription deployment take?
How long does subscription deployment take?
Do I need to assign all six role collections to every user?
Do I need to assign all six role collections to every user?
ProcessAutomationDeveloper, while an end user who only triggers processes needs ProcessAutomationParticipant. Granting unnecessary roles can expose functionality that is not relevant to that user’s work.What is the difference between the standard plan and build-default plan?
What is the difference between the standard plan and build-default plan?
standard plan is used to create a service instance, which enables API-level access via Cloud Foundry. The build-default plan is used to create the application subscription, which provides access to the SAP Build Process Automation web interface. You need both for a fully functional setup.Is a technical user required for agent installation?
Is a technical user required for agent installation?
Can I add more entitlement plans later?
Can I add more entitlement plans later?
storage, standard-user, api-calls, or addon (for UiPath connectivity). Adding plans later does not disrupt your existing configuration.