- Access to the SAP BTP Cockpit with global account administrator privileges
- Access to an SAP Cloud Identity Services (IAS) tenant
What You’ll Learn
- How to create a new SAP BTP subaccount and configure identity provider trust settings
- How to assign the service entitlements, including SAP Document AI service plans and Cloud Foundry environment
- How to enable Cloud Foundry and create a service instance and application subscription for SAP Document AI
- How to configure admin access through SAP Cloud Identity Services (IAS) and assign Document AI role collections to users
- How to configure document retention, Instant Learning, and Data Feedback Collection settings within the SAP Document AI interface
Chapter 1: Set Up Your SAP BTP Subaccount
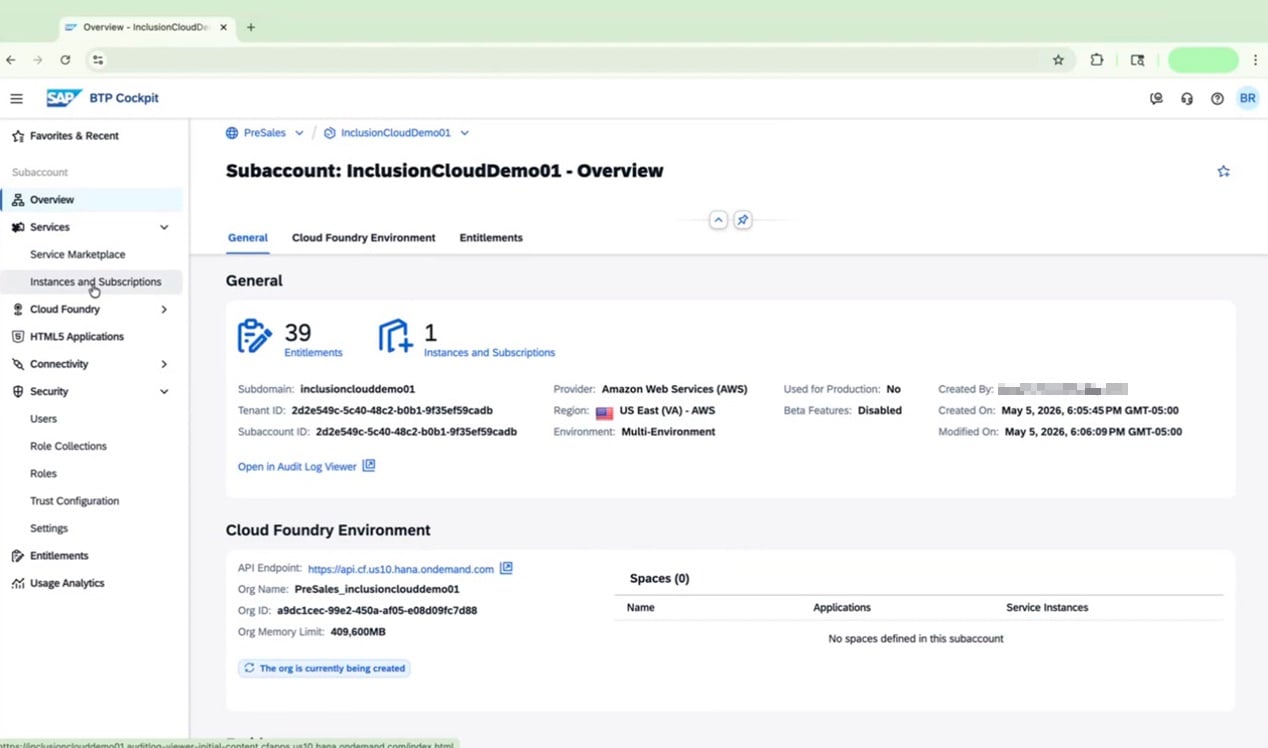
This chapter walks you through setting up a brand-new SAP BTP subaccount for Document AI — from creation and trust configuration all the way to enabling Cloud Foundry and assigning the required service entitlements.Create a New Subaccount
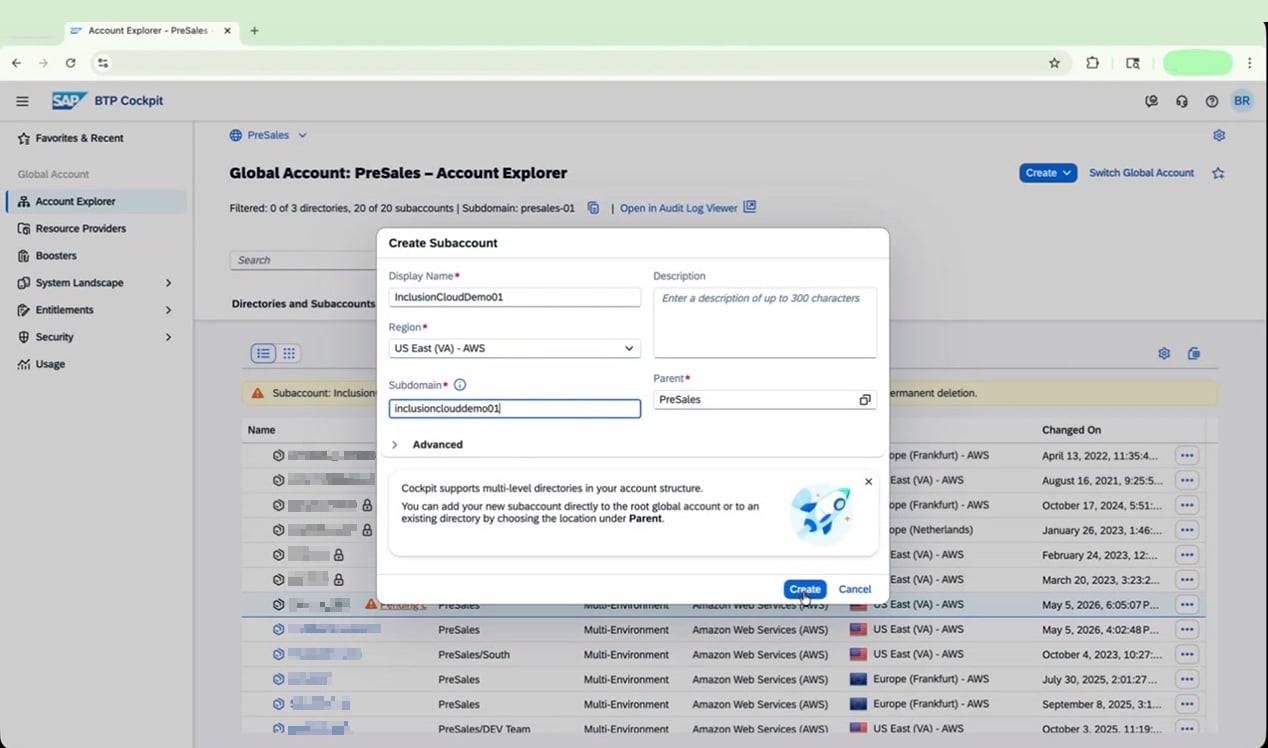
Fill in Subaccount Details
| Field | Value |
|---|---|
| Display Name | InclusionCloudDemo01 |
| Region | US East (VA) - AWS |
| Subdomain | inclusionclouddemo01 |
| Parent | Your parent location |
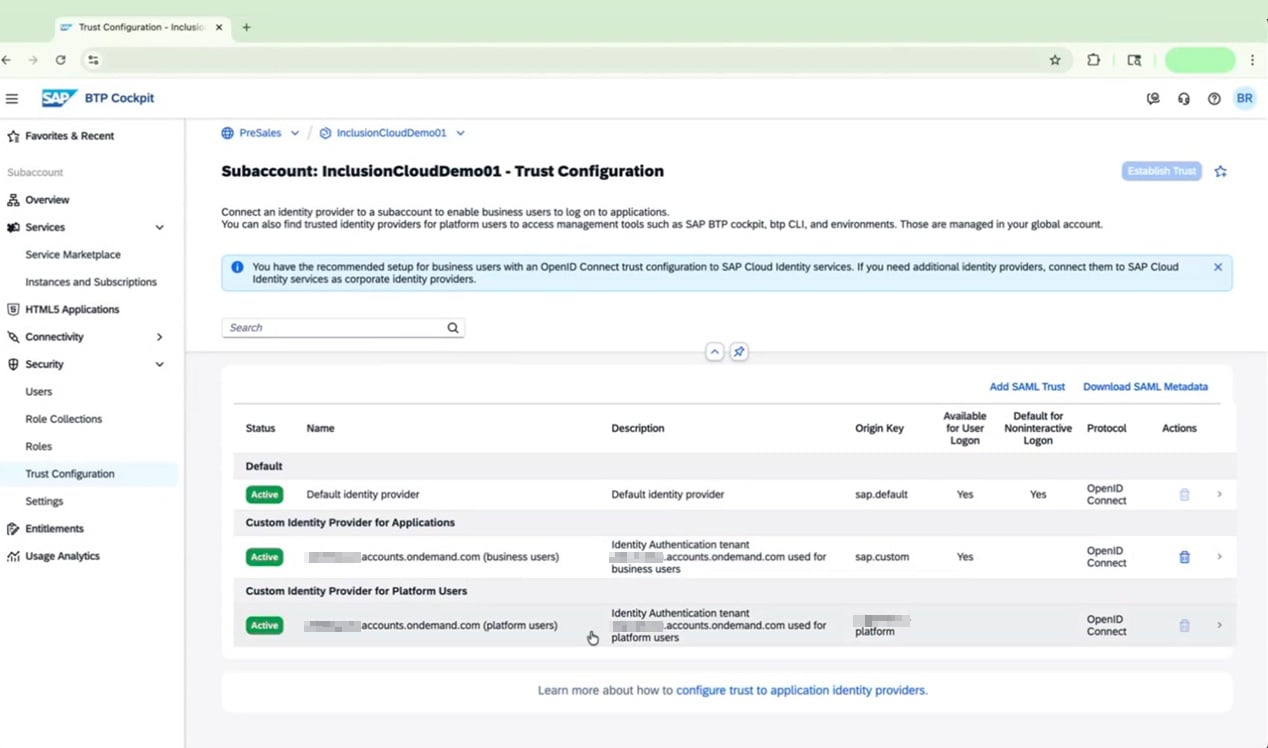
Configure Trust for Identity Authentication
Establish Trust
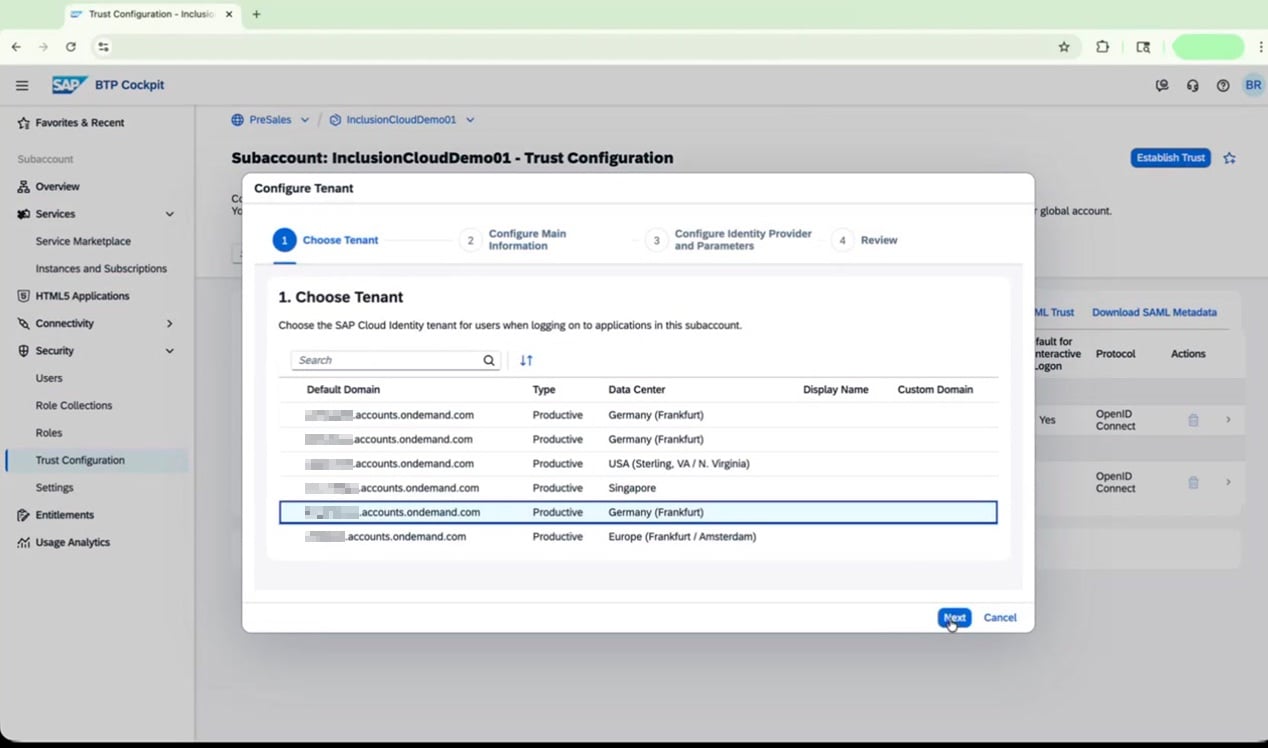
Complete the Configure Tenant Wizard
-
Step 1 – Choose Tenant: Select the appropriate SAP Cloud Identity tenant from the list (for example,
XYZ.accounts.ondemand.com), then click Next. -
Steps 2–4 – Main information, parameters, and review: Confirm the details on each screen, then click Finish.
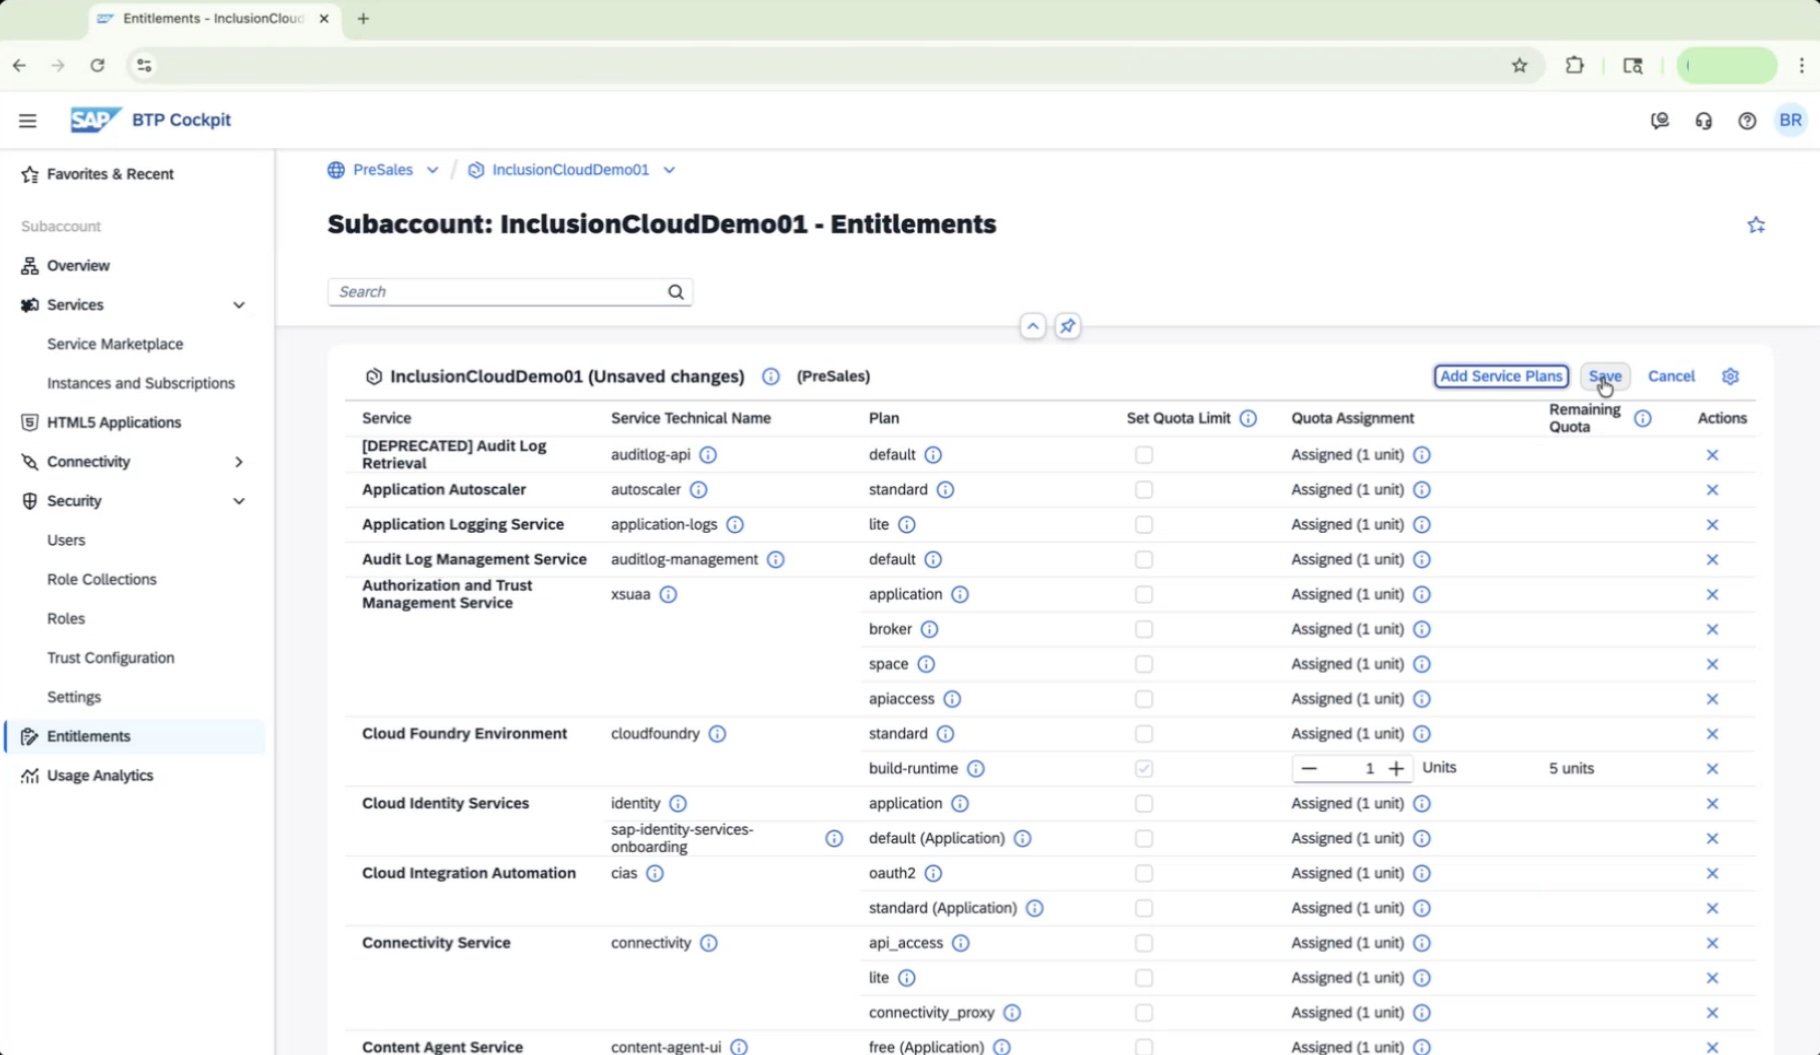
Assign Entitlements for Document AI
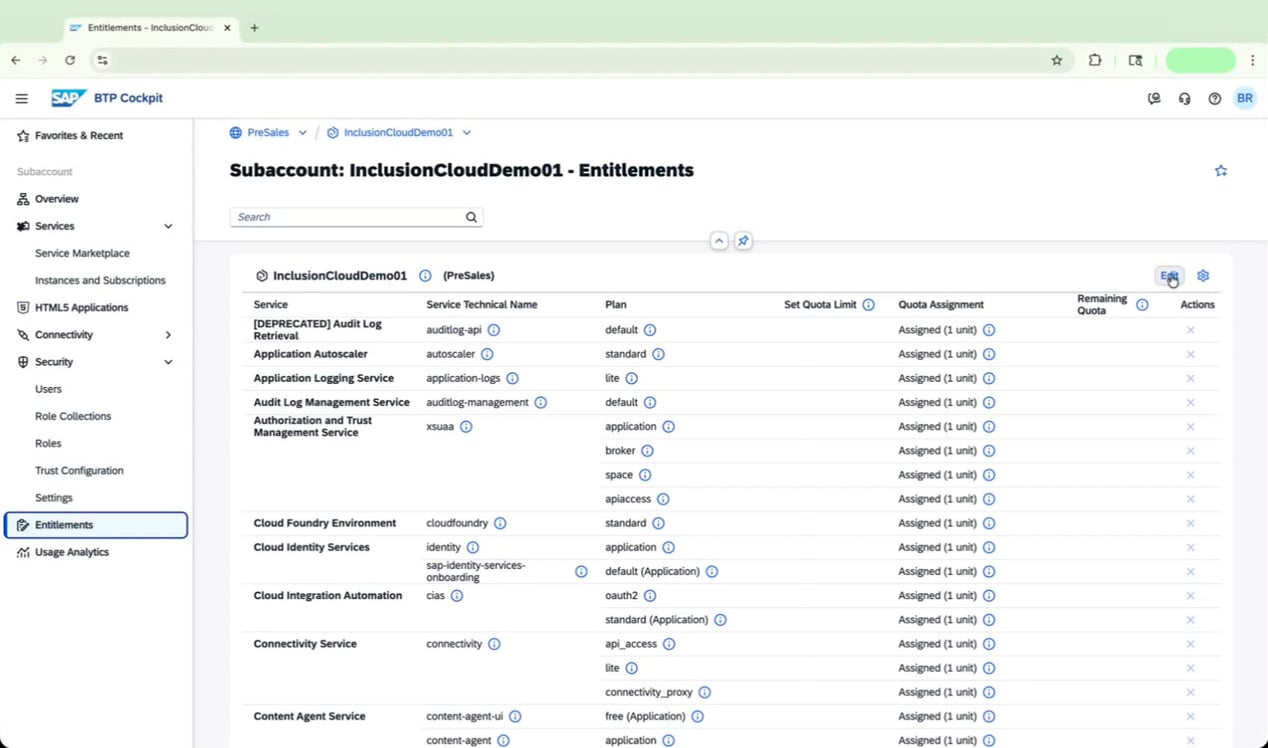
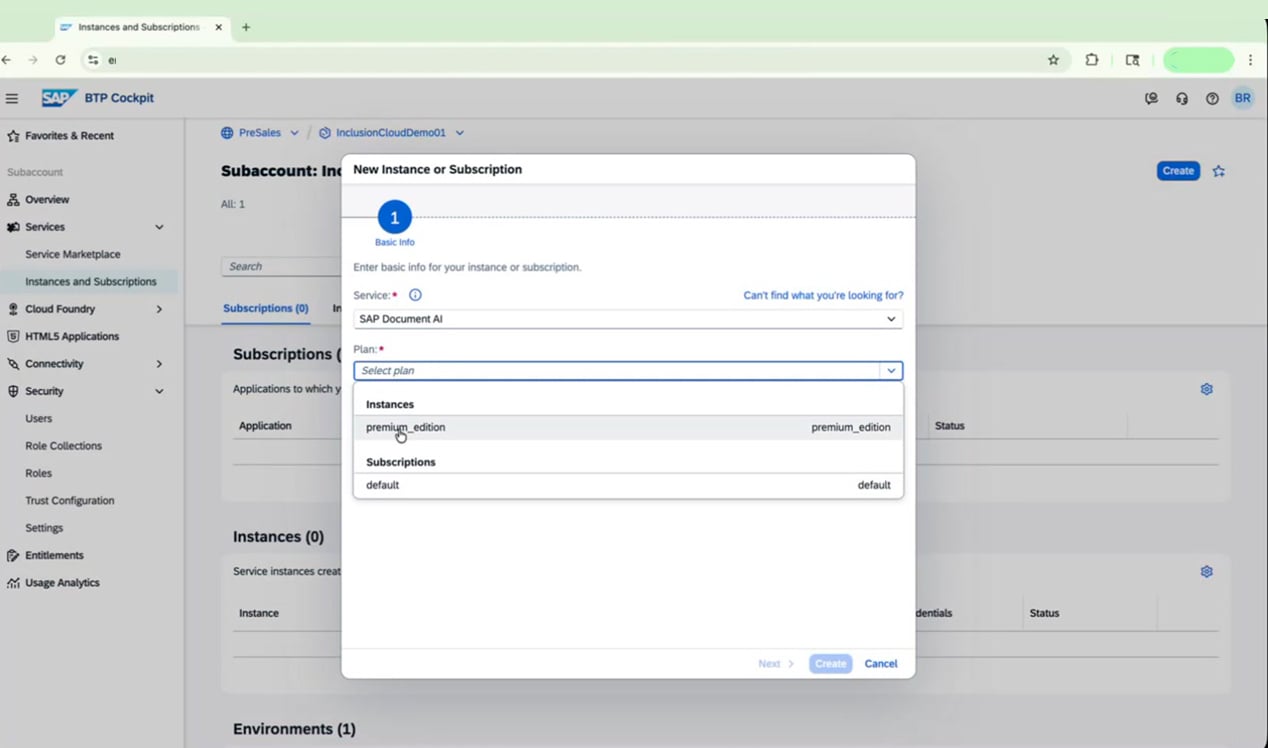
Open the Service Plan Selection Dialog
Select the Document AI Premium Plan
document. Select SAP Document AI from the results and review the available plans on the right: blocks_of_100, default, and premium_edition. Check the box for premium_edition.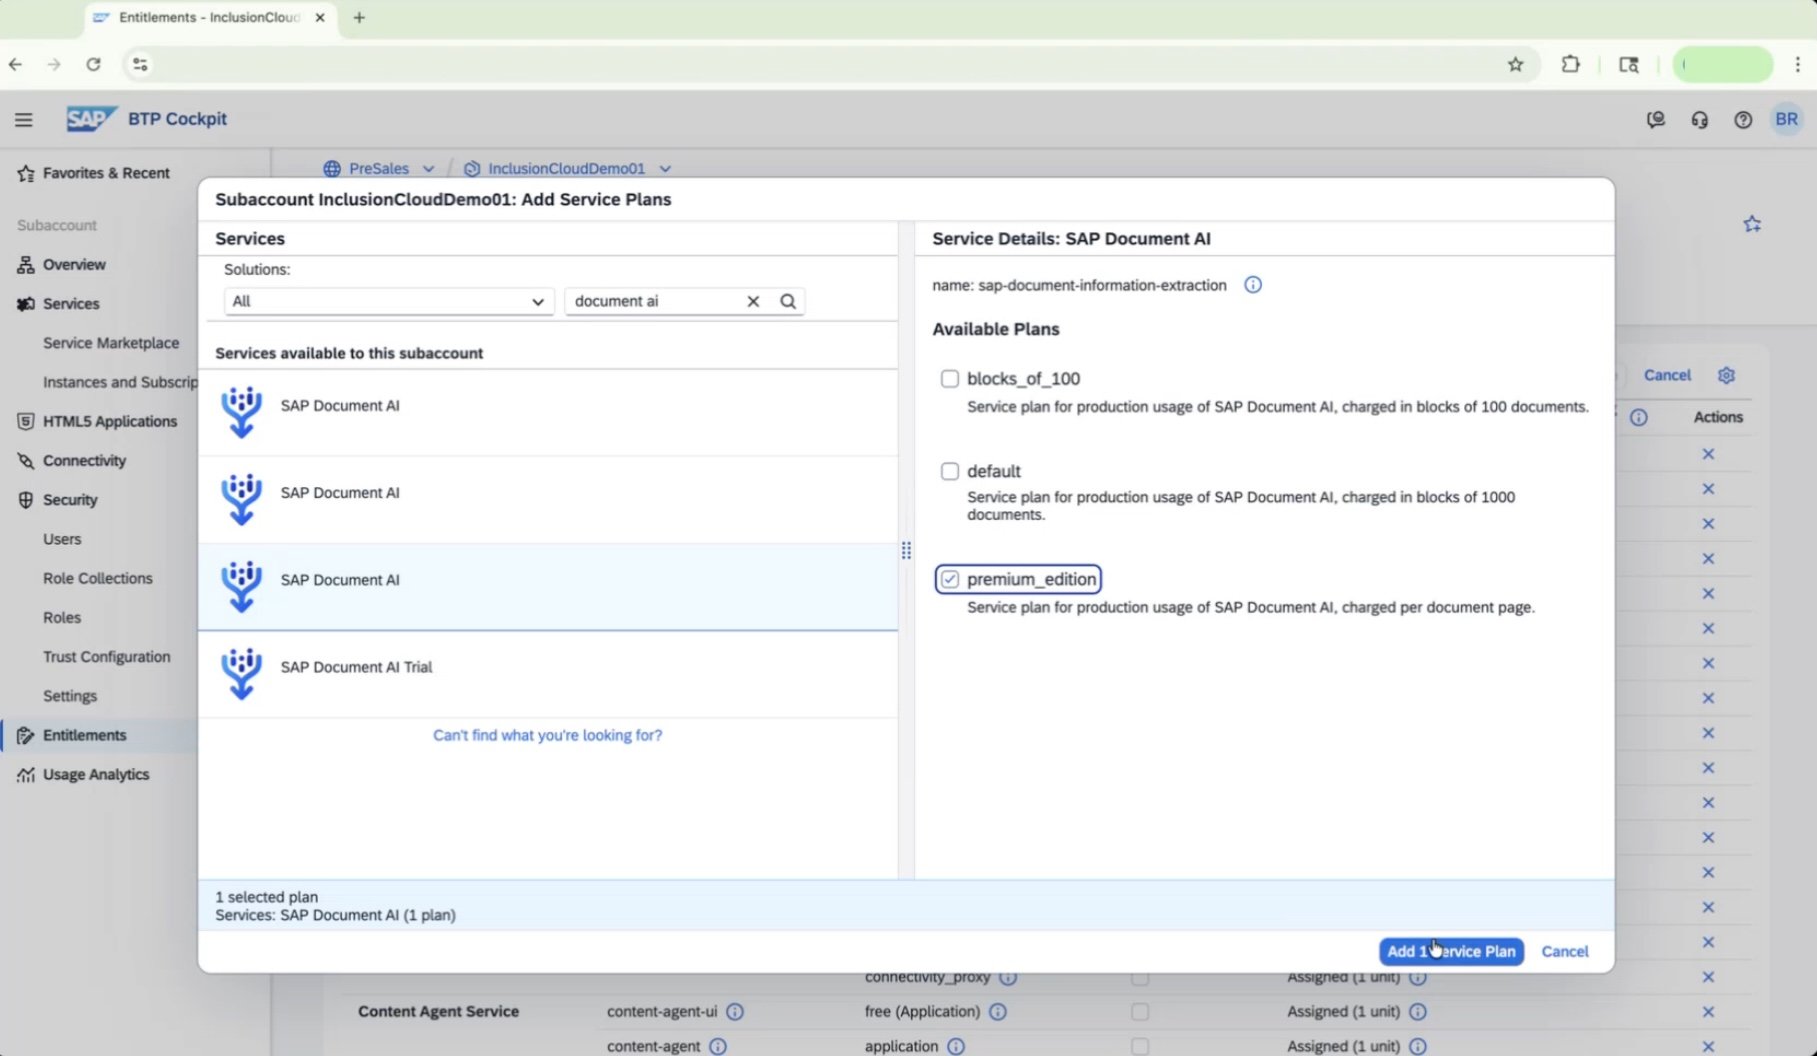
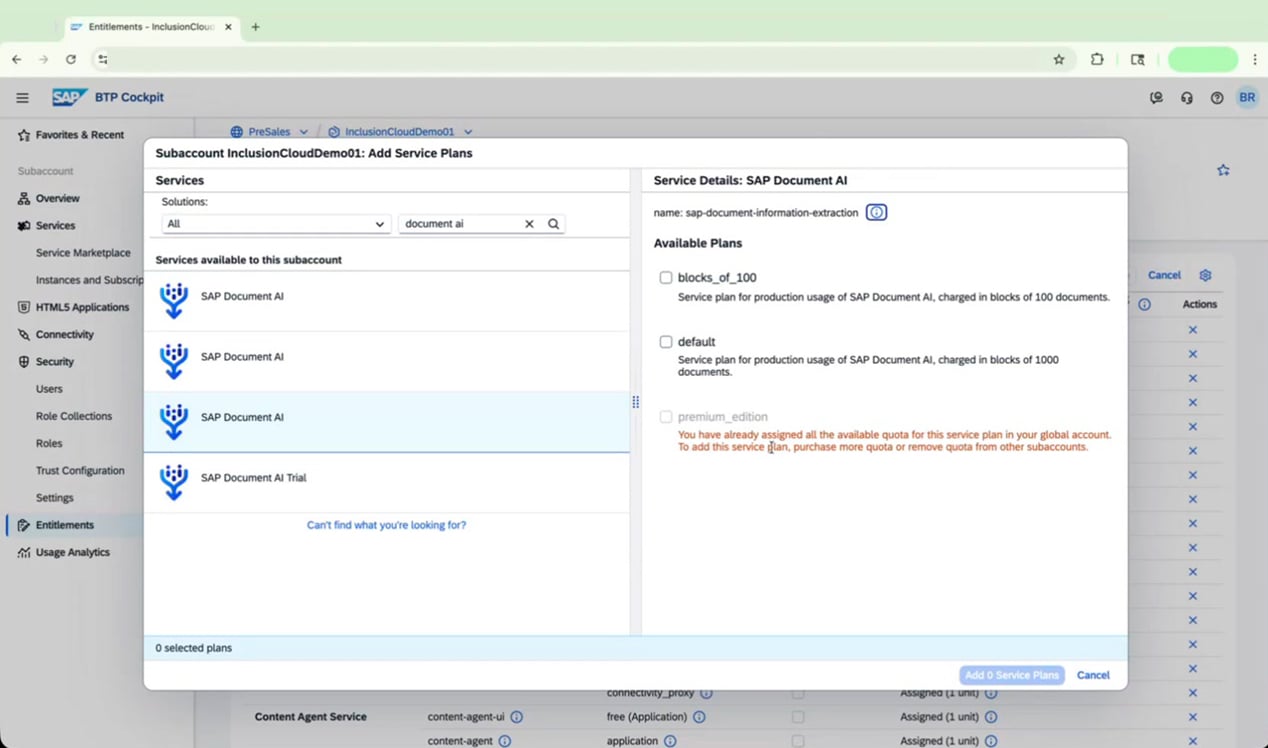
Select the Correct Document AI Application Entry
- If your customer has IAS configured: Select the entry whose name ends in
-ias(for example,document-information-extraction-application-ias) and choose the premium_edition plan. - If your customer does not have IAS configured: Select the SAP Document AI entry without
-iasat the end.
Add the Cloud Foundry Environment Plan
cloud. Select Cloud Foundry Environment, then choose the build-runtime plan on the right.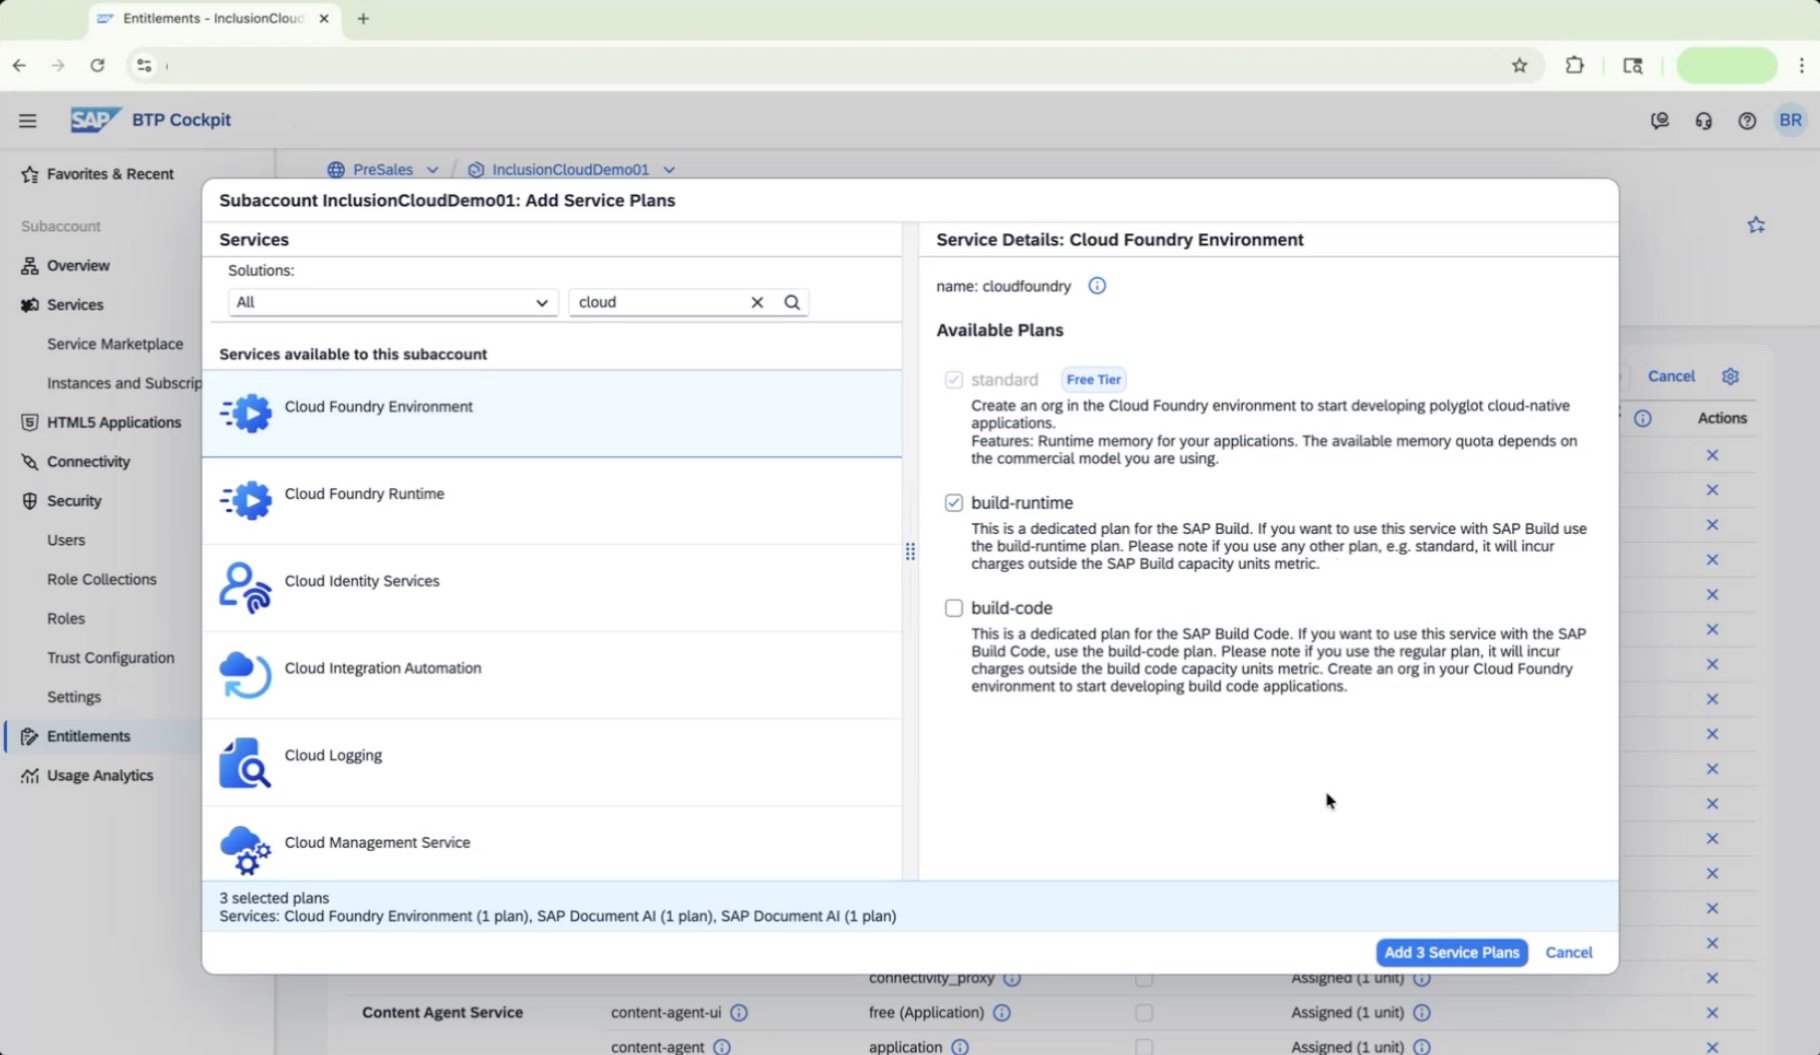
Add All Three Service Plans
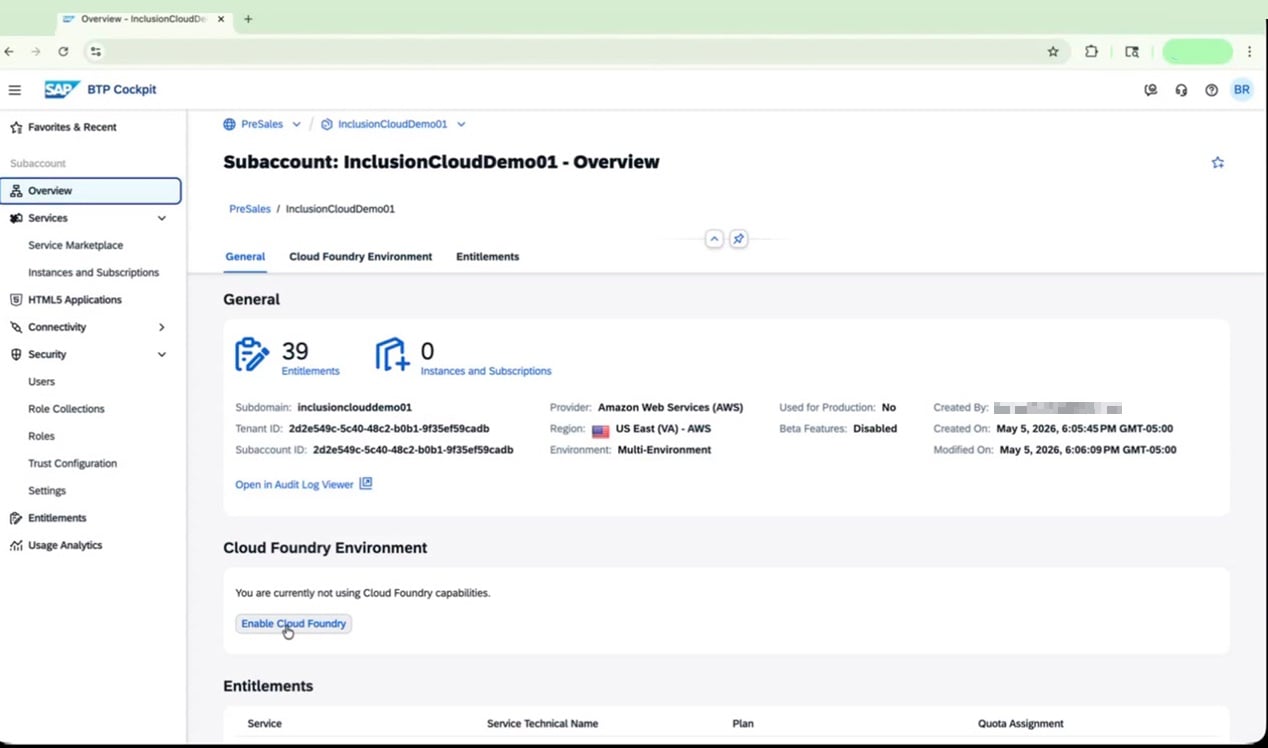
Enable Cloud Foundry
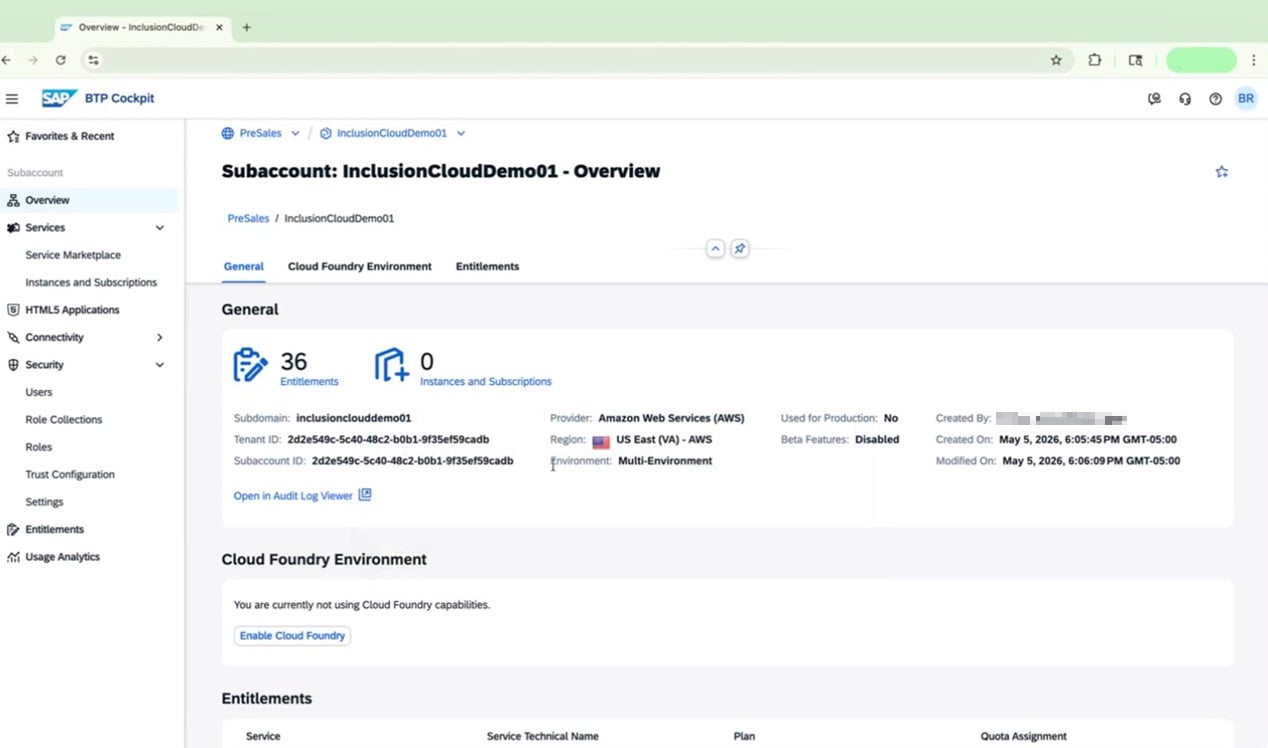
Navigate to Subaccount Overview
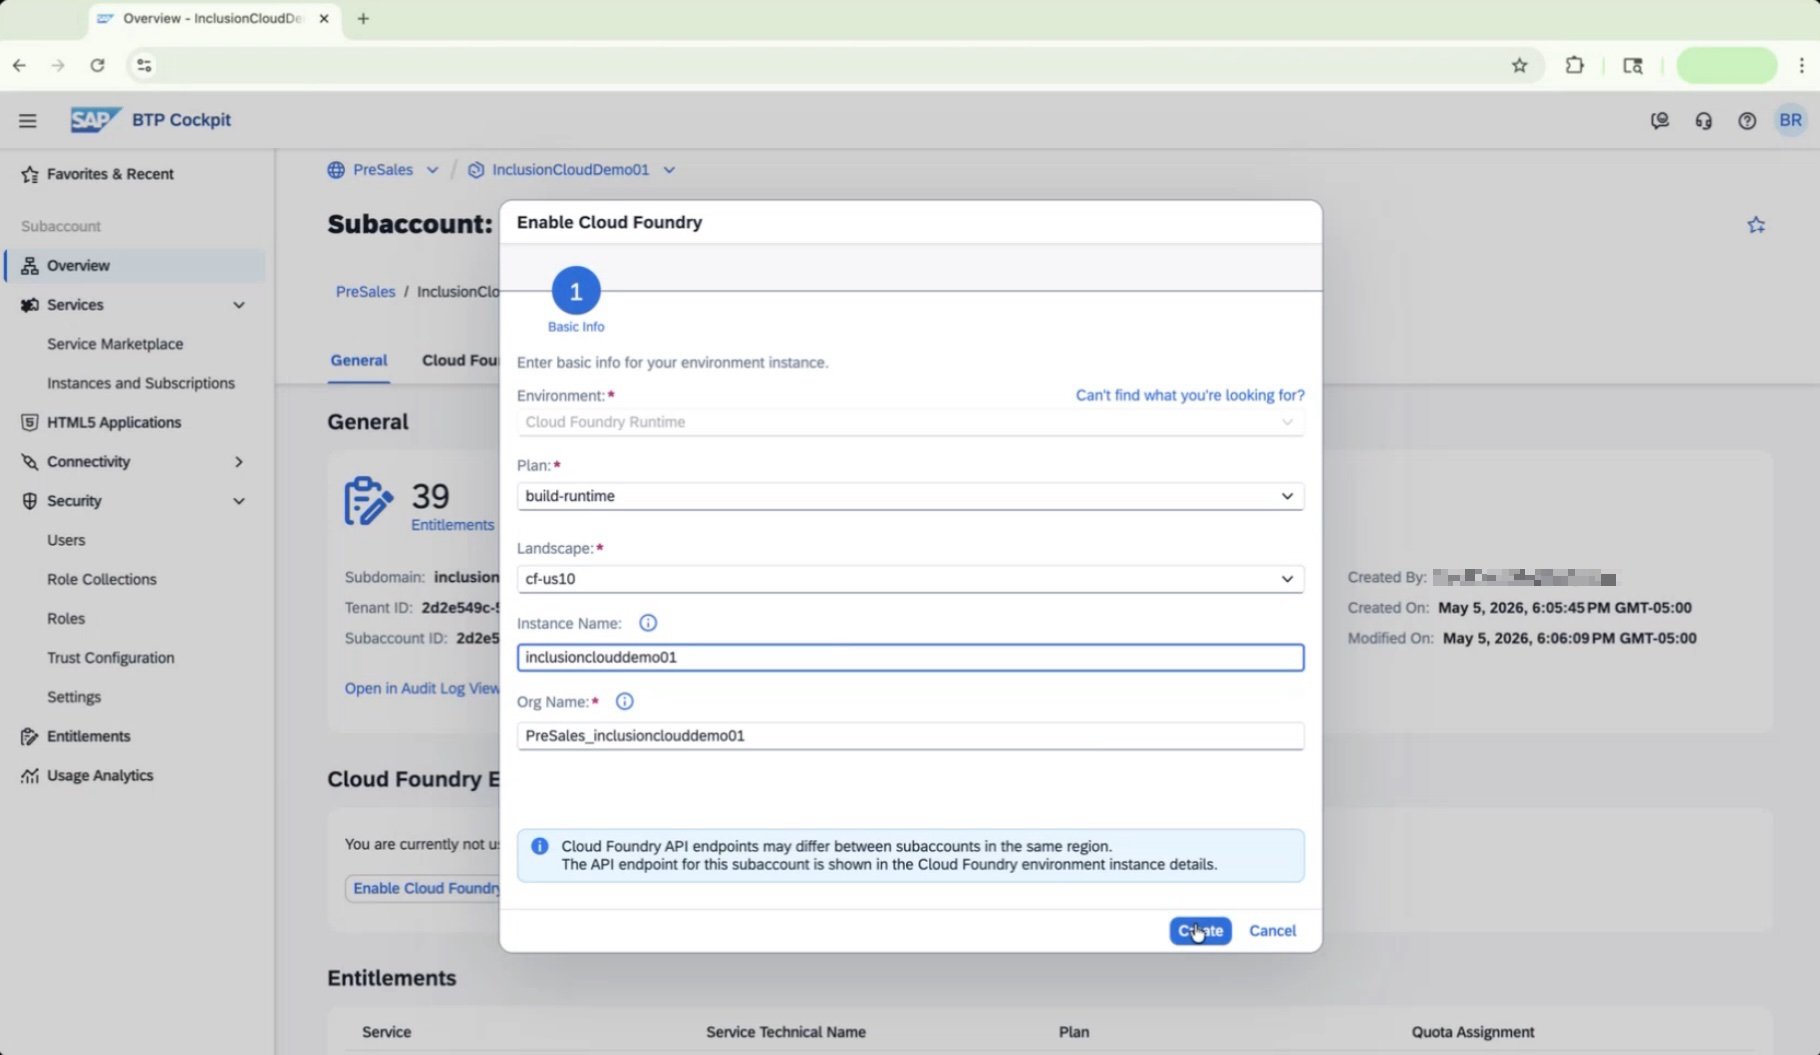
Configure and Create the Cloud Foundry Environment
| Field | Value |
|---|---|
| Plan | build-runtime |
| Landscape | Your current landscape |
| Instance Name | inclusionclouddemo01 |
| Org Name | PreSales_inclusionclouddemo01 |
Chapter 2: Create Instances and Configure User Access
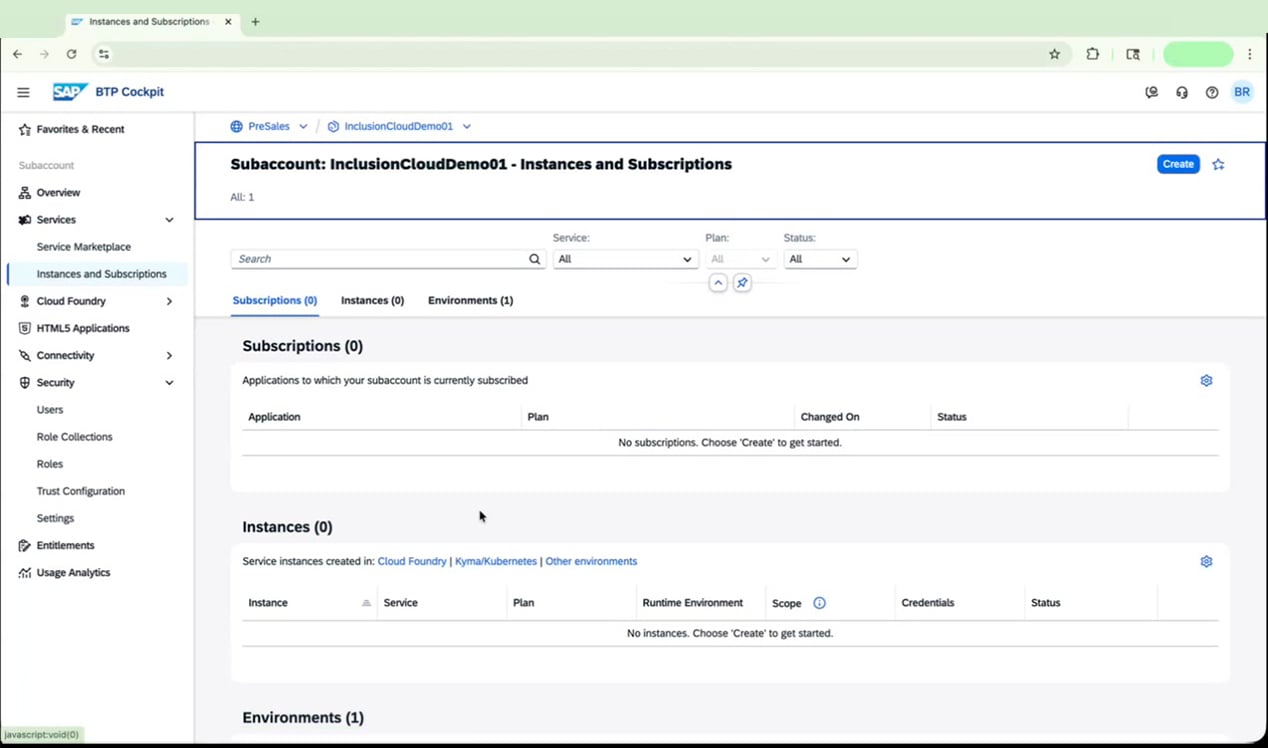
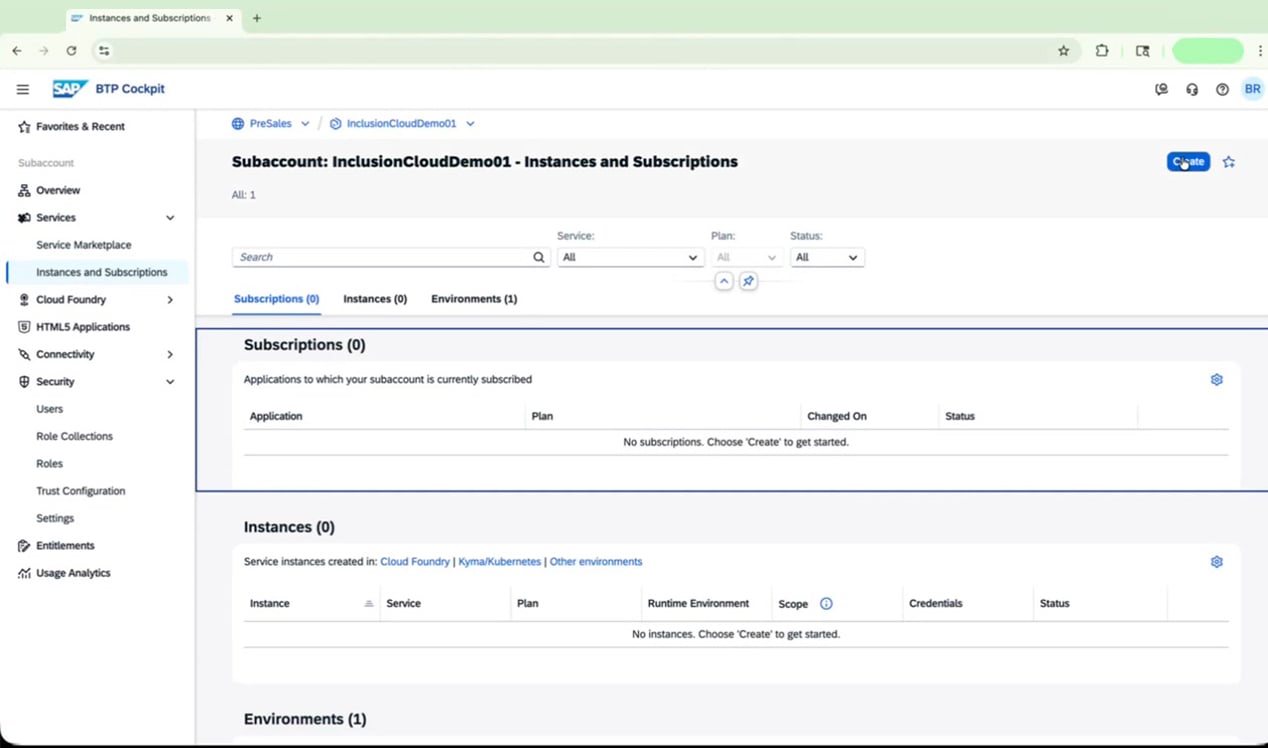
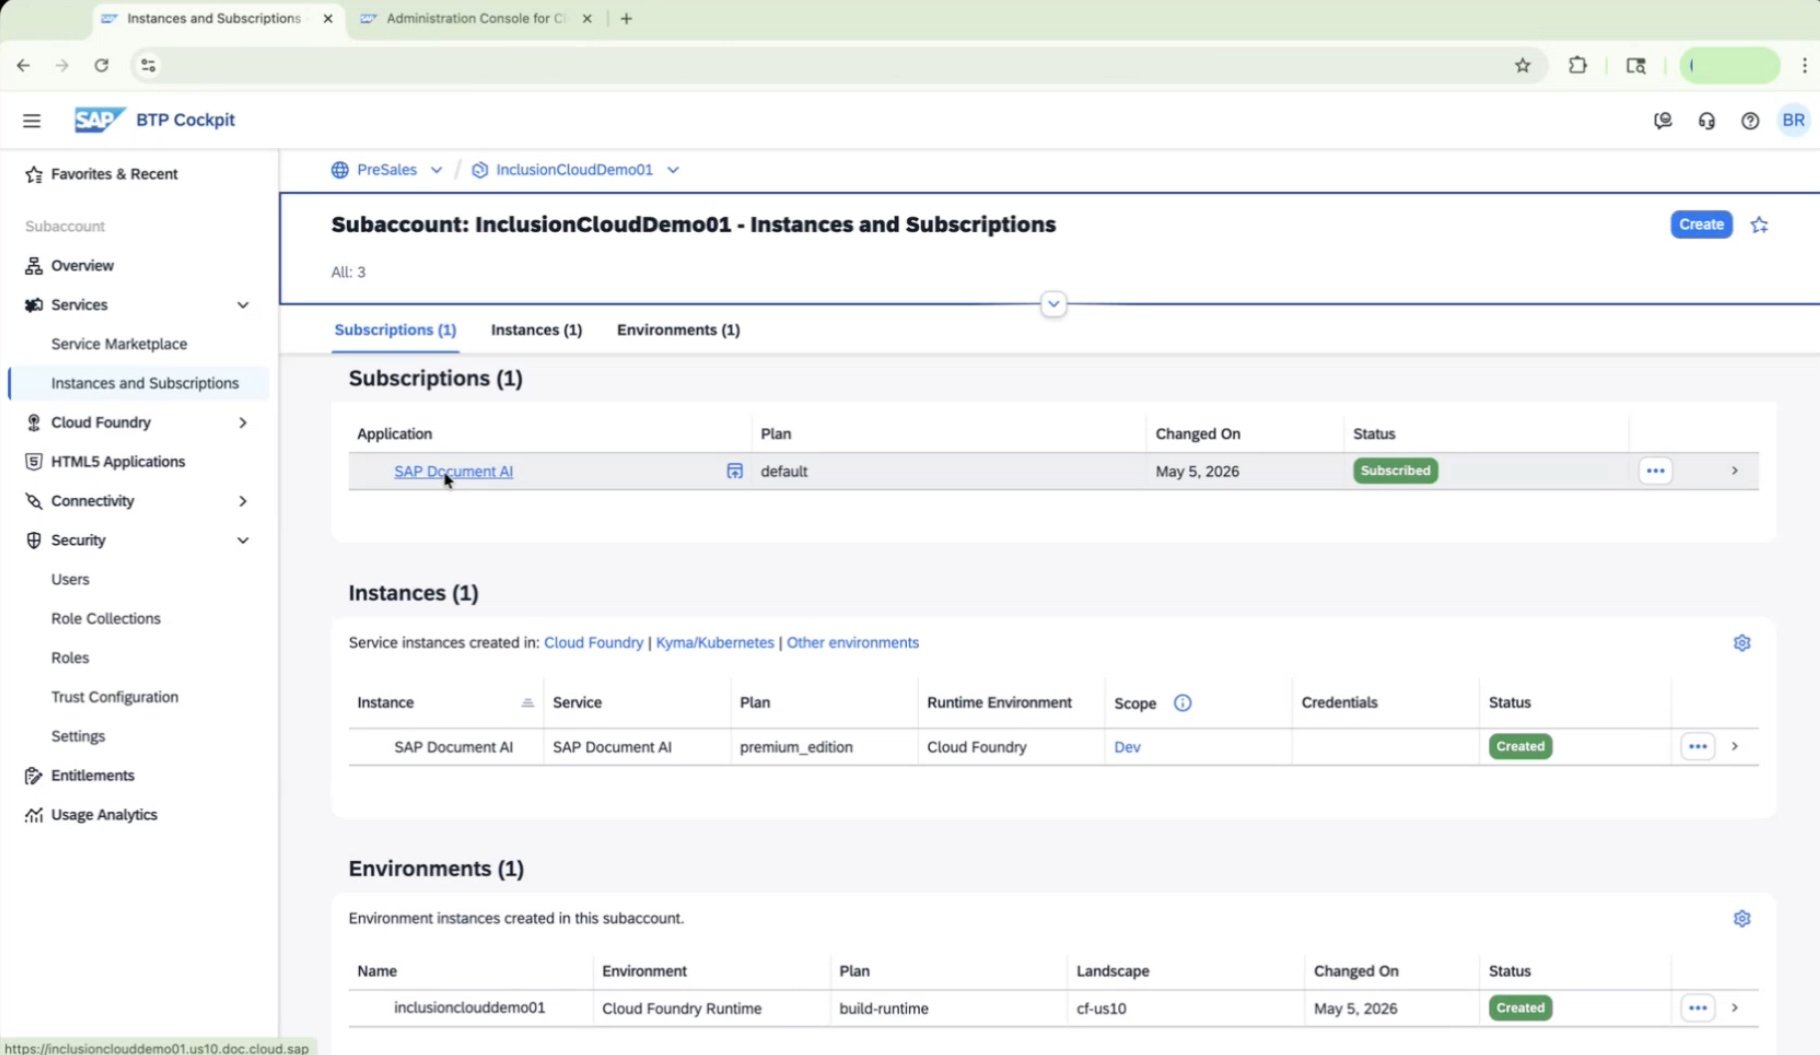
In this chapter, you’ll create a service instance and an application subscription for SAP Document AI, set up user access through SAP Cloud Identity Services (IAS), assign the required role collections, and troubleshoot any permission errors you may encounter.Create the Service Instance and Subscription
Open Your Subaccount
Go to Instances and Subscriptions
Open the Create Dialog
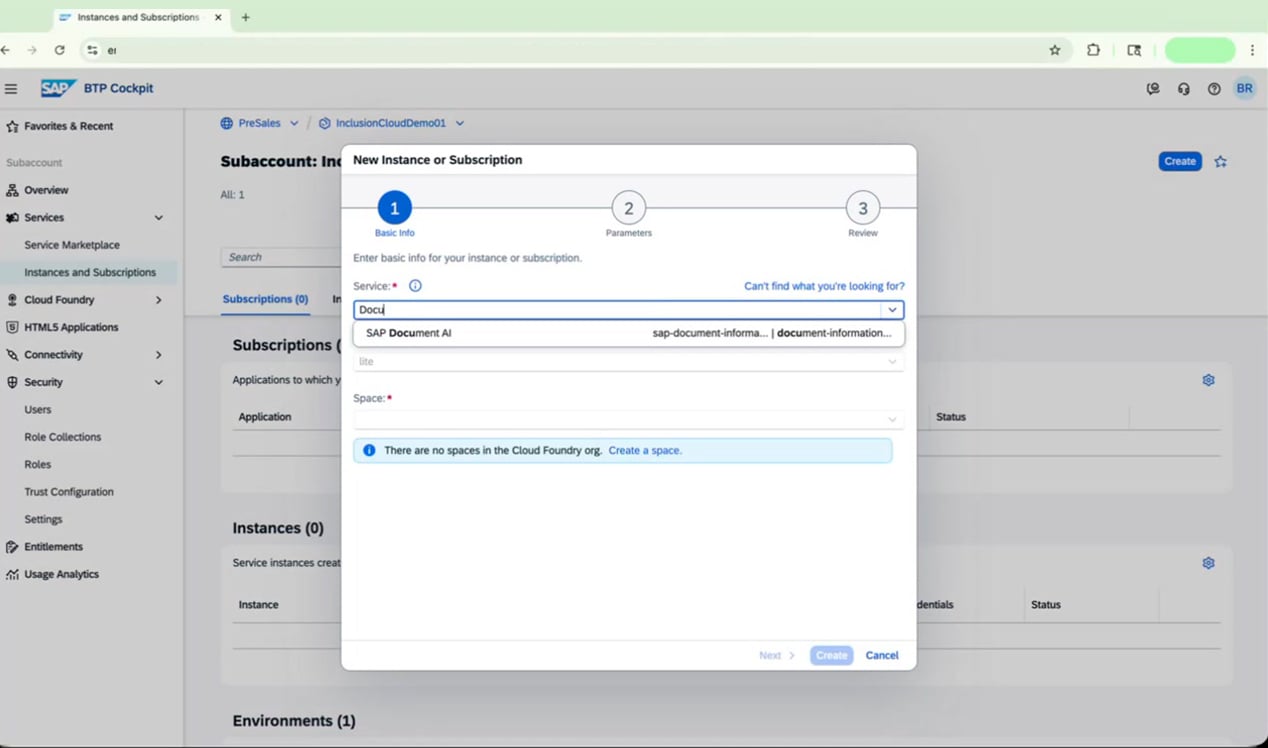
Select SAP Document AI as the Service
Create a Cloud Foundry Space (if needed)
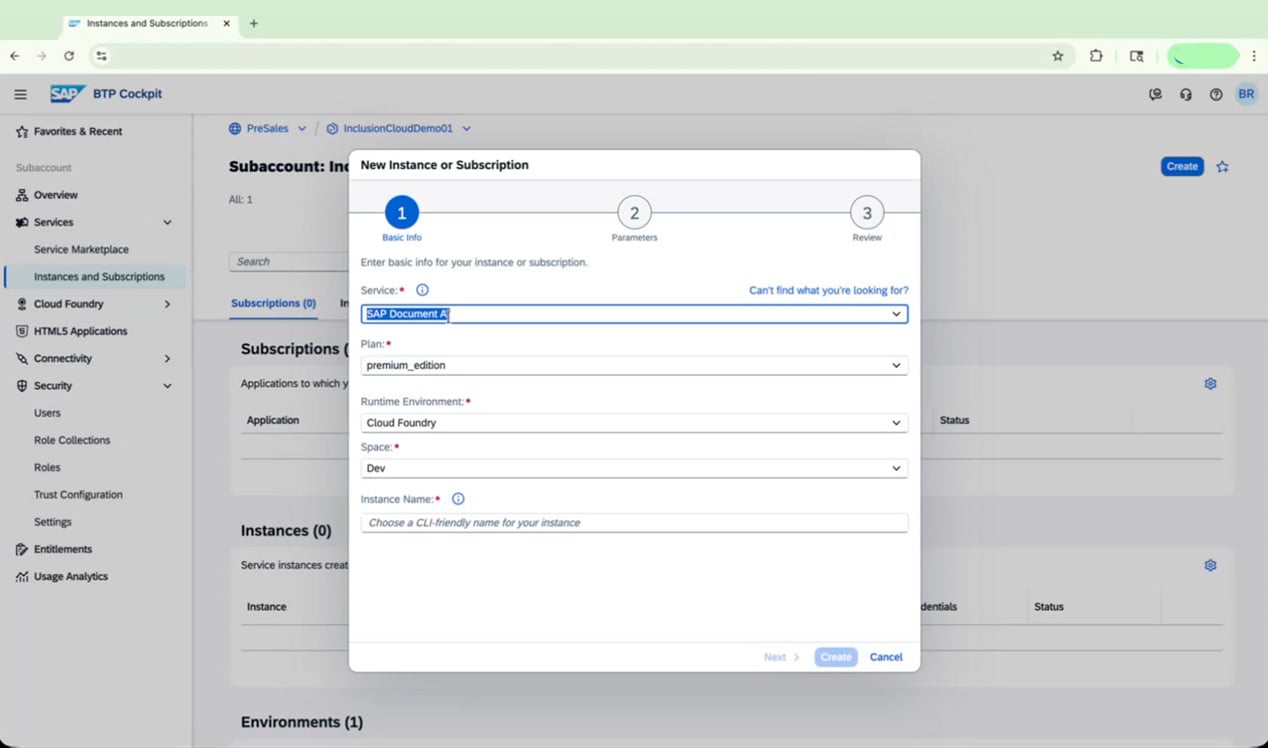
Complete and Submit the Instance Creation
| Field | Value |
|---|---|
| Service | SAP Document AI |
| Plan | premium_edition |
| Runtime Environment | Cloud Foundry |
| Space | Dev (or your chosen name) |
| Instance Name | A CLI-friendly name, e.g. docai-premium |
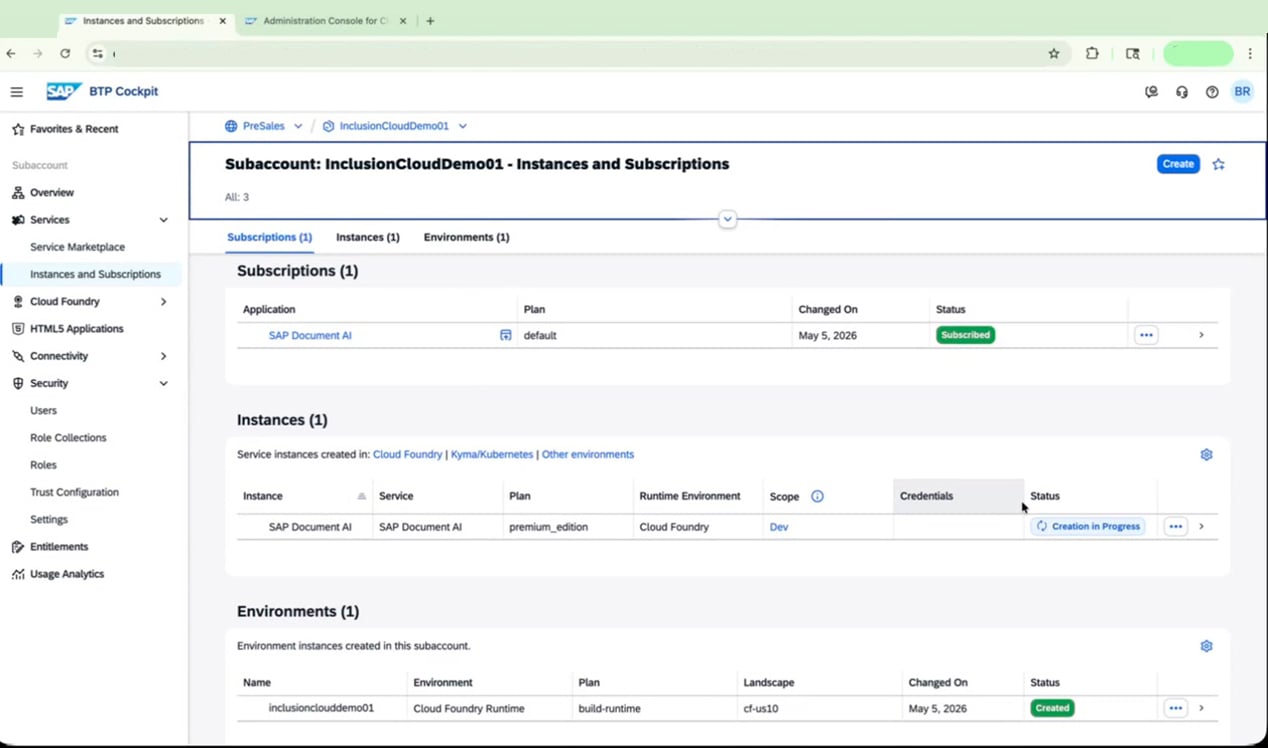
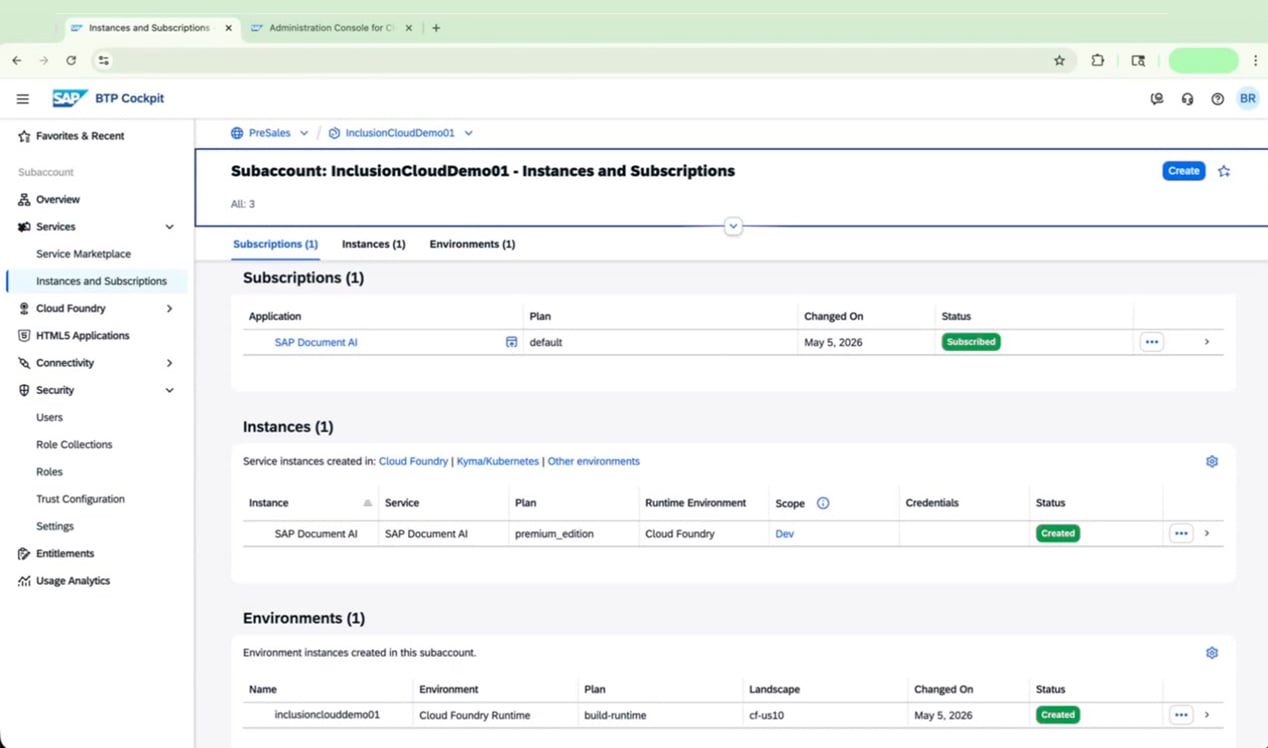
Confirm the Instance Is Being Created

Create the Application Subscription
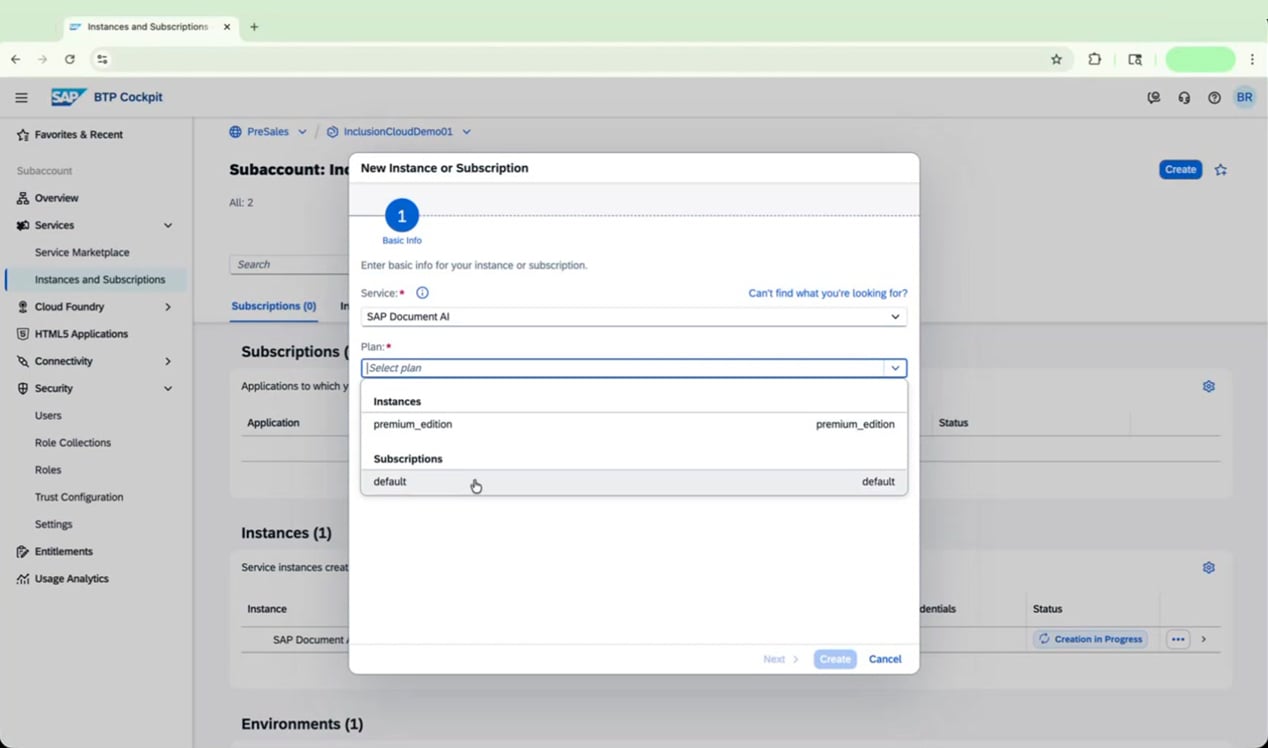
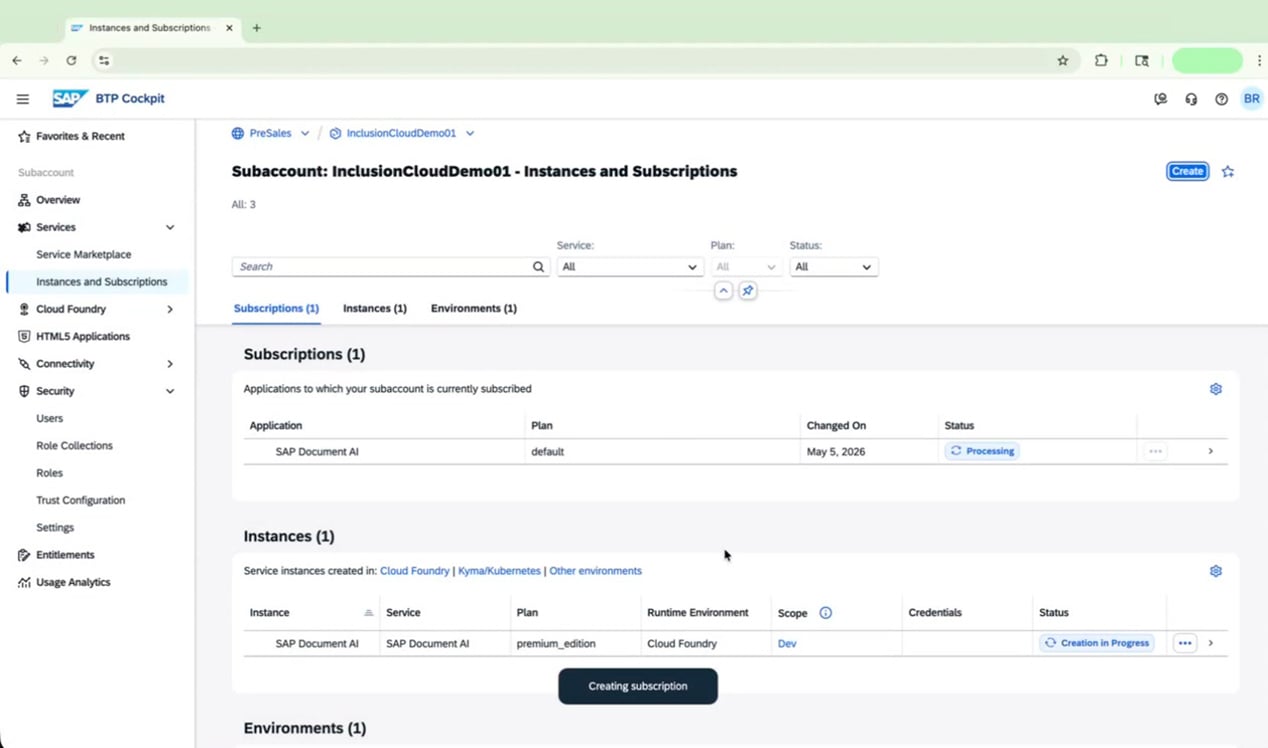
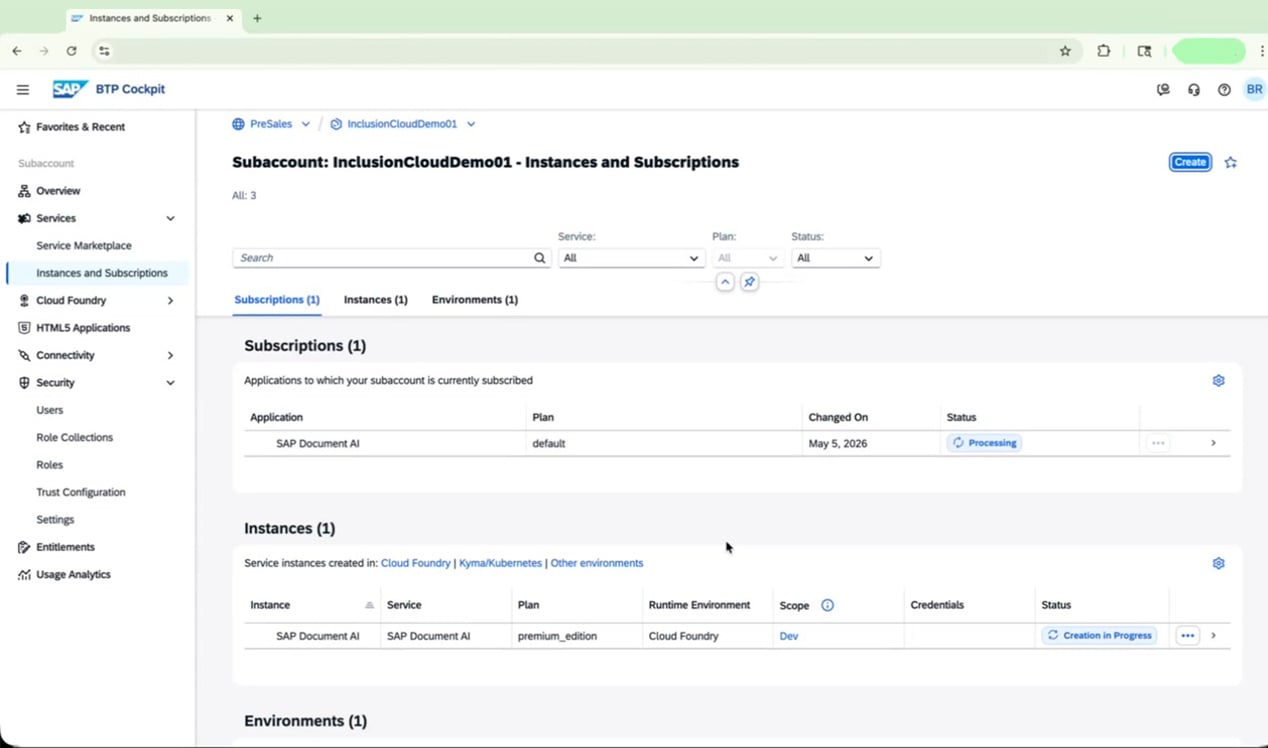
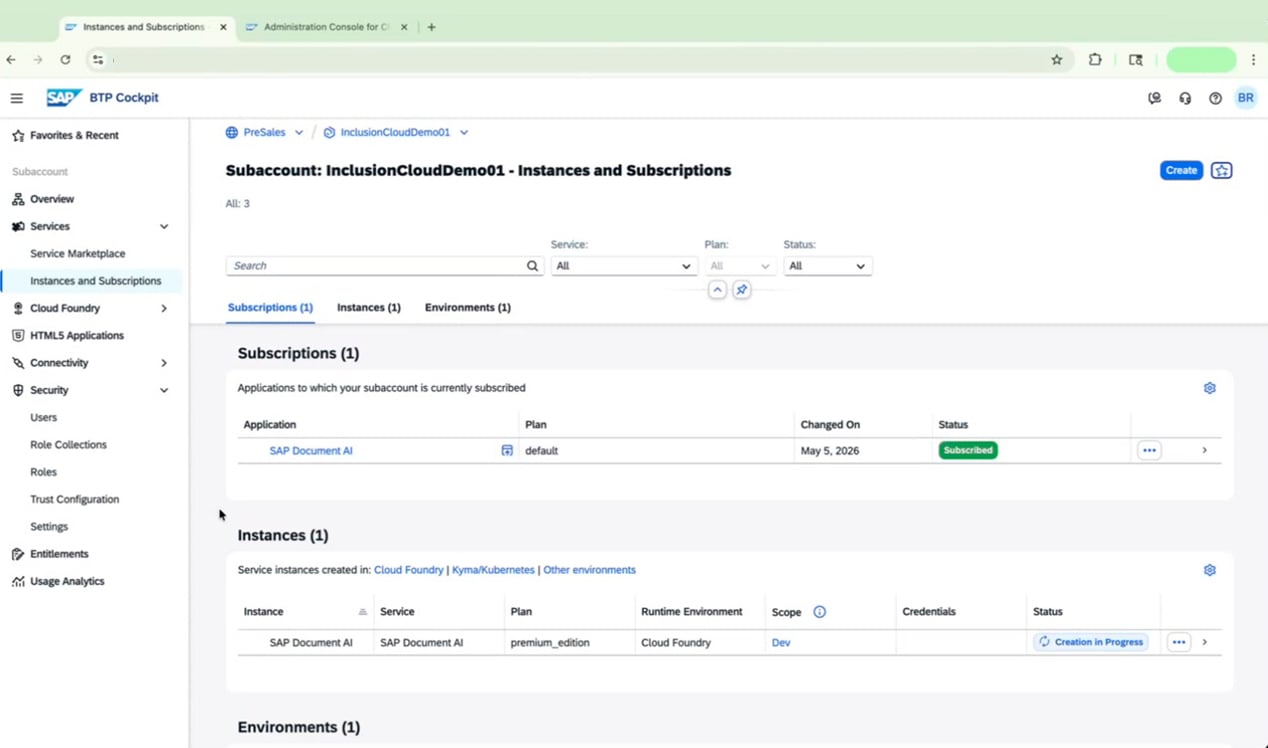
Verify Both Entries Are Processing
- Subscriptions: SAP Document AI | Plan: default | Status: Processing
-
Instances: SAP Document AI | Plan: premium_edition | Status: Creation in Progress
Configure Admin Access in SAP Cloud Identity Services
While you wait for provisioning to complete, you can configure admin access for SAP Document AI through the SAP Cloud Identity Services (IAS) Administration Console.Wait for the Subscription to Become Active
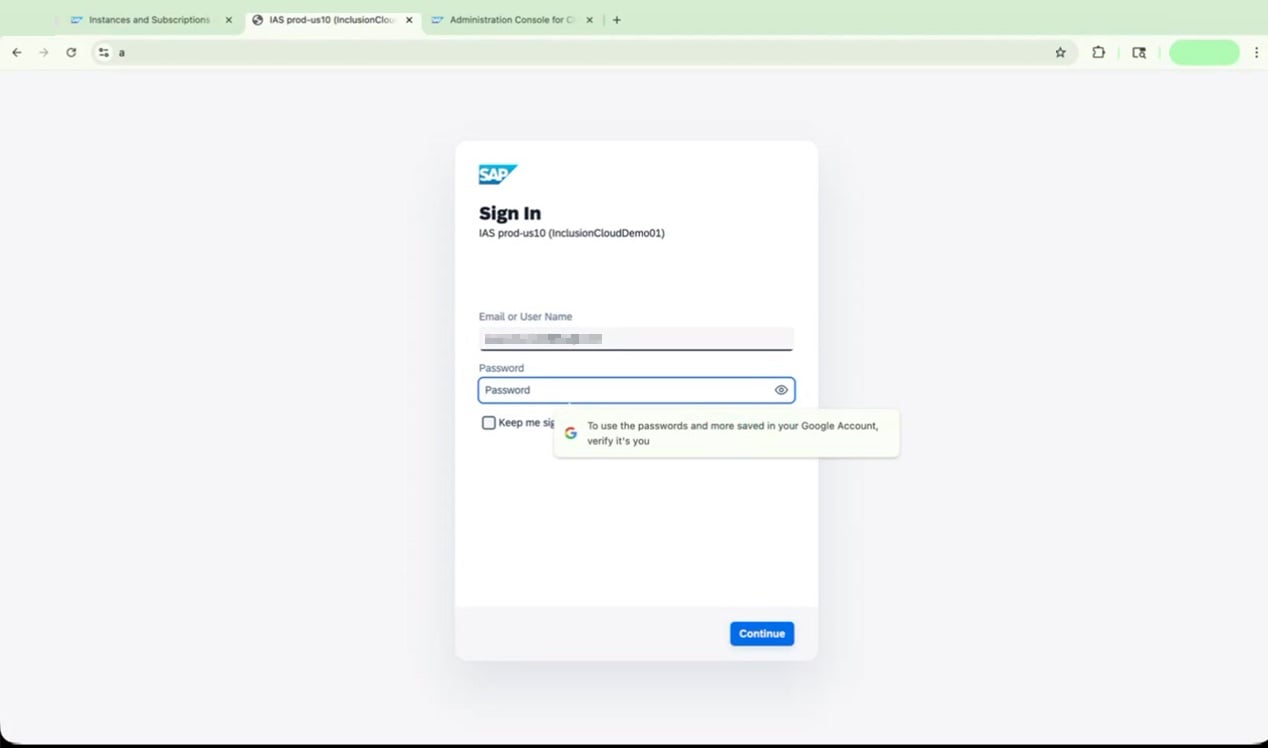
Open the IAS Administration Console
XYZ.accounts.ondemand.com/admin/). You’ll see the Administration Console Log On screen.
Open the Groups Section
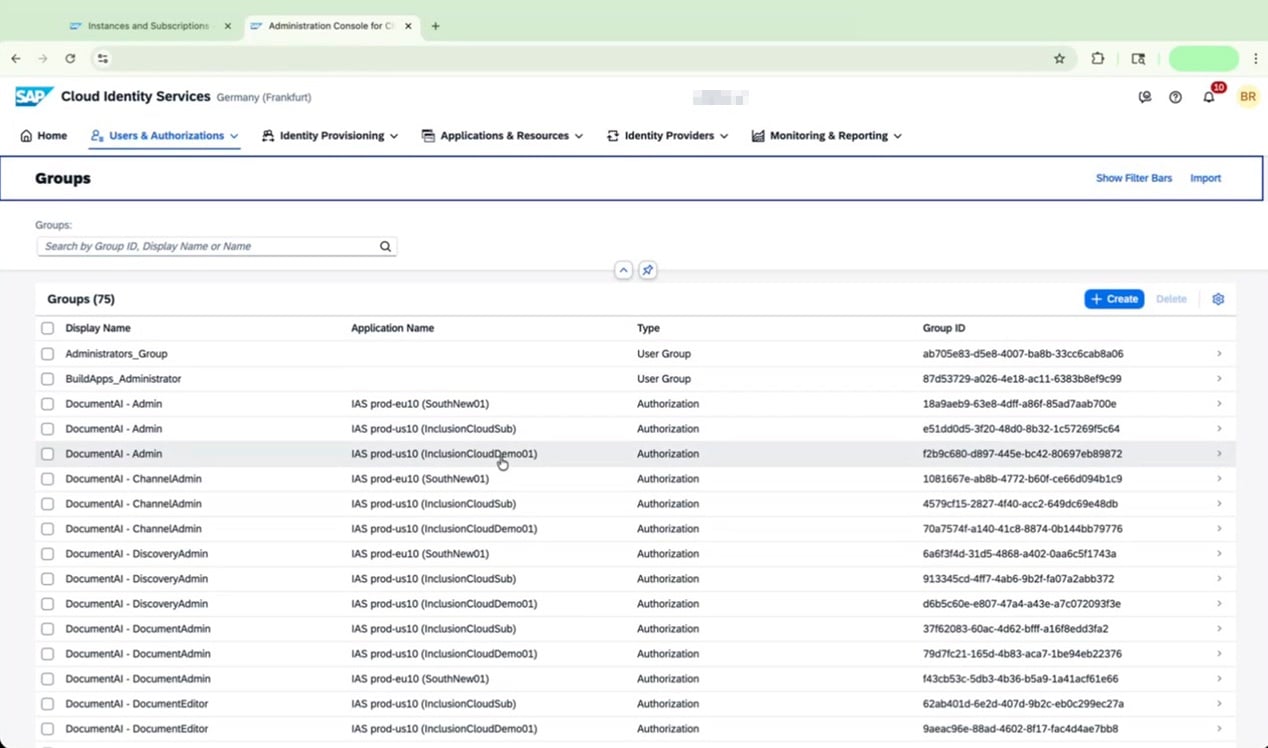
Open the DocumentAI - Admin Group

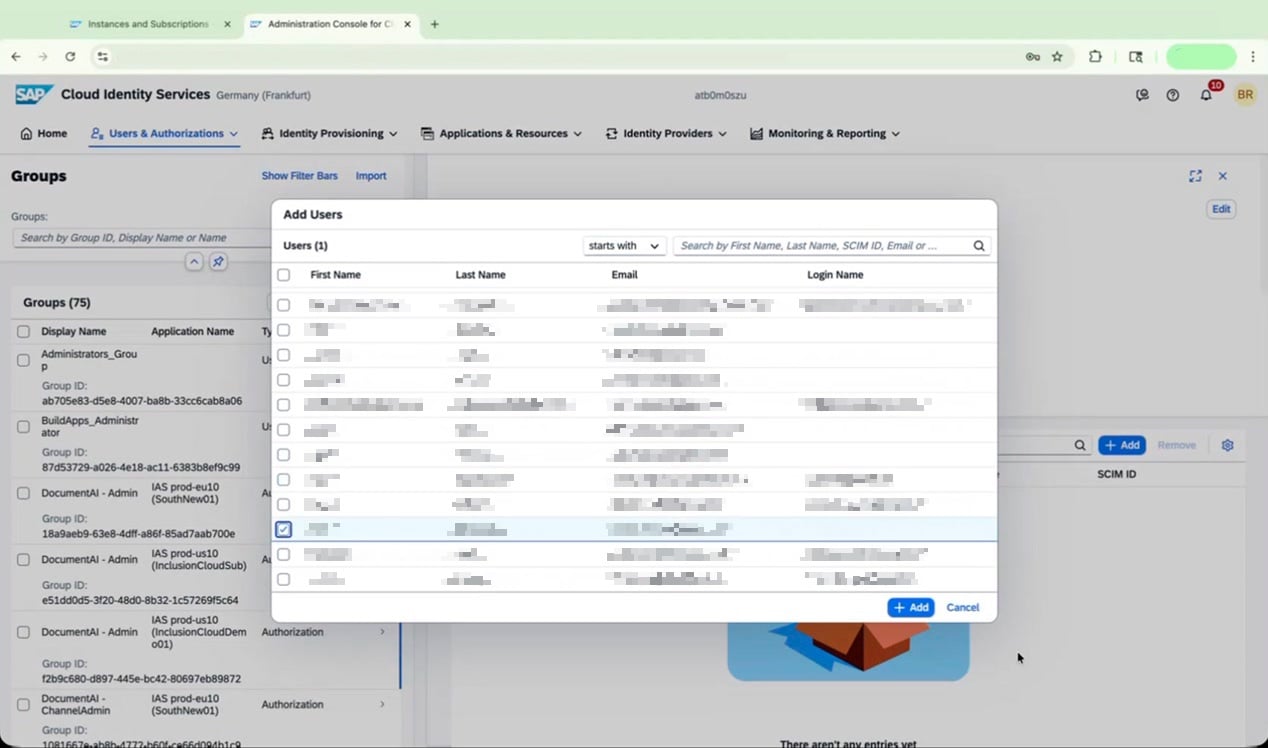
Add Your User to the Admin Group
Add Users and Assign Role Collections
With admin access configured in IAS, add your user to the SAP BTP subaccount and assign the Document AI role collections.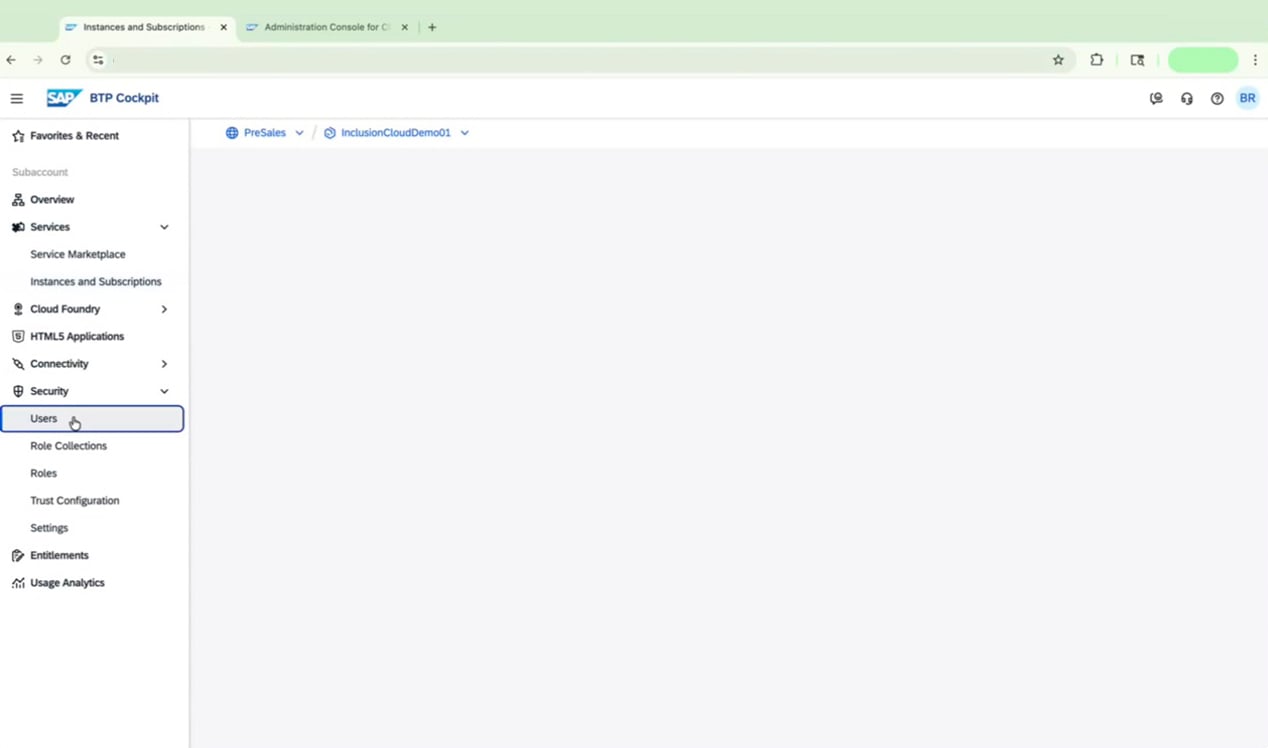
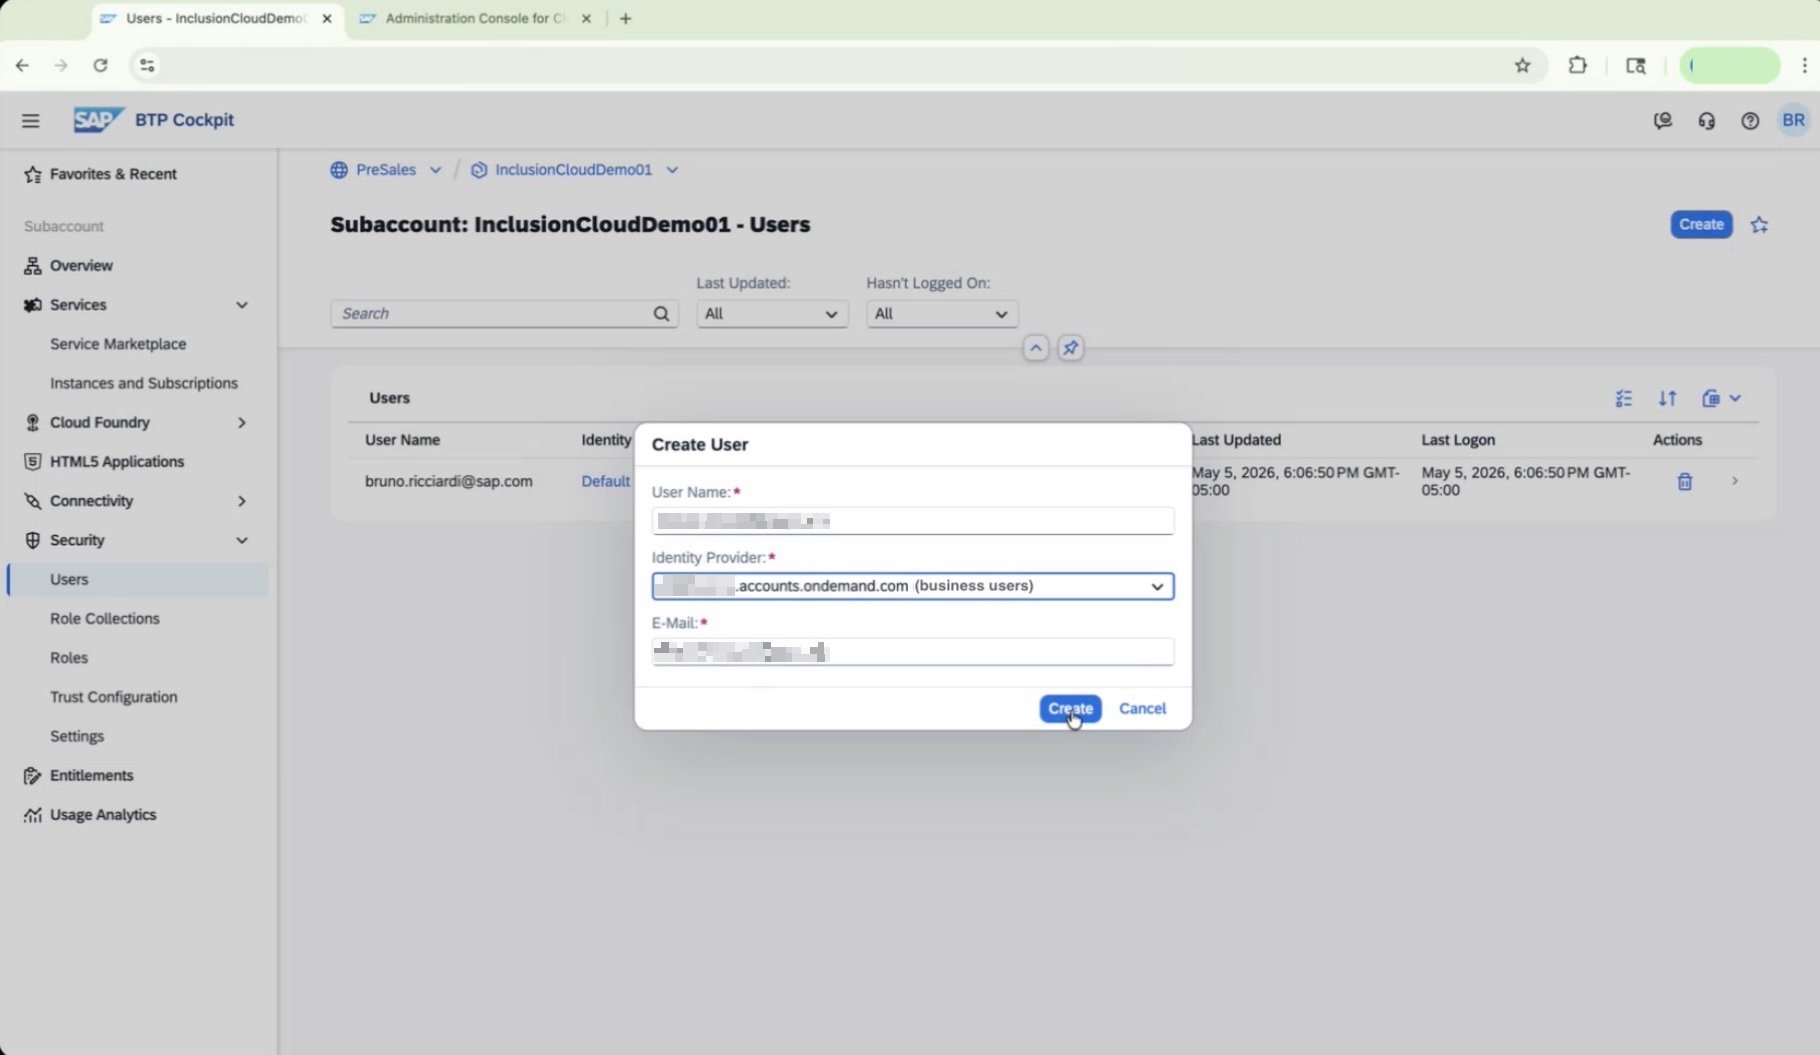
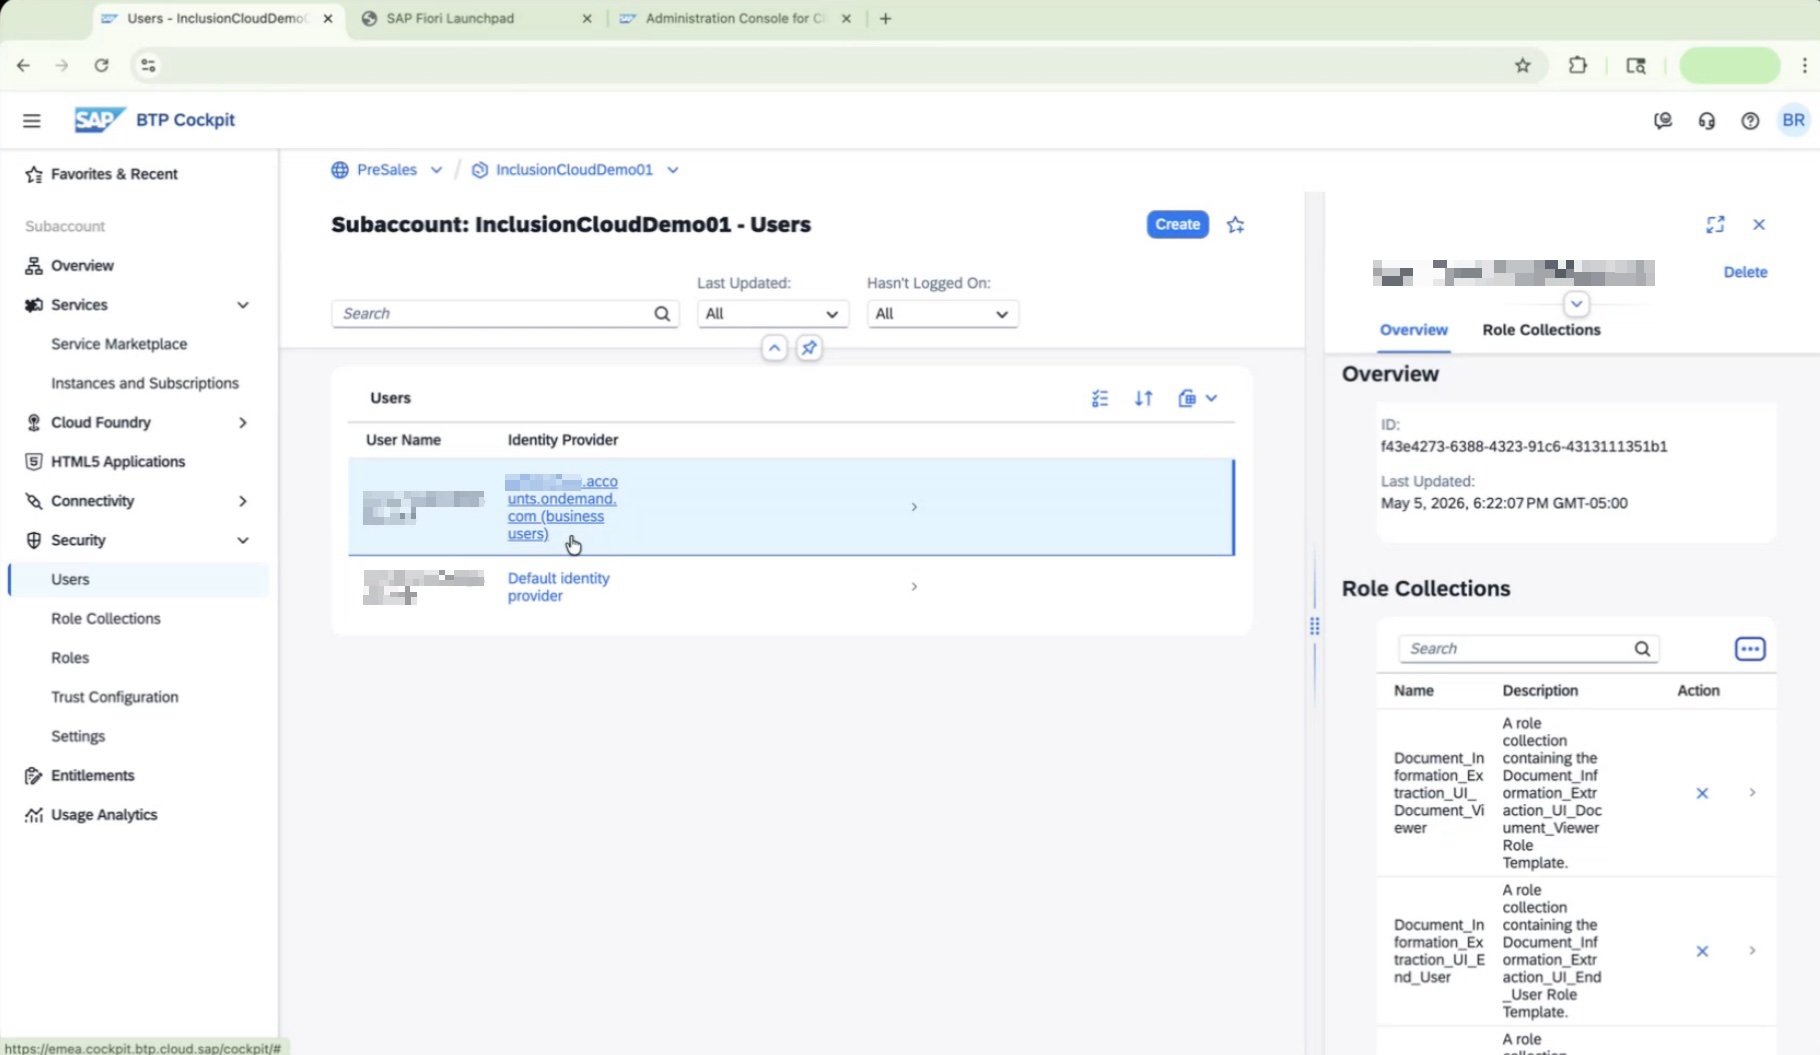
Create the User
| Field | Value |
|---|---|
| User Name | Your user’s email address |
| Identity Provider | Your IAS tenant URL (business user) |
| Your user’s email address |
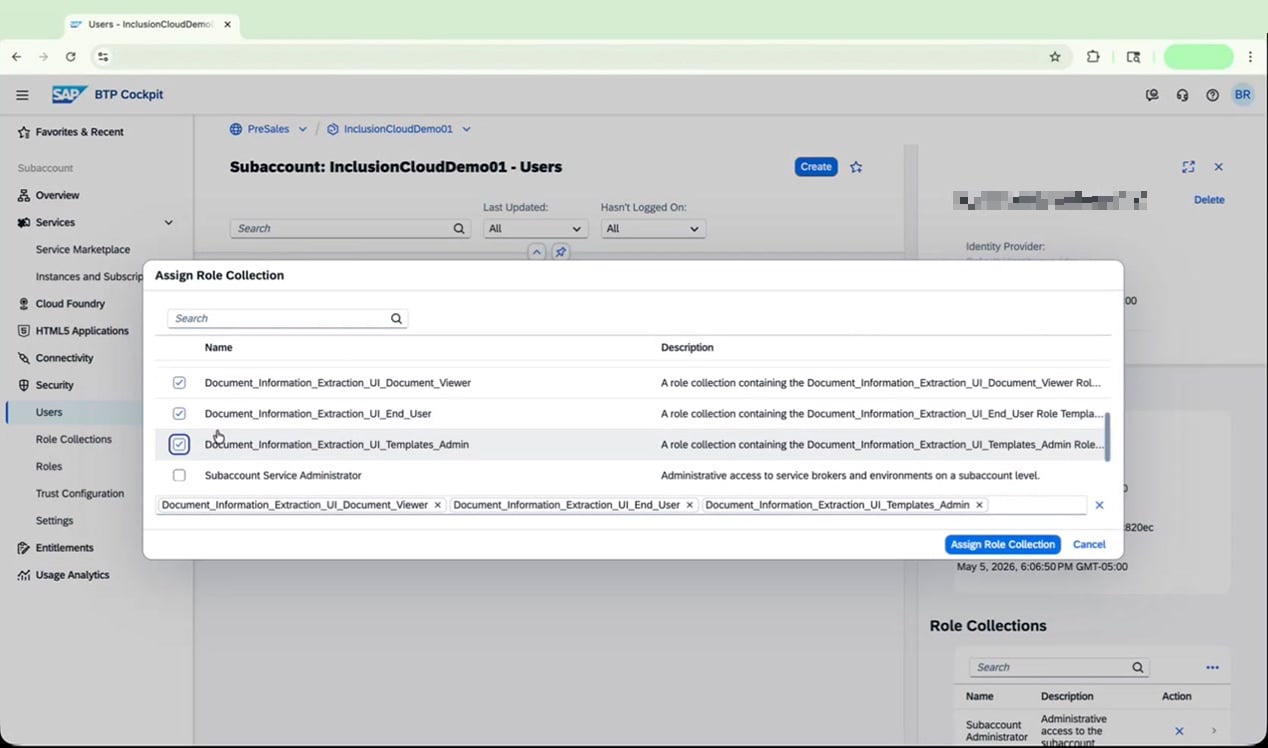
Open Assign Role Collection
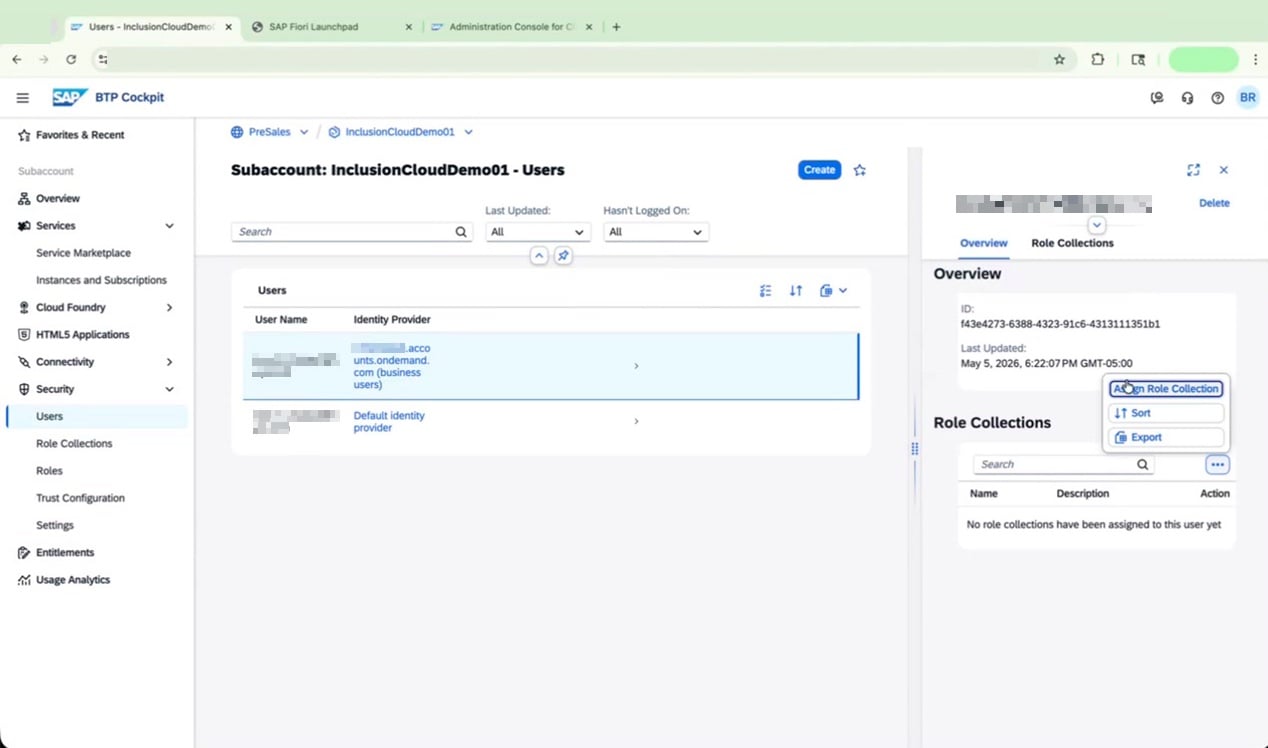
Assign the Three Document AI Role Collections
Document_Information_Extraction_UI_Document_ViewerDocument_Information_Extraction_UI_End_UserDocument_Information_Extraction_UI_Templates_Admin
Repeat for Additional Users
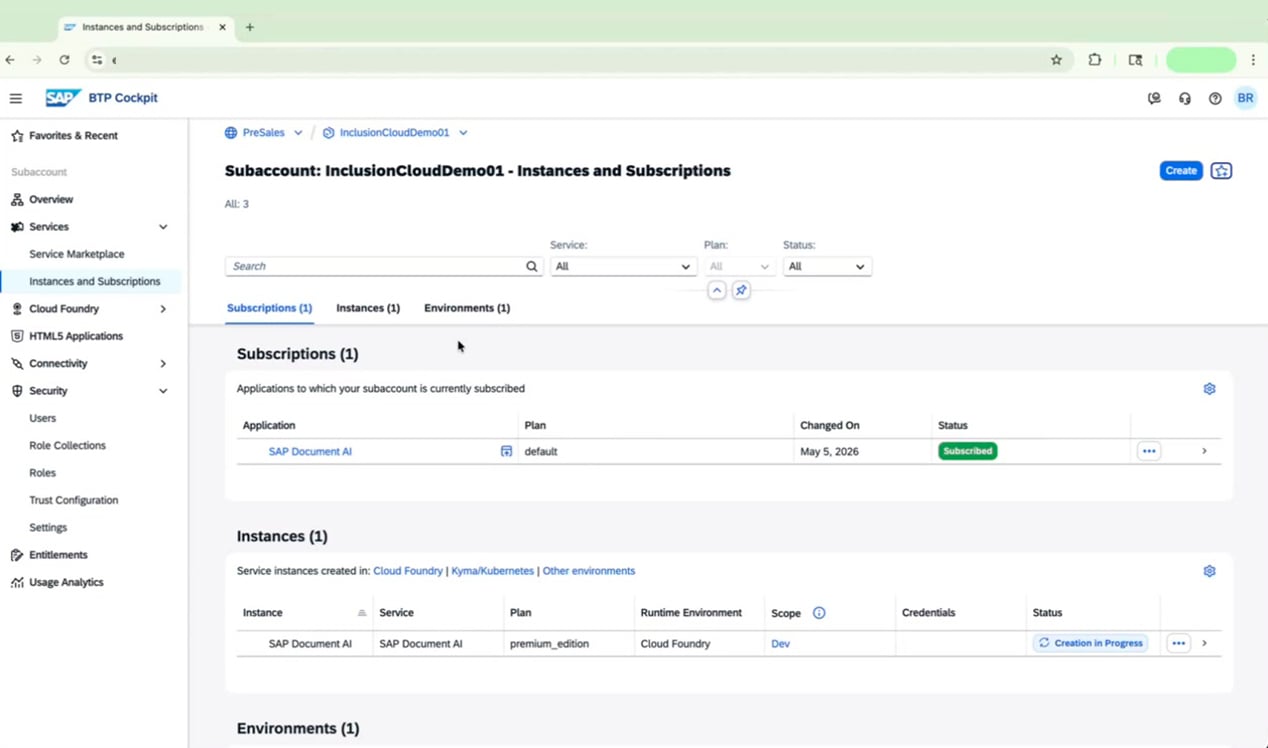
Verify Instance and Subscription Status
- Subscriptions: SAP Document AI | Plan: default | Status: Subscribed
-
Instances: SAP Document AI | Plan: premium_edition | Runtime: Cloud Foundry | Scope: Dev | Status: Creation in Progress
Troubleshoot “Permission Denied” Errors
Even after assigning role collections, you may encounter a “Permission Denied” error when first opening the SAP Document AI workspace. Follow these steps to resolve it.Confirm Both Statuses Are Ready
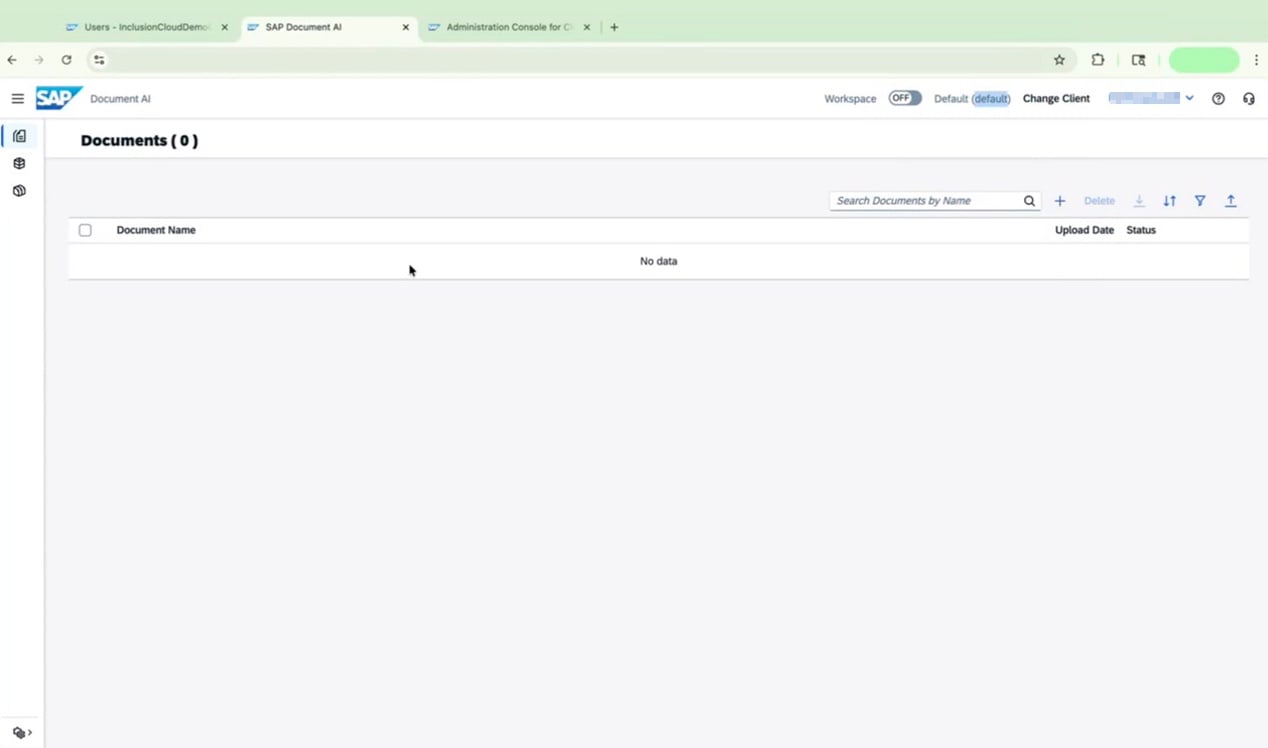
Open the SAP Document AI Workspace
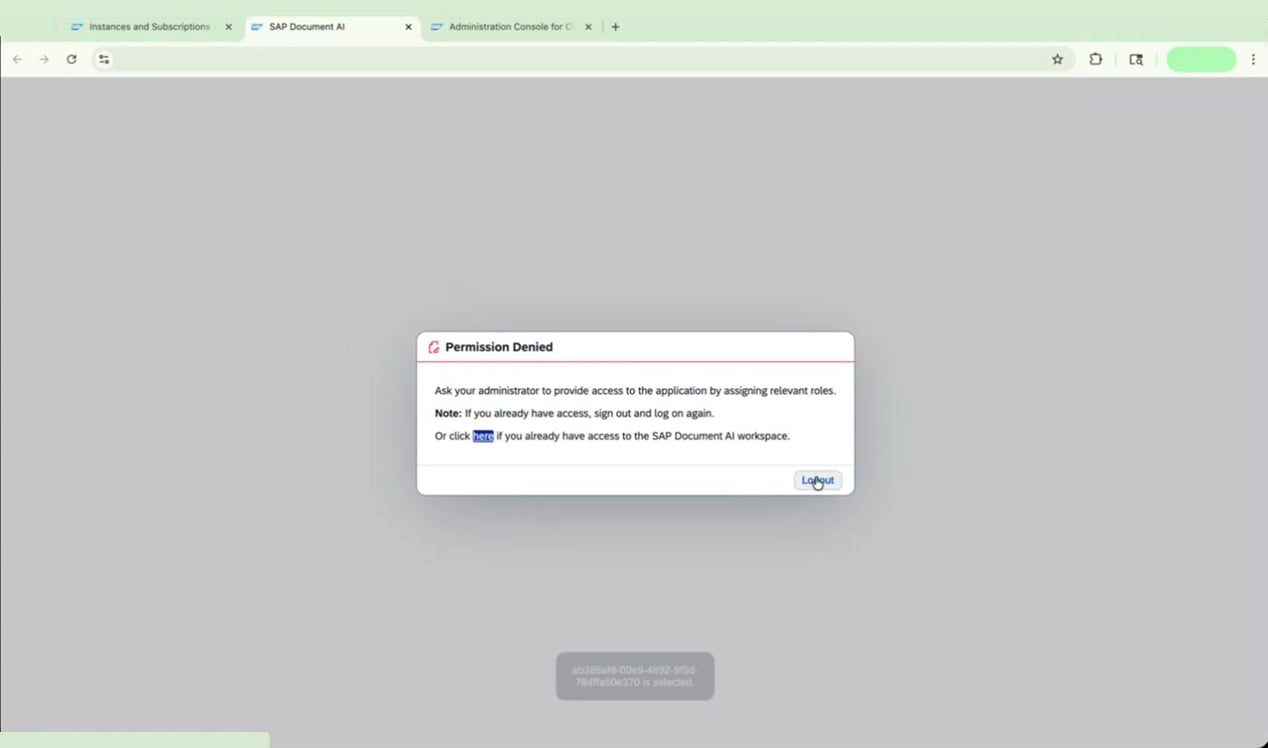
Re-authenticate in BTP Cockpit
Check the User's Identity Provider
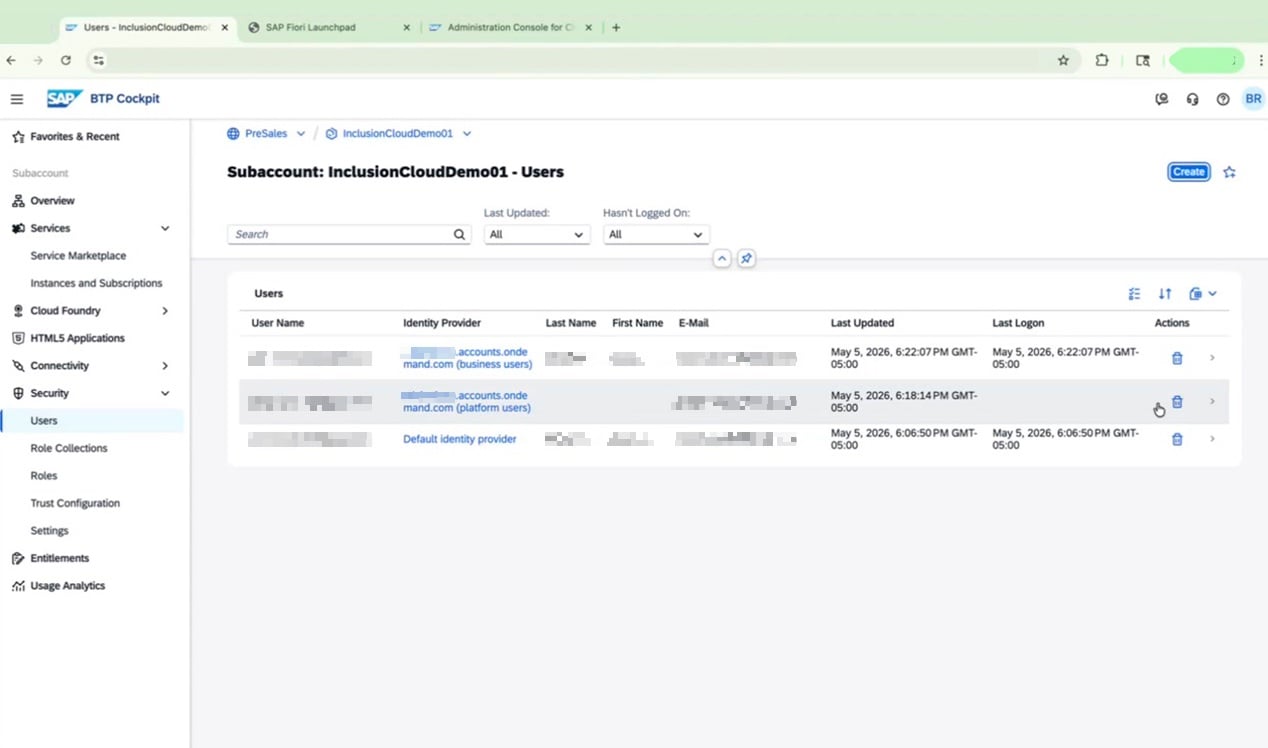
Delete the Incorrect User Entry
Reassign Role Collections to the Correct User
Verify the Role Collections Are Assigned
-
Document_Information_Extraction_UI_Document_Viewer -
Document_Information_Extraction_UI_End_User -
Document_Information_Extraction_UI_Templates_Admin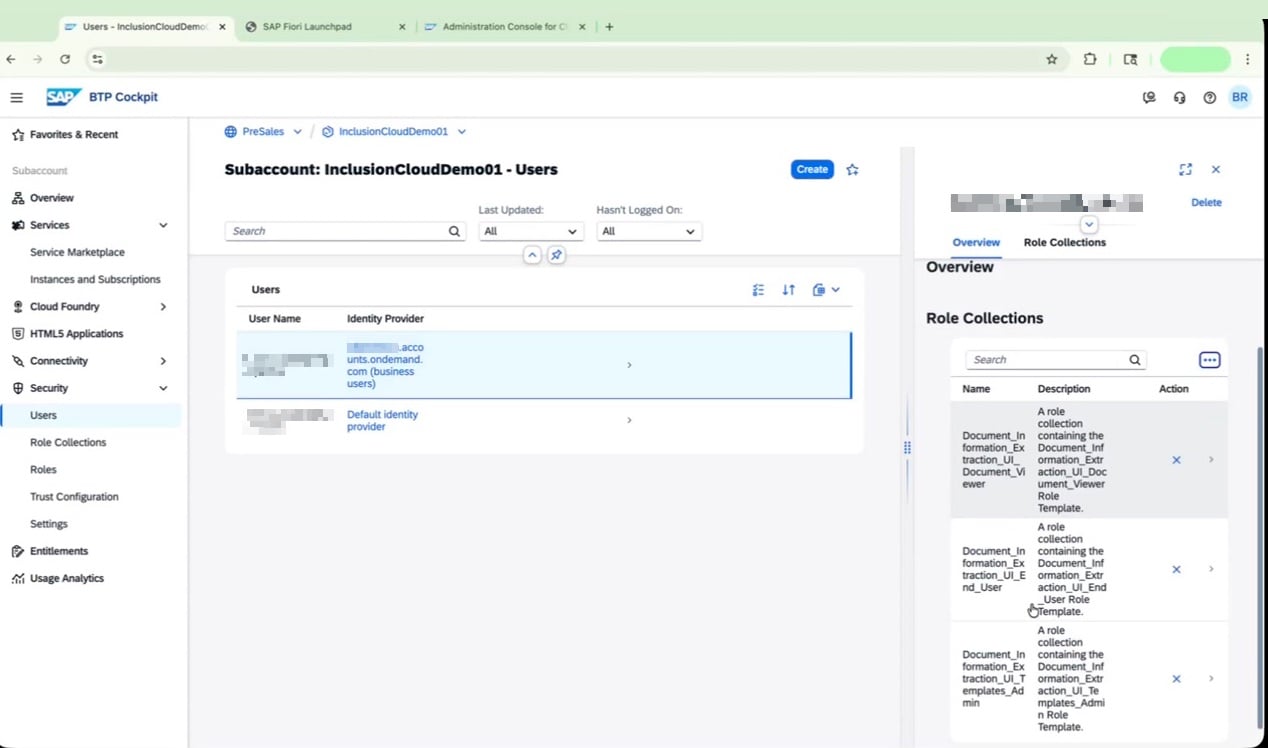
Chapter 3: Finalize Your Document AI Configuration
With the core setup complete, this chapter walks you through the final configuration steps inside the SAP Document AI interface — including document retention, Instant Learning, and Data Feedback settings — and shows you how to review user access in the SAP BTP Cockpit.Log In and Navigate the Interface
Access SAP Document AI
Switch to the New UI
Open the Configuration Screen
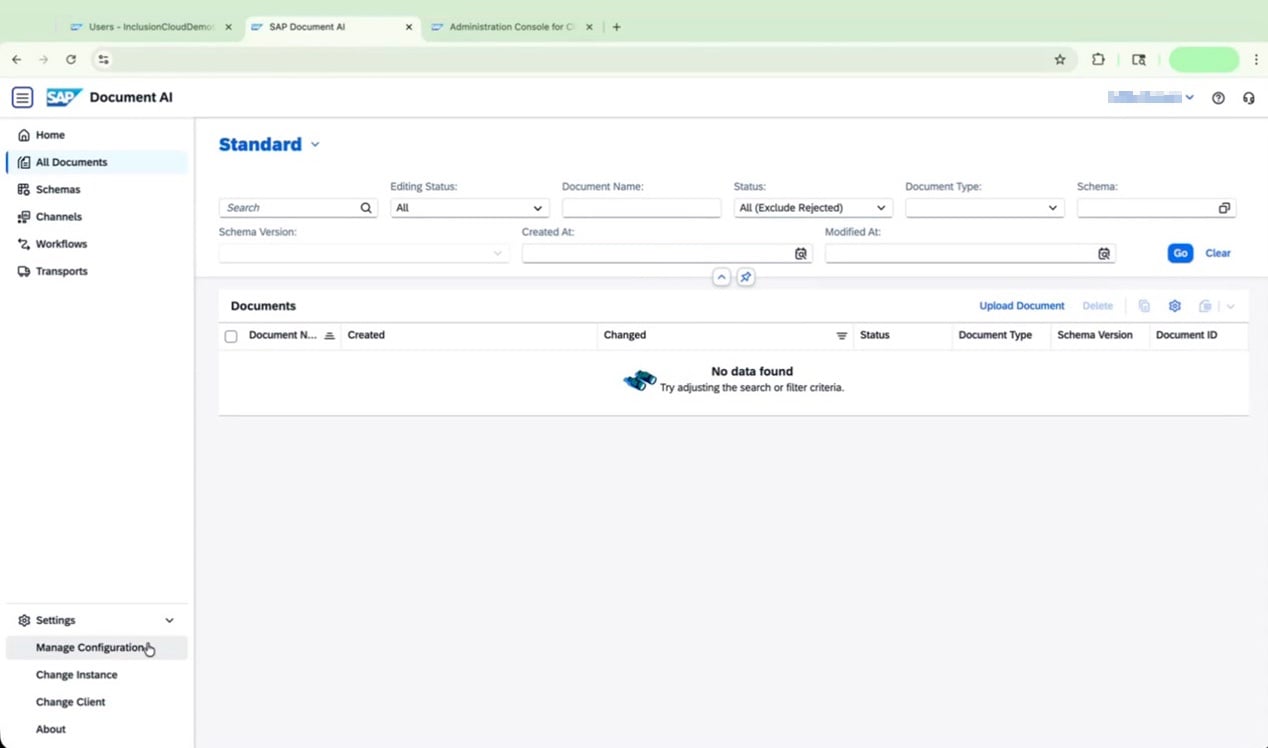
Browse Documents
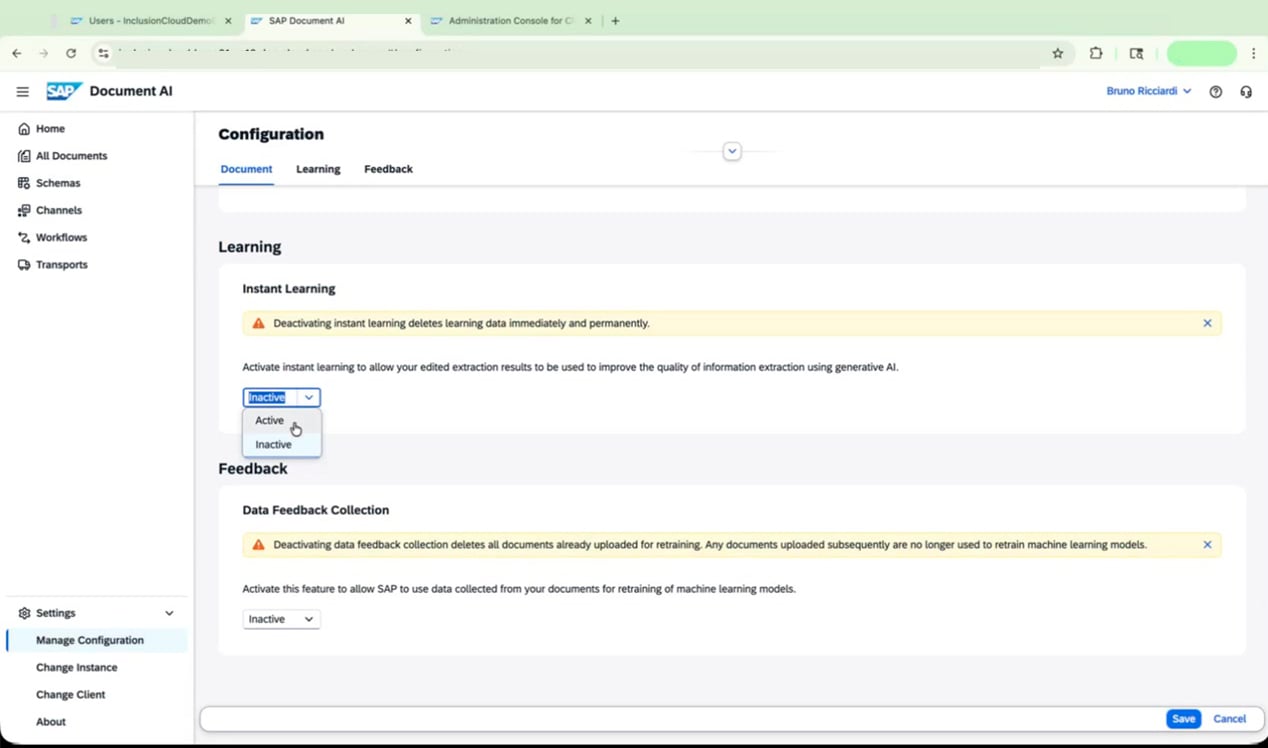
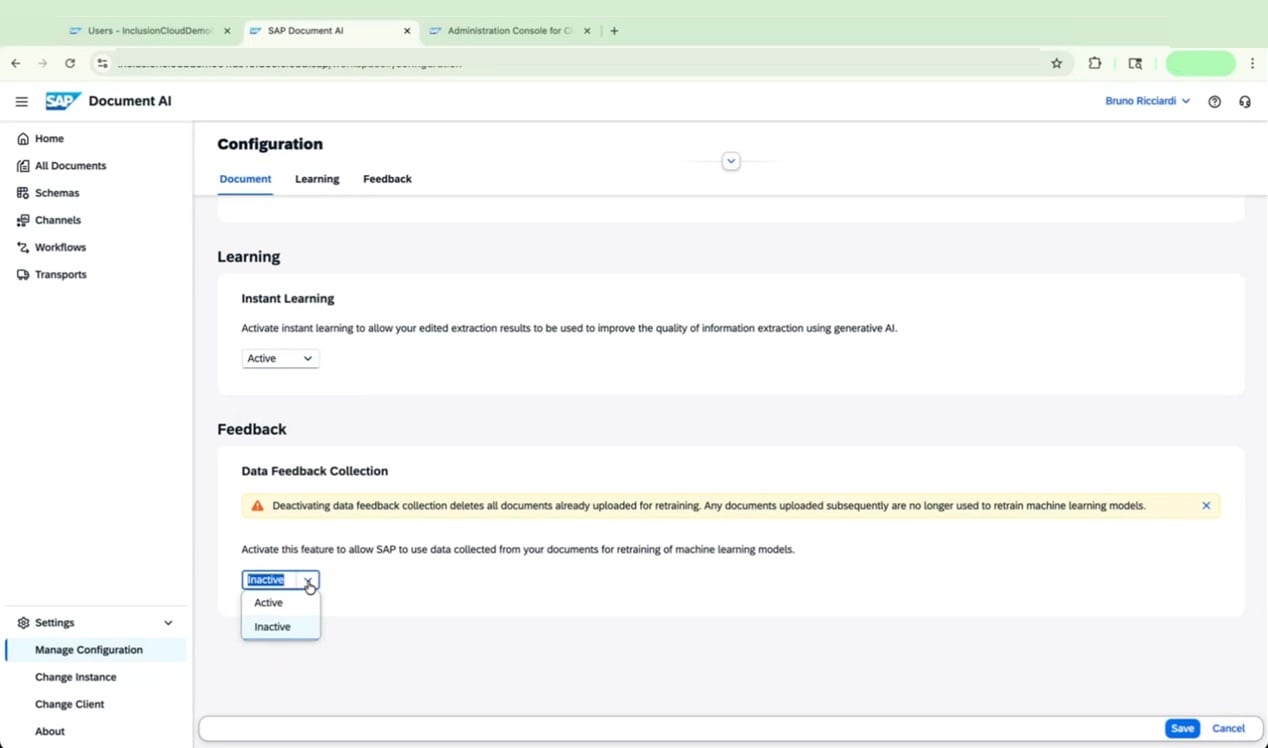
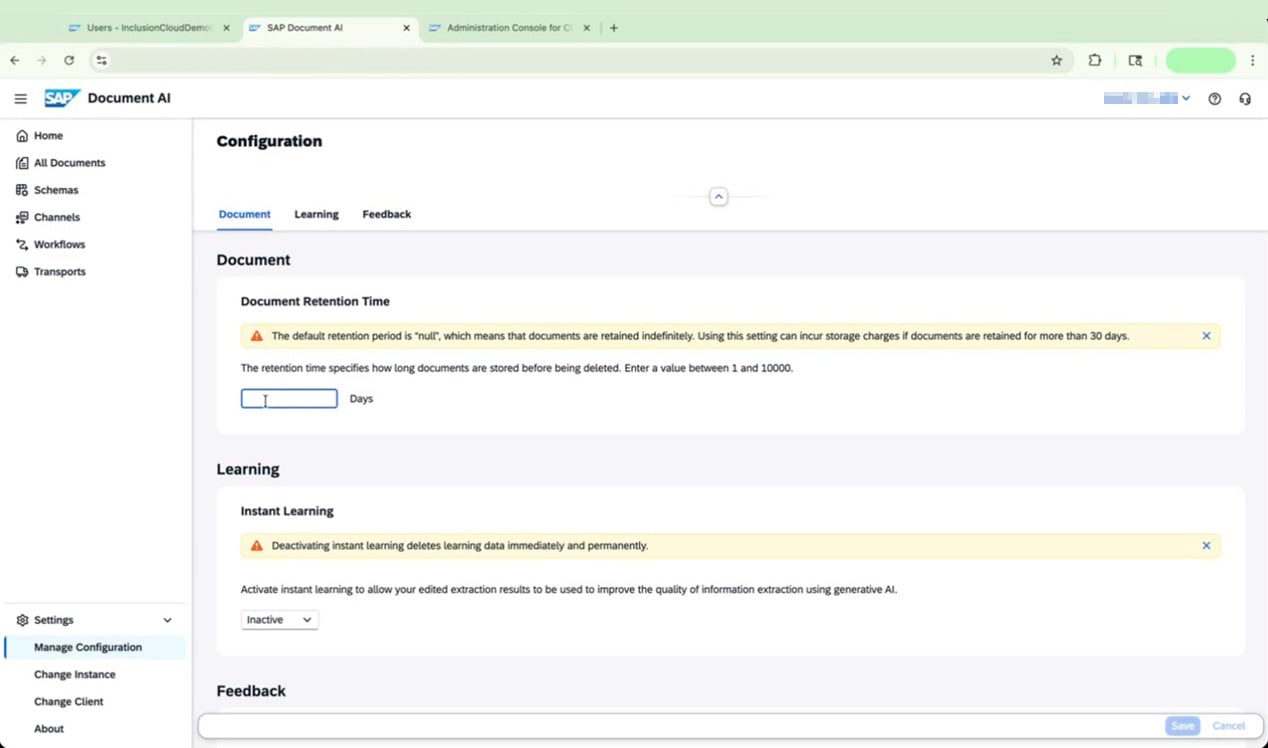
Configure Document Retention, Learning, and Feedback
Set Document Retention Time
Save and Confirm Your Settings
Save the Configuration


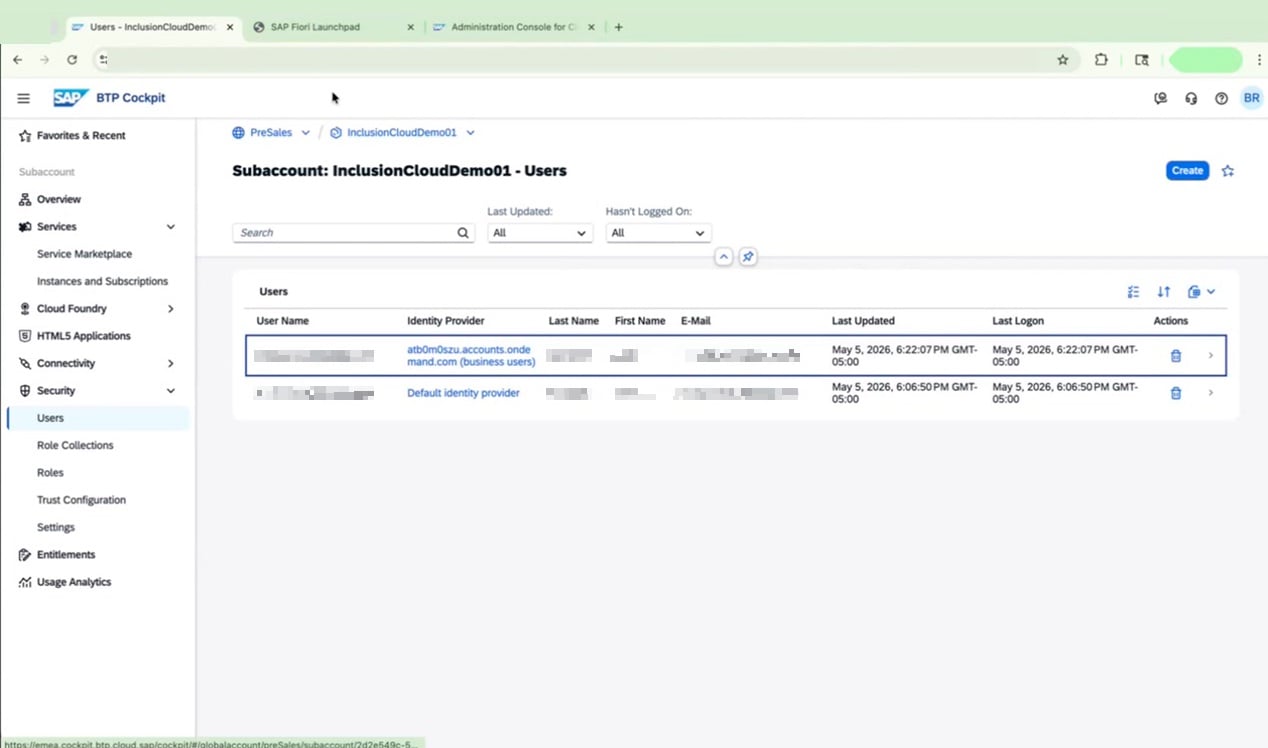
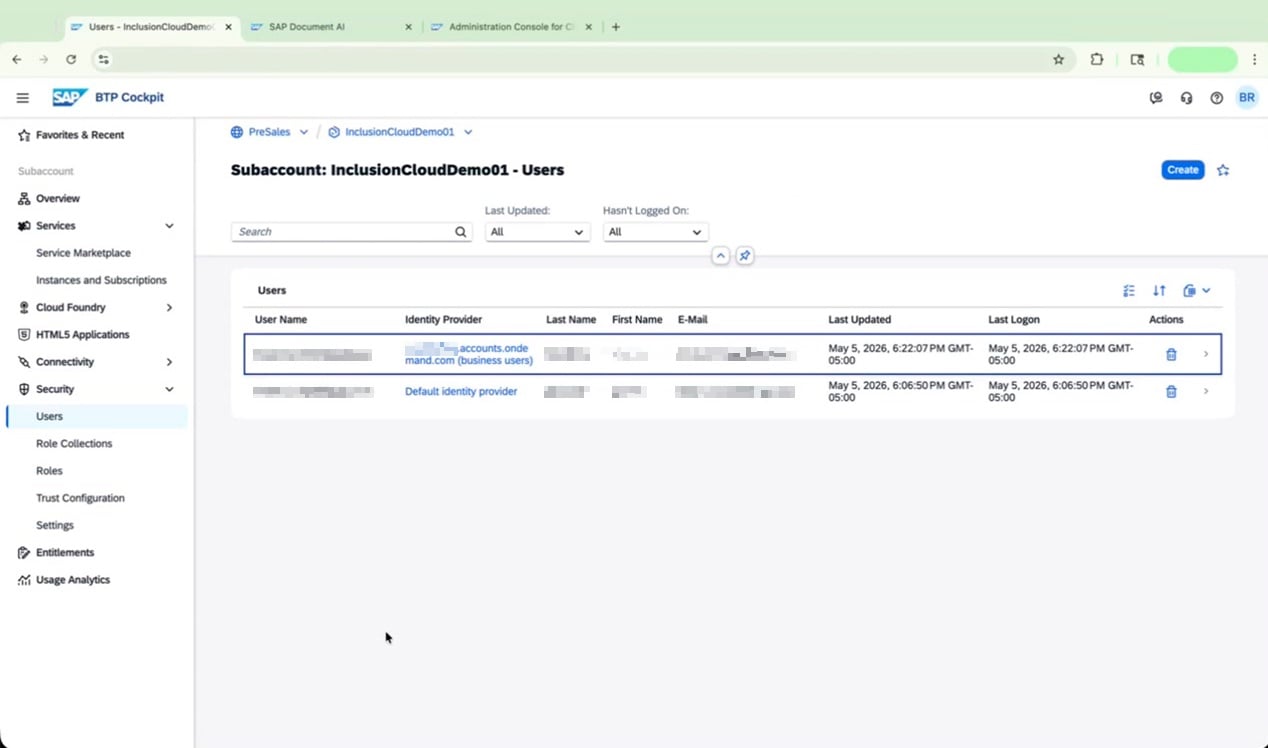
Review User Access in SAP BTP Cockpit
Go to Security > Users
Frequently Asked Questions
What SAP Document AI service plans are available, and which one should I choose?
What SAP Document AI service plans are available, and which one should I choose?
blocks_of_100, default, and premium_edition.- For the service instance, select premium_edition.
- For the application subscription, select default.
What should I do if I see a quota warning when adding entitlements?
What should I do if I see a quota warning when adding entitlements?
Do I need to select a different SAP Document AI entitlement entry depending on my identity setup?
Do I need to select a different SAP Document AI entitlement entry depending on my identity setup?
- IAS configured: Select the entry whose name ends in
-ias(for example,document-information-extraction-application-ias) and choose the premium_edition plan. - IAS not configured: Select the entry without the
-iassuffix.
How long does provisioning take, and can I proceed before it finishes?
How long does provisioning take, and can I proceed before it finishes?
Why am I getting a 'Permission Denied' error after logging in?
Why am I getting a 'Permission Denied' error after logging in?
What are the three role collections required for SAP Document AI access?
What are the three role collections required for SAP Document AI access?
Document_Information_Extraction_UI_Document_ViewerDocument_Information_Extraction_UI_End_UserDocument_Information_Extraction_UI_Templates_Admin
What happens if I deactivate Instant Learning or Data Feedback Collection after enabling them?
What happens if I deactivate Instant Learning or Data Feedback Collection after enabling them?
- Deactivating Instant Learning deletes all learning data immediately and permanently.
- Deactivating Data Feedback Collection deletes all documents already uploaded for retraining.
Are there storage cost implications for the Document Retention Time setting?
Are there storage cost implications for the Document Retention Time setting?